

Unwanted noise from neighbouring rooms, traffic, or outdoor activities can make your home feel less peaceful and private. Whether you're dealing with a noisy home theatre, loud teenagers, or street traffic, soundproofing batts offer a practical and affordable solution to reduce noise transmission and create quieter, more comfortable living spaces. These specialised insulation products work by absorbing sound energy within wall and ceiling cavities, stopping noise before it travels between rooms or from outside.
What Are Soundproofing Batts and How Do They Work
Soundproofing batts are dense, fibrous insulation materials specifically designed to reduce airborne noise transmission through walls, ceilings and floors. Unlike standard thermal insulation, which focuses primarily on heat flow, acoustic batts feature higher density construction and optimised fibre configurations that trap and absorb sound waves.
When sound travels through the air and hits a wall, it causes the wall structure to vibrate. These vibrations transfer through the cavity and radiate sound on the other side. Soundproofing batts disrupt this process by filling the cavity with dense, resilient material that absorbs sound energy rather than allowing it to pass through freely.
Key Performance Characteristics
The effectiveness of soundproofing batts is measured using several metrics:
- Sound Transmission Class (STC): Higher numbers indicate better sound blocking (STC 50+ is considered good for residential applications)
- Noise Reduction Coefficient (NRC): Measures sound absorption on a scale from 0 to 1 (higher is better)
- Density: Typically 22-32 kg/m³ for acoustic applications, compared to 9-14 kg/m³ for standard thermal batts
- Thickness: Usually 90-140mm to maximise cavity fill and sound absorption
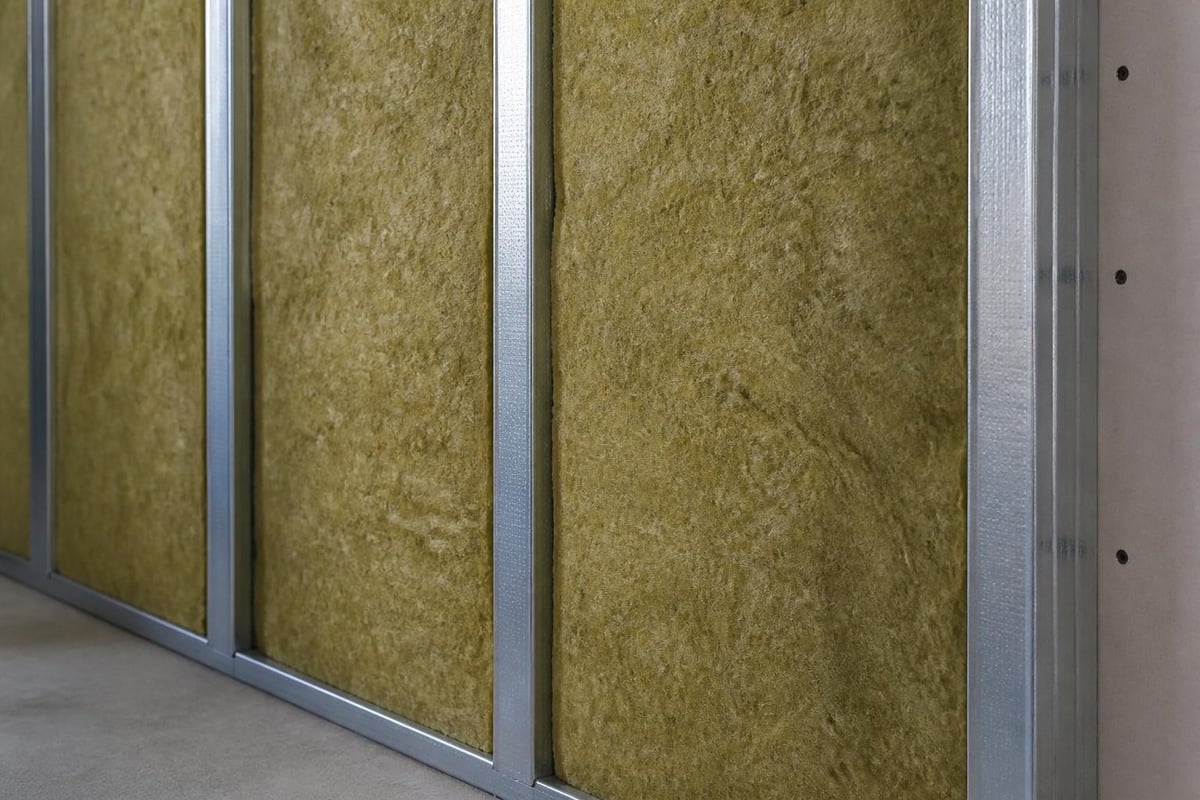
Research from laboratory testing on lightweight wall assemblies demonstrates that cavity insulation significantly improves sound transmission loss, particularly when combined with proper wall construction techniques and decoupling strategies.
Types of Soundproofing Batts Available in Australia
Different acoustic batt products suit different applications and budgets. Understanding the options helps you choose the right solution for your specific noise problem.
Glasswool Acoustic Batts
Glasswool batts manufactured with advanced technologies like ECOSE® offer excellent sound absorption combined with thermal performance. These products use recycled glass content and bio-based binders, making them softer to handle and lower in dust than older fibreglass products.
Best for: Internal walls, ceiling applications, residential noise control
Typical density: 22-28 kg/m³
Common applications: Home theatres, bedrooms, offices, music rooms
Rockwool (Stone Wool) Acoustic Batts
Rockwool batts deliver superior density and fire resistance alongside outstanding acoustic performance. Made from volcanic rock spun into fibres, these products excel in high-noise environments and multi-residential buildings where both sound and fire ratings matter.
Best for: Party walls, high-traffic areas, commercial applications
Typical density: 28-60 kg/m³
Additional benefits: Non-combustible, water-repellent, dimensionally stable
| Product Type | Density Range | Best Application | Fire Rating | Handling |
|---|---|---|---|---|
| Glasswool Acoustic | 22-28 kg/m³ | Internal walls, ceilings | Non-combustible | Soft, low dust |
| Rockwool Acoustic | 28-60 kg/m³ | Party walls, commercial | Non-combustible | Firm, durable |
| Polyester Acoustic | 20-40 kg/m³ | Sensitive environments | Flame retardant | Very soft |
Polyester Acoustic Batts
Polyester acoustic batts provide an alternative for people sensitive to mineral fibres or working in environments where fibre release is a concern. While less common for structural applications, they work well in exposed acoustic treatments and specific retrofit situations.
Where to Install Soundproofing Batts in Your Home
Strategic placement of acoustic batts delivers the best noise reduction results. Focus on the walls and ceilings where unwanted sound travels most frequently.
Internal Walls Between Rooms
Installing soundproofing batts in walls separating bedrooms, bathrooms, home offices and living areas significantly reduces conversation transfer, television noise and bathroom sounds. The batts work in conjunction with the wall construction to create a more private, peaceful environment.
For maximum effectiveness, ensure batts completely fill the cavity from floor to ceiling without compression. Gaps or compressed areas create acoustic weak points that allow sound to pass through more easily.
Ceiling and Floor Assemblies
Noise from footsteps, furniture movement and voices on upper floors can be particularly intrusive. Acoustic batts installed in ceiling cavities reduce both airborne noise (voices, music) and help dampen impact noise when combined with resilient ceiling systems or floating floors.
According to England's Approved Document E, which provides detailed guidance on sound resistance, cavity absorption materials play a crucial role in achieving acceptable acoustic separation in multi-storey residential buildings.
External Walls for Traffic and Street Noise
While external walls already contain thermal insulation in most modern homes, upgrading to higher-density soundproofing batts during renovation can significantly reduce traffic noise, neighbourhood sounds and outdoor activity noise intrusion.
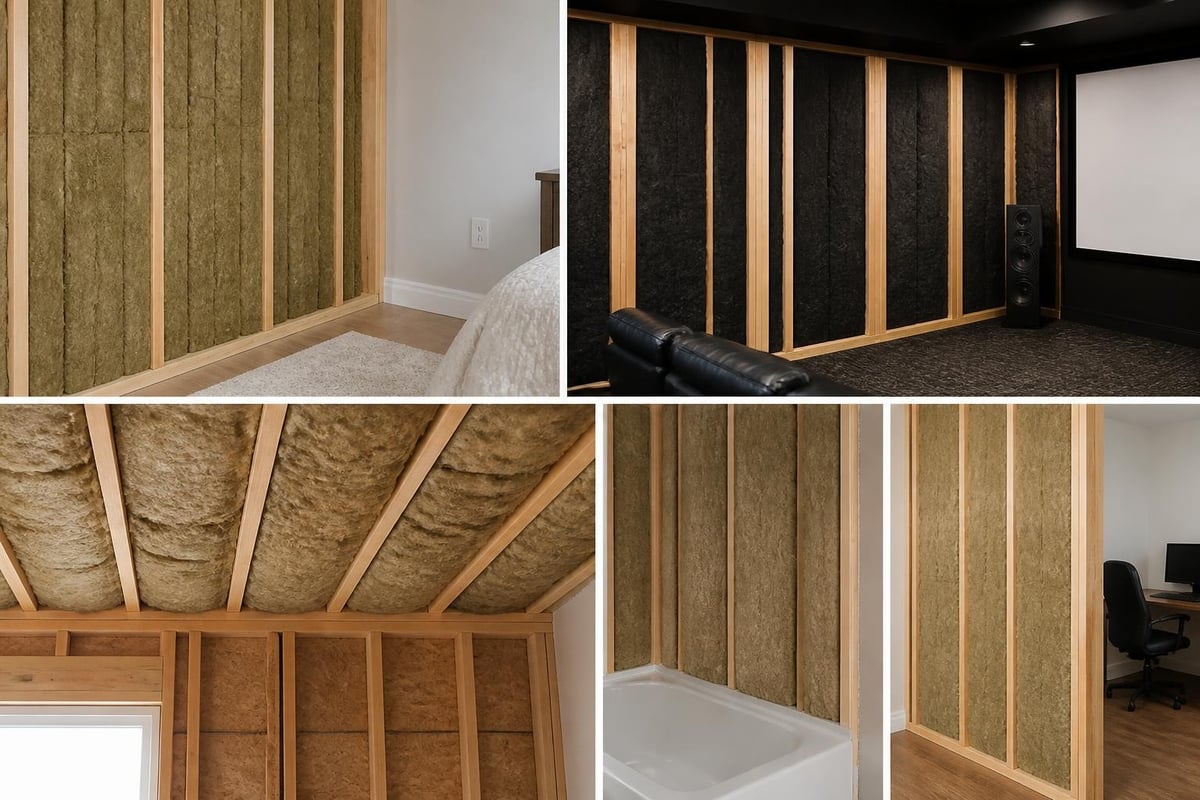
The effectiveness of external wall insulation for sound control depends heavily on window quality, as windows typically represent the weakest acoustic link. Even the best wall insulation in Melbourne won't fully eliminate street noise if windows remain single-glazed.
Installation Best Practices for Maximum Sound Reduction
Proper installation technique makes the difference between acceptable and excellent acoustic performance. Even premium soundproofing batts deliver poor results when installed incorrectly.
Achieving Complete Cavity Fill
Soundproofing batts must completely fill the cavity without gaps, compression or bunching. Cut batts to fit snugly around electrical boxes, plumbing penetrations and bracing, but avoid compressing the material, which reduces both acoustic and thermal performance.
Key installation steps:
- Measure cavity depth and stud spacing accurately
- Cut batts slightly oversized to friction-fit between studs
- Push batts fully to the back of the cavity
- Trim around obstacles while maintaining continuous coverage
- Ensure batts sit flush against the back wall lining
Managing Penetrations and Service Routes
Every hole, gap or penetration creates a sound leak that undermines batt performance. The National Research Council Canada's soundPATHS research demonstrates how flanking paths through service penetrations can completely negate cavity insulation benefits.
- Seal electrical boxes with acoustic putty pads
- Use acoustic sealant around penetrations before plasterboard installation
- Avoid back-to-back electrical outlets on opposite sides of walls
- Route plumbing and ducting through non-critical walls where possible
Wall Construction Matters
Soundproofing batts work as part of a complete wall or ceiling system. The wall framing, lining materials and construction techniques all contribute to the final acoustic performance. High-density batts in a poorly constructed wall still deliver disappointing results.
The Best Practice Guide on Fire Stops and Fire Blocks explains how fireblocking and cavity breaks can create unintended flanking paths that compromise acoustic separation, highlighting the need for integrated design.
Choosing the Right Density and Thickness
Not all soundproofing batts offer the same performance level. Density and thickness determine how effectively batts absorb sound energy and prevent transmission.
Understanding Density Requirements
Higher density generally means better sound absorption, but only up to a point. Beyond 60 kg/m³, additional density delivers diminishing returns for most residential applications while making installation more difficult and expensive.
For typical home applications:
- 22-24 kg/m³: Good performance for internal walls, budget-friendly option
- 26-28 kg/m³: Better performance, recommended for home theatres and music rooms
- 32-45 kg/m³: High performance for party walls and commercial applications
- 60+ kg/m³: Specialist applications, recording studios, mechanical plant rooms
Matching Thickness to Cavity Depth
Acoustic batts work best when they completely fill available cavity depth. Standard Australian timber frame walls use 90mm studs, while steel frame and masonry cavity walls may accommodate 90-140mm batts.
| Stud Depth | Recommended Batt Thickness | Typical Application |
|---|---|---|
| 70mm | 70mm | Steel frame internal walls |
| 90mm | 90mm | Timber frame internal walls |
| 140mm | 140mm | External cavity walls, party walls |
Avoid installing batts that are too thin for the available cavity. A 70mm batt in a 90mm cavity leaves air gaps that reduce acoustic performance and create convective heat loss.
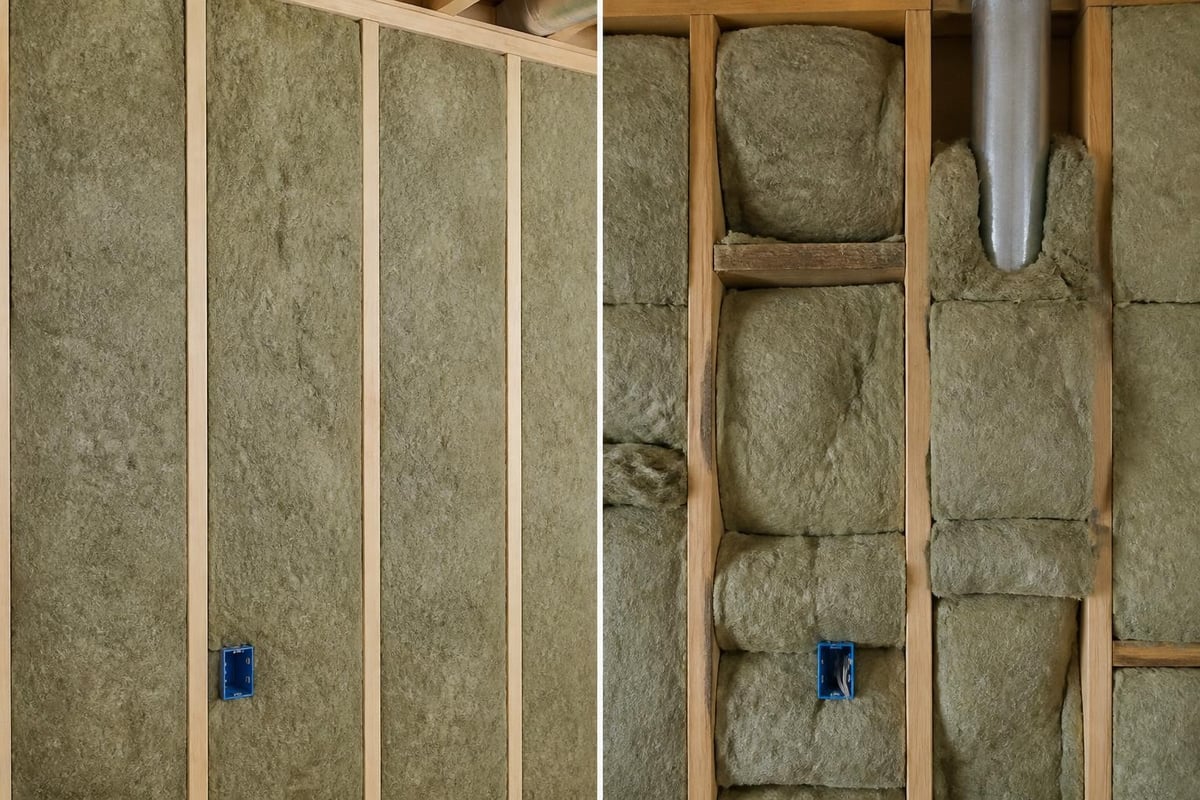
For renovation projects where existing walls have shallow cavities, combining thinner high-density batts with additional wall lining layers may deliver better results than attempting to compress thicker batts.
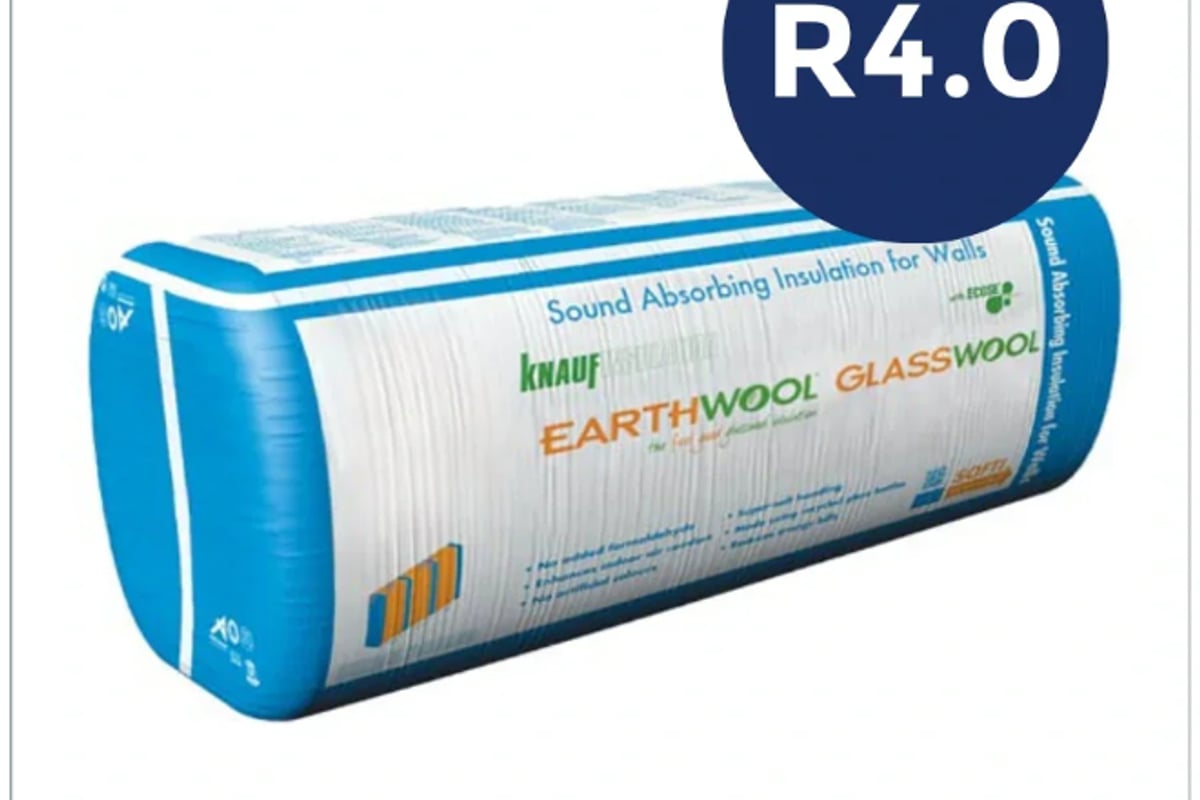
When you're upgrading your home's acoustic comfort, products like the Earthwool Sound Shield R4.0 offer an excellent combination of high-density construction (22.6 kg/m³) and thermal performance (R4.0), making them ideal for walls where both soundproofing and energy efficiency matter. The advanced ECOSE® Technology ensures these batts remain soft to handle and low in dust during installation.
Common Mistakes That Reduce Soundproofing Performance
Even expensive, high-performance soundproofing batts fail to deliver expected results when common installation and design errors occur. Avoiding these mistakes ensures you get the acoustic improvement you're paying for.
Compression and Poor Fitting
Compressing batts to fit into shallow cavities reduces density where it matters and creates hard, reflective surfaces that bounce sound rather than absorbing it. Similarly, leaving gaps around the perimeter or between batt sections creates direct sound paths.
Common compression problems:
- Forcing thick batts into shallow studs
- Pushing batts behind electrical conduit or plumbing
- Installing multiple layers instead of correct thickness
- Allowing batts to bulge forward past stud faces
Ignoring Flanking Paths
Sound travels the path of least resistance. Even perfectly installed soundproofing batts provide little benefit when sound flanks around them through:
- Gaps under doors and around door frames
- Ceiling plenums and roof spaces above walls
- Floor cavities and services running between rooms
- Back-to-back electrical outlets and switches
The Acoustical Society of America research consistently demonstrates that real-world acoustic performance depends on complete system design, not just cavity insulation selection.
Using Thermal Batts for Acoustic Applications
Standard thermal insulation batts typically feature densities of 9-14 kg/m³, far below the 22+ kg/m³ needed for effective sound absorption. While thermal batts provide some acoustic benefit compared to empty cavities, they deliver significantly less noise reduction than proper acoustic products.
Don't assume any insulation will solve noise problems. Purpose-designed soundproofing batts cost only slightly more than thermal products but deliver dramatically better acoustic results.
Combining Batts With Other Soundproofing Strategies
Soundproofing batts work best as part of a multi-layered acoustic strategy rather than as a standalone solution. Combining cavity absorption with other techniques delivers superior noise reduction.
Mass-Loaded Barriers and Double Lining
Adding mass to wall and ceiling surfaces reduces vibration transmission. Installing two layers of plasterboard (instead of one) significantly improves sound blocking, particularly when combined with high-density batts in the cavity.
For critical applications like home theatres or recording spaces:
- Use acoustic-grade plasterboard (higher density, better damping)
- Offset plasterboard joints on each layer
- Install resilient channels or isolation clips to decouple linings from framing
- Seal all joints with acoustic sealant, not standard gap filler
Decoupling Techniques
Decoupling prevents vibration transfer between wall surfaces by mechanically isolating lining materials from studs. This approach works particularly well in conjunction with soundproofing batts to address both airborne and structure-borne noise.
Simple decoupling methods include:
- Staggered stud walls (studs on alternating sides of the plate)
- Double stud walls with separate frames
- Resilient channels or acoustic isolation clips
- Floating floors with resilient underlay
The Federal Highway Administration technical guidance provides detailed explanations of how cavity absorption materials work together with mass and decoupling in complete noise control systems.
Sealing and Acoustic Caulking
Even tiny gaps allow substantial sound transmission. Professional acoustic installations use acoustic-grade sealant at every junction, penetration and perimeter to create continuous air seals that stop sound leaks.
Critical sealing locations:
- Wall-to-ceiling junctions
- Wall-to-floor perimeters
- Around electrical boxes and switches
- Door and window frames
- Plumbing and HVAC penetrations
Quality acoustic sealant remains flexible over time, accommodating building movement without cracking and creating new sound leaks.
Soundproofing Batts vs Other Acoustic Insulation Options
Understanding how soundproofing batts compare to alternative products helps you make informed decisions for your specific acoustic challenges and budget.
Acoustic Foam Panels
Foam panels excel at controlling room acoustics, reducing echo and improving sound quality within a space, but provide minimal sound blocking between rooms. They absorb sound that would otherwise reflect off hard surfaces, making rooms less "echoey" but not more private.
Learn more about the differences in our guide to acoustic insulation foam.
Best use: Recording studios, home theatres, podcasting spaces (for internal sound quality)
Not suitable for: Blocking noise transmission between rooms or from outside
Mass-Loaded Vinyl (MLV)
MLV adds significant mass to walls and floors without requiring thick constructions. This dense, flexible membrane blocks sound transmission effectively but provides little sound absorption, making it complementary rather than alternative to batts.
Best combination: MLV on wall surfaces + high-density batts in cavity
Limitations: Expensive, requires professional installation, adds weight to structures
Spray Foam Insulation
Closed-cell spray foam creates excellent air seals and high R-values but offers poor acoustic performance due to its rigid structure and low density. The hard surface actually reflects sound rather than absorbing it.
Acoustic benefit: Seals air gaps that would allow sound transmission
Acoustic limitation: Minimal sound absorption compared to fibrous batts
| Product Type | STC Improvement | Installation Difficulty | Cost vs Batts | Best Application |
|---|---|---|---|---|
| Soundproofing Batts | High (8-12 points) | Easy-Moderate | Baseline | General noise reduction |
| Acoustic Foam | Low (0-2 points) | Very Easy | Similar | Room acoustics only |
| Mass-Loaded Vinyl | Very High (10-15 points) | Difficult | 3-5x higher | Critical acoustic barriers |
| Spray Foam | Low (2-4 points) | Professional only | 2-4x higher | Air sealing, thermal |
Compliance and Building Regulations in Victoria
Understanding relevant building standards ensures your soundproofing installation meets minimum requirements and performs as expected.
National Construction Code Requirements
The National Construction Code (NCC) sets minimum acoustic performance standards for certain building types, particularly multi-residential and attached dwellings. While detached single-family homes face fewer acoustic requirements, renovations triggering building permits may require compliance.
Key NCC acoustic provisions:
- Separating walls between dwellings: minimum Rw+Ctr 50
- Separating floors between dwellings: minimum Rw+Ctr 50 and Ln,w+CI 62
- Wall and floor systems must be tested or calculated to demonstrate compliance
Victorian Building Authority Guidelines
The Victorian Building Authority (VBA) enforces NCC requirements and provides guidance on acoustic compliance through the building permit process. Acoustic testing may be required for Class 2 and Class 3 buildings (apartments, townhouses, boarding houses).
For renovations and extensions, check with your certifier whether acoustic compliance is required. Even when not mandated, following acoustic construction best practices delivers better comfort and property value.
Cost Considerations and Return on Investment
Soundproofing batts represent a modest additional cost compared to standard insulation, but deliver disproportionate benefits in comfort, privacy and property value.
Material Cost Comparison
High-density acoustic batts typically cost 15-40% more than standard thermal batts of similar thickness. For a typical internal wall installation (10-15m²), this represents approximately $30-$80 additional material cost.
Budget example (90mm internal wall, 12m²):
- Standard thermal batts (11 kg/m³): $85-$110
- Acoustic batts (22 kg/m³): $110-$145
- Premium acoustic batts (28+ kg/m³): $145-$190
This modest cost increase delivers significant acoustic improvement, typically 6-10 STC points compared to thermal batts alone. Products such as acoustic batts specifically designed for noise control provide much better value than attempting to achieve similar results through wall construction modifications alone.
Installation Cost Factors
DIY installation keeps costs low, as soundproofing batts install using the same techniques as thermal insulation. Professional installation typically costs $15-$30 per square metre for labour, depending on access, wall complexity and project scope.
Cost-saving installation tips:
- Install batts during renovation or construction when walls are already open
- DIY installation in simple, accessible wall cavities
- Combine acoustic upgrades with necessary repairs or redecoration
- Focus on the highest-impact walls (bedrooms, bathrooms, home offices) rather than entire home
Long-Term Value and Comfort Benefits
Acoustic comfort significantly impacts quality of life and property desirability. Homes with effective soundproofing between bedrooms, living areas and bathrooms consistently command higher resale values and rental returns.
Beyond financial returns, improved acoustic privacy provides:
- Better sleep quality and reduced stress
- Increased working-from-home productivity
- More enjoyable entertainment without disturbing others
- Enhanced privacy for bathrooms and bedrooms
DIY Installation Guide for Homeowners
Installing soundproofing batts is within reach for most confident DIYers, particularly in new construction or renovation projects where wall cavities are already exposed.
Safety Equipment and Preparation
While modern acoustic batts using ECOSE® or similar technologies produce less dust and irritation than older fibreglass products, proper safety equipment remains important.
Essential safety gear:
- Dust mask or respirator (P2 rated minimum)
- Safety glasses or goggles
- Long-sleeved shirt and long pants
- Work gloves (disposable nitrile or cotton)
- Well-ventilated work area
Measuring and Cutting Techniques
Accurate measurement ensures complete cavity fill without excessive compression or gaps. Measure each cavity individually rather than assuming uniform spacing, as stud centres often vary slightly.
Measuring and cutting steps:
- Measure cavity height from floor to ceiling
- Measure stud spacing at top, middle and bottom
- Add 10-15mm to width for friction fit
- Cut batts on clean, flat surface using long-blade knife or batt saw
- Compress batt slightly during installation for snug fit
For cutting around obstacles like electrical boxes, create a template from cardboard first, then transfer the shape to the batt for precise cuts.
Securing and Finishing
Most friction-fit soundproofing batts require no additional fastening beyond the natural friction against studs. However, ensure batts sit fully back against the rear lining and don't sag or bulge forward.
For ceiling installations:
- Use temporary support (wire, string, or lightweight battens) until lining installation
- Work with a helper for overhead installations
- Install batts immediately before ceiling lining to prevent sagging
- Consider using ceiling-specific products if available
Detailed installation guidance for underfloor insulation and ceiling batts provides helpful context for related applications.
Troubleshooting Poor Acoustic Performance
When soundproofing batts fail to deliver expected noise reduction, systematic troubleshooting identifies the weak points compromising performance.
Identifying Sound Leaks
Sound follows the path of least resistance, often bypassing excellent cavity insulation through small gaps and penetrations. Conduct a methodical inspection:
- Generate loud white noise or music in the source room
- Walk the perimeter of adjacent rooms listening for sound transmission
- Mark high-transmission areas (around doors, outlets, fixtures)
- Check ceiling and floor junctions where walls terminate
Common leak locations often include:
- Gaps under and around doors (even 5mm significantly reduces performance)
- Electrical outlets on opposite sides of walls
- Ceiling plenums where walls don't extend to structure
- HVAC vents and ducting connecting rooms
- Poorly sealed window and door frames
Testing and Verification
While professional acoustic testing using calibrated equipment provides definitive performance data, simple testing helps homeowners verify improvements.
Basic acoustic testing:
- Measure background noise level in receiving room
- Generate consistent sound source (pink noise, constant music) in source room
- Measure sound level in receiving room
- Calculate approximate STC improvement
For critical applications or building compliance, engage acoustic consultants who can perform standardised testing conforming to ASTM standards and provide certified reports.
Upgrading Underperforming Installations
When existing soundproofing batts deliver inadequate noise reduction, several upgrade paths exist without complete wall demolition:
- Add second layer of plasterboard (most cost-effective improvement)
- Install resilient channels before second plasterboard layer
- Address all identified air gaps with acoustic sealant
- Upgrade doors to solid-core with proper seals
- Add acoustic treatment to ceiling plenum space
Sometimes the issue isn't the batts themselves but rather the complete wall assembly design. Consulting with acoustic specialists helps identify the most effective improvements for your specific situation.
Soundproofing batts deliver effective, affordable noise reduction when properly selected and installed as part of a complete acoustic strategy. By understanding product density, installation best practices, and complementary soundproofing techniques, you can significantly improve your home's acoustic comfort and privacy. Ready to reduce unwanted noise and create quieter living spaces? Insulation Supplies Australia offers expert advice and a comprehensive range of high-performance acoustic insulation products, with competitive pricing, fast delivery across Victoria, and the guidance you need to choose the right soundproofing solution for your project.