

Shipping containers have become popular choices for affordable homes, studios, storage sheds and commercial spaces across Australia. Yet the same steel construction that makes these structures durable also creates significant thermal challenges. Without proper insulation, a container can turn into an oven in summer and a freezer in winter. A shipping container insulation kit offers a practical, pre-packaged solution for tackling these temperature extremes, bringing together the materials and components needed to create a comfortable, energy-efficient interior. Whether you're converting a container into a tiny home, workshop or backyard office, understanding how these kits work and what alternatives exist will help you make smarter decisions about thermal performance, moisture control and long-term comfort.
Understanding the Thermal Challenge of Steel Containers
Shipping containers are built from corrugated steel, a material with virtually no insulative properties. Steel conducts heat exceptionally well, which means the interior temperature closely follows outdoor conditions.
In Melbourne's climate zone 6, summer days regularly exceed 30°C whilst winter nights can drop below 5°C. An uninsulated container experiences wild temperature swings, making it uncomfortable and unusable for extended periods.
Key thermal issues include:
- Extreme surface temperatures on steel walls and roof
- Rapid heat gain during sunny weather
- Quick heat loss on cold nights
- Condensation forming on cold interior steel surfaces
- High heating and cooling costs if climate control is added
The ASHRAE handbook chapter on building envelopes explains how thermal bridging through continuous steel framing significantly reduces the effective R-value of any insulation system. This makes material selection and installation method critical for container conversions.
What a Shipping Container Insulation Kit Typically Includes
A complete shipping container insulation kit bundles everything needed to insulate the interior envelope of a standard 6-metre or 12-metre container. Most kits are designed for DIY installation and aim to simplify the material selection process.
Common components include:
- Pre-cut insulation panels or batts sized for container dimensions
- Vapour barrier or reflective foil facing
- Adhesive or mechanical fasteners
- Joining tape for sealing seams
- Installation instructions specific to container geometry
Some kits also include furring strips or framing components to create an air gap or mounting surface for interior linings. The quality, materials and R-value vary significantly between manufacturers, so it's important to evaluate each kit against your specific climate requirements and intended use.
Material Options for Container Insulation
Spray Polyurethane Foam (SPF)
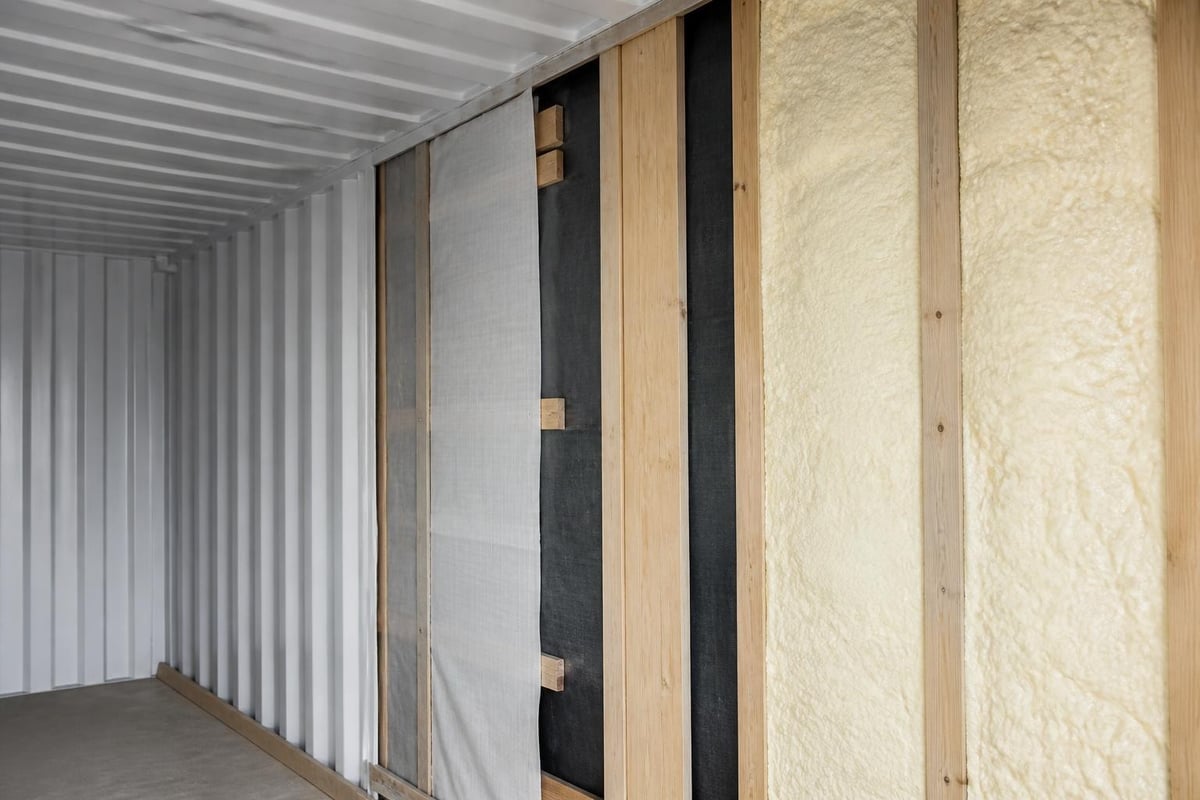
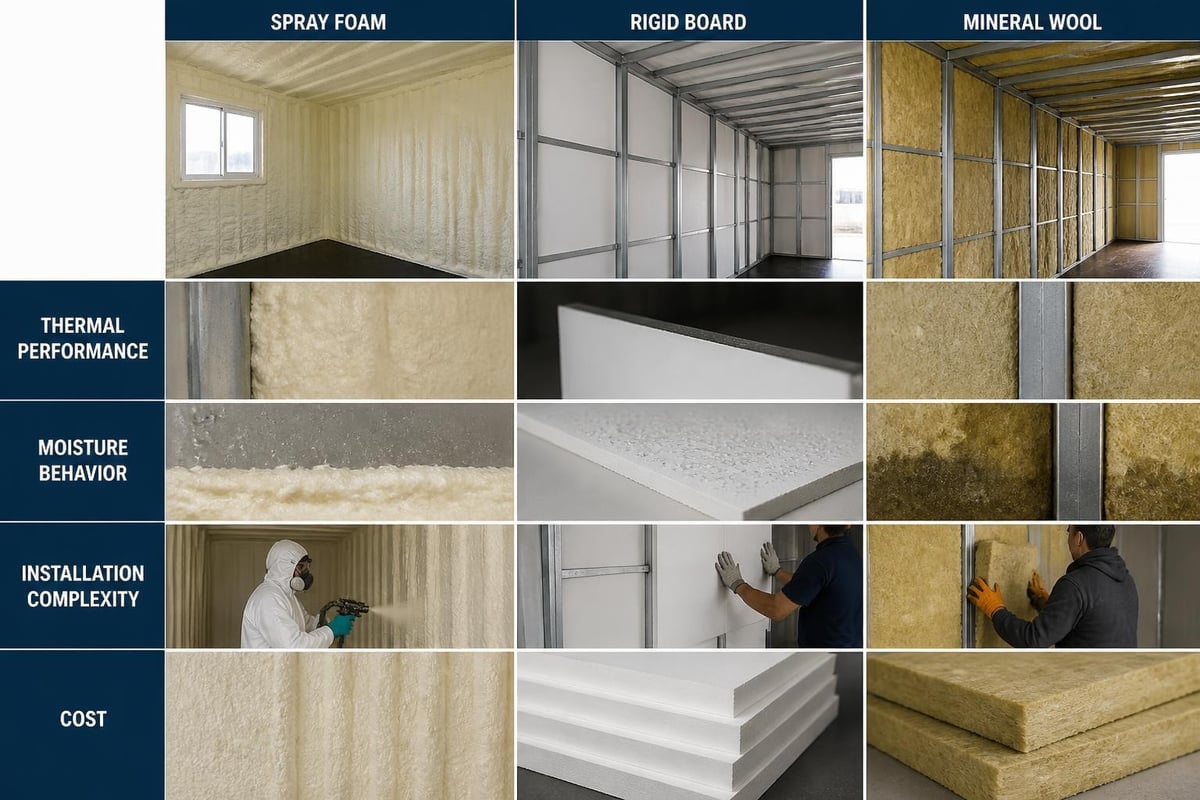
Spray foam remains the most popular professional choice for container insulation. It expands to fill gaps, adheres directly to steel, provides both insulation and air-sealing, and adds structural rigidity.
Benefits of spray foam:
- High R-value per inch (R-6 to R-7 for closed-cell)
- Excellent air sealing eliminates draughts
- Bonds to steel and inhibits condensation
- Adds racking strength to container structure
Drawbacks to consider:
- Requires professional application and safety equipment
- Off-gassing during installation necessitates ventilation
- Higher upfront cost than batt or board systems
- Permanent installation makes future access difficult
The U.S. EPA guidance on spray polyurethane foam highlights important safety considerations around ventilation, re-entry times and protective equipment when using SPF in enclosed metal spaces like containers.
Rigid Foam Boards (XPS and EPS)
Extruded polystyrene (XPS) and expanded polystyrene (EPS) boards offer predictable performance, easy handling and good moisture resistance. Boards can be cut to fit between ribs or glued directly to steel surfaces.
| Property | XPS | EPS |
|---|---|---|
| R-value per 25mm | ~R-1.0 | ~R-0.7 |
| Moisture resistance | Excellent | Good |
| Compressive strength | High | Moderate |
| Cost | Moderate-high | Low-moderate |
The Styroboard XPS Insulation Board 75mm delivers R2.27 thermal resistance with 350kPa compressive strength, making it suitable for floor applications where containers rest on uneven ground or require load-bearing insulation beneath a concrete topping.
Rigid boards work well in combination with air gaps or reflective foil layers. They can be mechanically fastened or adhesively bonded, though thermal bridging through fasteners should be minimized by using adhesive wherever possible.
Glasswool and Rockwool Batts
Glasswool and rockwool batts are familiar to most Australian builders and offer good thermal and acoustic performance at competitive prices. They're less common in shipping container insulation kits but can be effective when properly installed with vapour barriers.
Advantages of mineral wool batts:
- Non-combustible and thermally stable
- Good acoustic dampening for noisy environments
- Easy to cut and fit between framing members
- Lower embodied energy than foam products
Installation considerations:
- Require framing or furring to hold batts in place
- Must be protected from moisture with vapour barriers
- Compression reduces R-value significantly
- Settling can create gaps over time if not well-supported
If you're building a timber stud wall inside your container, standard wall batts can be installed just as you would in a conventional home, provided moisture control is carefully managed.
Moisture and Condensation Management
Understanding Dew Point in Metal Enclosures
Steel containers create condensation risks that don't exist in timber-framed buildings. When warm, humid interior air contacts cold steel surfaces, moisture condenses and can accumulate quickly.
The dew point is the temperature at which water vapor in the air condenses into liquid. In an uninsulated container on a cold Melbourne winter night, interior surfaces easily drop below the dew point, causing widespread condensation.
Effective moisture strategies include:
- Continuous vapour barrier on the warm side of the insulation
- Ventilation to remove moisture-laden air before it condenses
- Air gaps between insulation and steel to allow drainage
- Closed-cell insulation that stops vapour transmission completely
The ASHRAE chapter on cargo containers discusses hygrothermal design specifically for containerized enclosures, noting that moisture control is often more critical than R-value in these applications.
Vapor Barriers and Air Sealing
A vapour barrier prevents humid interior air from reaching cold steel surfaces where it would condense. In Australian climates, the vapour barrier typically belongs on the interior (warm) side of the insulation.
Key installation practices:
- Overlap all seams by at least 150mm
- Seal joints with appropriate tape or mastic
- Penetrations for electrical and plumbing must be carefully sealed
- Continuous barrier around entire envelope including floor and ceiling
Many shipping container insulation kits include reflective foil laminates that serve as both vapour barrier and radiant barrier. These multi-functional layers can improve overall thermal performance when combined with air gaps.
Installation Methods and Framing Strategies
Direct-Attach Systems
Direct-attach methods bond insulation directly to the interior steel surfaces using adhesive or mechanical fasteners. This approach maximizes interior space and works well with spray foam or rigid boards.
Steps for direct-attach rigid board:
- Clean steel surfaces thoroughly to ensure good adhesion
- Apply construction adhesive in beads or patterns
- Press insulation boards firmly against steel
- Secure with mechanical fasteners if required
- Seal all joints with expanding foam or tape
- Install vapour barrier over insulation surface
Direct attachment minimizes thermal bridging but makes future access to the steel shell difficult. It's best suited for permanent conversions where modifications are unlikely.
Stud-Wall Framing Inside Container
Building a timber or steel stud wall inside the container creates space for thicker insulation, utility runs and attachment points for interior lining.
This method is more labour-intensive but offers several advantages:
- Easy installation of standard batt insulation
- Space for electrical wiring and plumbing
- Familiar construction method for most trades
- Simple attachment for plasterboard or lining panels
Typical stud-wall sequence:
- Install bottom plate anchored to container floor
- Erect vertical studs at regular centres (typically 450mm or 600mm)
- Install top plate secured to ceiling ribs or purlins
- Fill stud cavities with insulation batts
- Apply vapour barrier over studs facing interior
- Fix plasterboard or lining panels to studs
The stud wall approach reduces usable interior width by roughly 150-200mm but creates a more conventional living space that feels less industrial.
Hybrid Systems
Many successful container conversions combine methods. A common hybrid approach uses spray foam applied directly to the steel shell (typically 25-50mm) followed by a stud wall with additional batt insulation.
This strategy delivers:
- Air sealing and condensation control from the spray foam
- Additional R-value from batts in the stud cavities
- Utility space and attachment points from the framing
- High overall thermal performance without excessive thickness
R-Value Requirements for Australian Containers
Climate Zone Considerations
Australia's Building Code divides the country into eight climate zones, each with different insulation requirements. Most container applications won't fall under the National Construction Code (NCC) residential provisions, but using those R-values as a baseline ensures reasonable comfort and energy efficiency.
Recommended minimum R-values for containers in Victoria (Zone 6):
| Building element | Minimum R-value |
|---|---|
| Roof/ceiling | R4.0 – R5.0 |
| Walls | R2.5 – R3.0 |
| Floor | R2.0 – R2.5 |
These targets assume the container will be heated and cooled. For unconditioned storage or workshop use, lower values may be acceptable depending on your comfort expectations.
You can review detailed climate zone maps and recommendations at Insulation Supplies Australia's climate zones guide.
Accounting for Thermal Bridging
The International Energy Conservation Code requirements on continuous insulation recognize that thermal bridging through framing can reduce whole-wall R-values by 20-40% compared to cavity-only insulation.
In containers, thermal bridging occurs through:
- The continuous steel shell behind any insulation
- Steel ribs and corrugations in walls and ceiling
- Fasteners and fixing points that penetrate insulation
- Window and door frames connected directly to steel
To minimize thermal bridging impact, consider insulating the exterior of the container (less common but highly effective) or using continuous insulation layers that wrap over framing before adding cavity insulation.
Floor Insulation for Containers
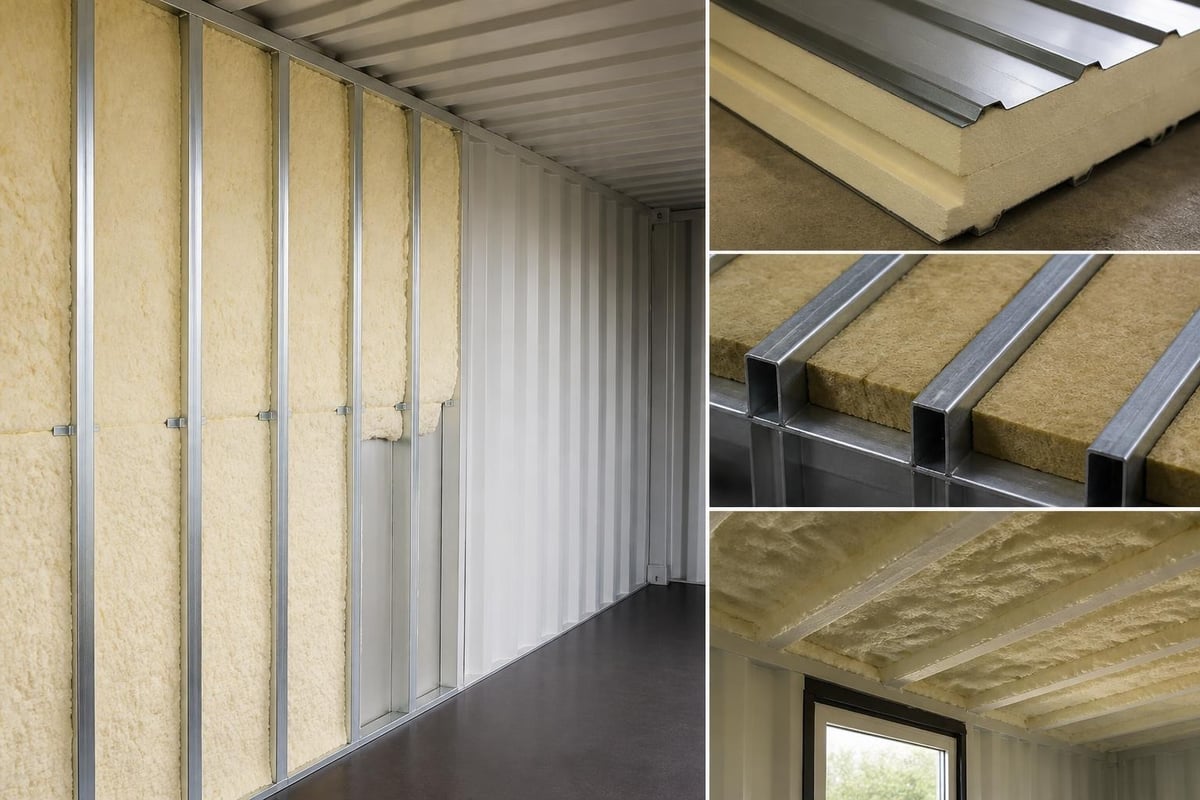
Container floors consist of 19mm marine plywood over steel cross-members. This floor is non-structural for occupancy loads in most building applications and typically requires replacement or overlay.
Floor insulation strategies:
- Remove existing plywood and install rigid foam boards between steel joists
- Build up floor level with sleepers, insulation between, and new decking over
- Pour levelling screed over XPS or EPS insulation board
- Use underfloor insulation products designed for suspended floors
For containers intended as living spaces, underfloor insulation significantly improves comfort by eliminating cold feet and reducing heat loss to the ground. Products like the Floorshield R2.5 Underfloor Batts work well when a suspended floor system is built inside the container with adequate depth for batts to fit between joists.
If you're placing the container on a concrete slab foundation, insulating beneath the slab with high-compressive-strength XPS provides excellent long-term thermal performance. Learn more about this approach in our guide to insulation for under concrete slab.
Fire Safety and Material Selection
Steel containers are inherently non-combustible, but the insulation materials inside them vary significantly in fire performance. This matters for both occupant safety and compliance with building regulations if the container is used as habitable space.
Insulation Material Fire Ratings
| Material | Combustibility | Fire rating notes |
|---|---|---|
| Spray polyurethane foam | Combustible | Class 3 or 4; requires barrier in habitable spaces |
| XPS / EPS boards | Combustible | Similar to SPF; barrier required |
| Glasswool / Rockwool | Non-combustible | Class 0; no fire barrier needed |
The National Fire Protection Association resources provide detailed guidance on foam insulation fire safety, smoke production and building code compliance considerations.
For habitable container conversions, most jurisdictions require combustible insulation to be covered by a thermal barrier (typically 12.5mm plasterboard) that will slow fire spread and delay flashover long enough for safe evacuation.
Non-combustible mineral wool insulation eliminates these concerns but may require thicker layers to achieve equivalent R-values, reducing usable interior space.
Health and Environmental Considerations
Beyond thermal performance and fire safety, your choice of insulation materials affects indoor air quality, occupant health and environmental impact.
Off-Gassing and VOC Emissions
Spray foam insulation releases volatile organic compounds (VOCs) during and after installation. While modern closed-cell foams have improved significantly, proper ventilation during curing is essential.
Best practices for spray foam:
- Ensure adequate cross-ventilation during application
- Avoid occupancy for 24-48 hours after spraying
- Use low-VOC formulations where available
- Consider third-party certification (GreenGuard, etc.)
The U.S. EPA guidance on greener insulation outlines lifecycle considerations including raw material sourcing, manufacturing emissions, installation safety and end-of-life recyclability when comparing insulation options.
Natural and Low-Impact Alternatives
For environmentally conscious container conversions, consider materials with lower embodied energy and better health profiles:
- Glasswool with ECOSE® Technology contains no formaldehyde and uses bio-based binders
- Cellulose made from recycled paper offers good performance with minimal chemical treatment
- Sheep's wool provides natural moisture buffering and excellent acoustic properties
- Cork and wood-fiber boards deliver moderate R-values with very low environmental impact
Learn more about low-impact options at Insulation Supplies Australia's natural insulation guide.
Cost Comparison: Kit vs. Custom Assembly
Shipping container insulation kits promise convenience and time savings, but are they cost-effective compared to sourcing components separately?
Typical shipping container insulation kit pricing (12-metre container):
- Budget kit (basic rigid boards + vapour barrier): $800-$1,200
- Mid-range kit (higher R-value boards + accessories): $1,500-$2,500
- Premium kit (spray foam or advanced system): $3,000-$5,000+
DIY component sourcing for equivalent coverage:
- Rigid XPS boards (R2.5, walls and ceiling): $600-$900
- Vapour barrier and tape: $150-$250
- Construction adhesive and fasteners: $100-$150
- Underfloor insulation: $400-$600
- Total: $1,250-$1,900
Custom assembly typically costs less and allows you to choose specific products for each application (higher R-value on roof, lower on walls, etc.). However, kits save time in calculation, ordering and coordination, which may be valuable for first-time container builders.
For Melbourne-based projects, ordering insulation materials from Insulation Supplies Australia gives you access to professional-grade products at competitive prices with Victoria-wide delivery and pickup options.
Common Installation Mistakes to Avoid
Even with a complete shipping container insulation kit, poor installation can undermine thermal performance and create long-term problems.
Frequent errors include:
- Compressing insulation to fit into tight spaces, reducing R-value
- Incomplete vapour barriers with unsealed penetrations and gaps
- Inadequate ventilation leading to moisture accumulation
- Thermal bridging through continuous metal framing
- Missing floor insulation while focusing only on walls and ceiling
- Skipping edge sealing where insulation meets container frame
- Using wrong adhesive that fails to bond properly to steel
Take time to prepare surfaces properly. Clean steel thoroughly with degreaser, ensure good ventilation during installation and test adhesive compatibility on a small section before full application.
The U.S. Department of Energy insulation guide offers practical contractor-focused advice on installation methods, moisture control and safety practices relevant to metal-envelope retrofits like containers.
Permits, Regulations and Building Approval
Whether you need council permits for your shipping container conversion depends on its use, location and permanence.
Generally require approval:
- Containers as habitable dwellings or granny flats
- Commercial or retail container fitouts
- Permanent foundations with utility connections
- Placement in bushfire-prone or flood-overlay areas
May not require permits:
- Temporary storage sheds on residential property
- Mobile containers that can be removed
- Minor workshop or hobby spaces (check local rules)
Even when permits aren't required, following good building practices for insulation, moisture control and fire safety protects your investment and ensures the space is comfortable and durable.
If your container will be owner-occupied residential space, most councils expect compliance with relevant NCC provisions for insulation, ventilation, fire egress and structural adequacy. Engage a building surveyor early to clarify requirements in your municipality.
Combining Container Insulation with Other Thermal Strategies
Insulation alone won't guarantee year-round comfort in a steel box. Effective container conversions combine passive design, active climate control and smart material choices.
Complementary strategies include:
- Shading and orientation: Position containers to minimize western sun exposure; use verandas, pergolas or trees for shade
- Thermal mass: Add mass inside the insulated envelope (concrete floors, masonry partitions) to moderate temperature swings
- Natural ventilation: Include operable windows, vents and skylights for cross-ventilation and heat purging
- Reflective roofing: Paint container roof white or install a metal roof over the container to reduce radiant heat gain
- Efficient HVAC: Right-size heating and cooling equipment for the insulated space to minimize energy consumption
These measures work synergistically. A well-insulated, properly shaded container with good ventilation may need only minimal mechanical climate control, saving energy and improving comfort.
Acoustic Performance in Insulated Containers
Steel transmits sound readily, and containers can be noisy environments without proper acoustic treatment. Fortunately, most insulation materials that improve thermal performance also reduce sound transmission.
Acoustic benefits by material:
- Glasswool and rockwool batts: Excellent sound absorption; high-density products like Earthwool Sound Shield offer superior performance
- Spray foam: Good at blocking airborne noise; less effective for impact sound
- Rigid foam boards: Minimal acoustic benefit; primarily thermal
- Mass-loaded vinyl: Specialty product that adds acoustic mass without thickness
For container studios, workshops or dwellings in noisy areas, consider using high-density glasswool in walls and ceiling cavities. Adding mass to interior linings (double plasterboard, acoustic panels) further improves sound isolation.
Explore more acoustic strategies at Insulation Supplies Australia's acoustic insulation guide.
Maintenance and Long-Term Performance
Properly installed container insulation should perform reliably for decades with minimal maintenance. However, periodic inspection helps catch small issues before they become major problems.
Annual inspection checklist:
- Check for water stains or signs of leaks around roof and penetrations
- Inspect vapour barrier integrity, especially around windows and doors
- Look for condensation on interior surfaces indicating vapour barrier failure
- Examine insulation for settling, compression or damage
- Verify ventilation systems are operating correctly
If condensation appears, address it immediately. Persistent moisture will degrade insulation performance, encourage mould growth and can cause steel corrosion even though containers use Corten or marine-grade steel.
Minor vapour barrier repairs can be made with high-quality sealing tape. Larger issues may require removing interior linings to properly re-seal or replace damaged insulation sections.
A shipping container insulation kit can simplify the process of transforming a steel box into a comfortable, energy-efficient space, but understanding your material options, moisture management requirements and installation best practices ensures you achieve the thermal performance and durability your project deserves. Whether you choose a complete kit or assemble your own custom solution, Insulation Supplies Australia offers the specialist insulation products, technical guidance and delivery convenience you need to make your container conversion succeed.