

Installing insulation for under concrete slab is one of the most effective ways to improve energy efficiency and thermal comfort in Australian homes, particularly in Melbourne's variable climate. Whether you're building a new home, adding an extension, or renovating an existing structure, understanding the benefits, materials, and installation requirements for under-slab insulation will help you make informed decisions that deliver long-term comfort and energy savings. This comprehensive guide explains everything you need to know about insulating beneath concrete slabs, from material selection to compliance requirements.
Why Insulation for Under Concrete Slab Matters
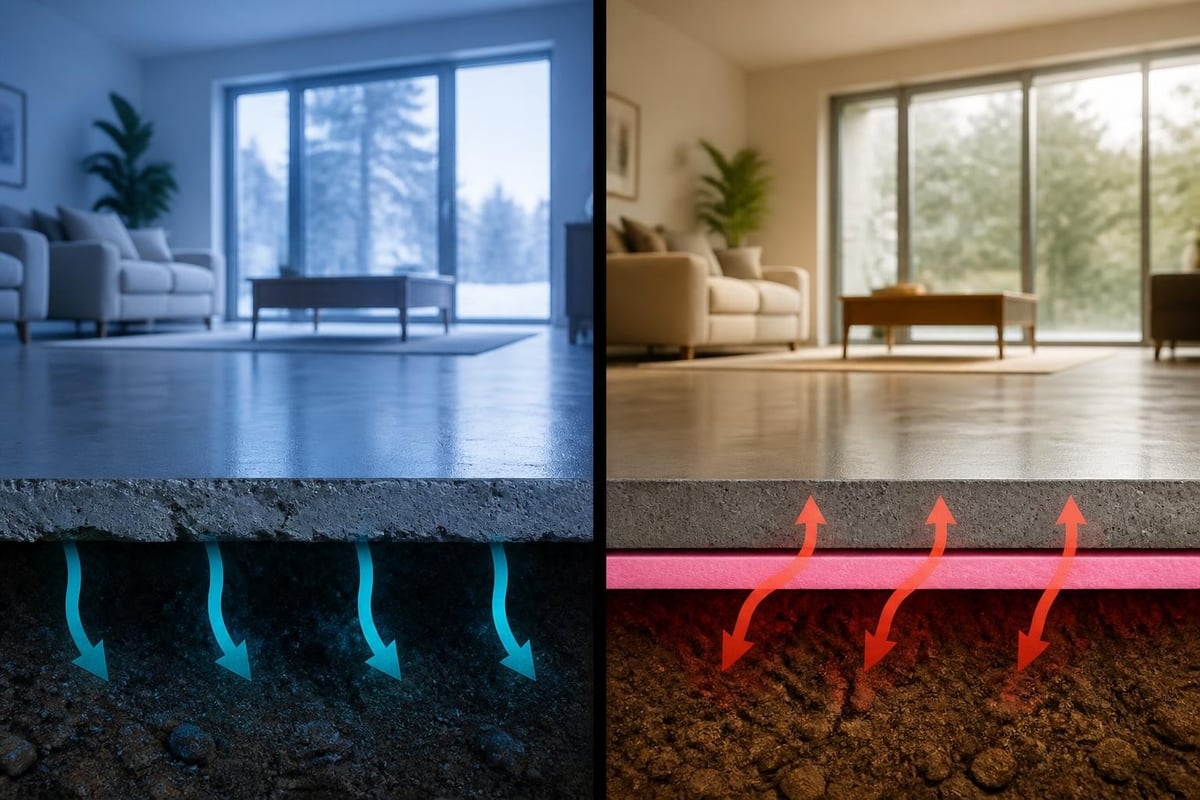
Concrete slabs transfer heat and cold directly from the ground into your home, creating uncomfortable living spaces and driving up heating and cooling costs. Without proper insulation, your concrete floor acts as a massive thermal bridge, allowing warmth to escape during winter and letting heat penetrate during summer.
The thermal performance benefits include:
- Reduced heat loss through the floor by up to 35%
- Lower heating and cooling bills year-round
- More consistent indoor temperatures
- Improved comfort, particularly in ground-level living areas
- Reduced risk of condensation and moisture problems
In Victoria's Climate Zone 6 and 7 regions, the National Construction Code (NCC) requires specific R-values for floor insulation to meet minimum energy efficiency standards. Installing insulation for under concrete slab ensures your project meets these requirements while maximising comfort and reducing running costs.
Understanding R-Values for Under-Slab Applications
The R-value measures insulation's resistance to heat flow. Higher R-values provide better thermal performance. For under-slab applications in Melbourne and regional Victoria, you'll typically need R-values between R1.0 and R2.5, depending on your specific climate zone and building design.
Recommended R-Values by Application
| Application Type | Minimum R-Value | Recommended R-Value |
|---|---|---|
| Standard residential slab | R1.0 | R1.5–R2.0 |
| High-performance homes | R2.0 | R2.5+ |
| Commercial buildings | R1.5 | R2.0–R2.5 |
| Extension/renovation | R1.0 | R1.5 |
These values align with NCC requirements while providing practical thermal performance for most residential projects. Always check with your builder or certifier to confirm the specific requirements for your project location and design.
The relationship between insulation thickness and R-value varies depending on the material you choose. Extruded polystyrene (XPS) and expanded polystyrene (EPS) are the two most common options for insulation for under concrete slab installations.
Best Materials for Under-Slab Insulation
Choosing the right insulation material depends on several factors including compressive strength, moisture resistance, thermal performance, and budget. Not all insulation types are suitable for placement beneath concrete slabs where they'll bear significant loads and potentially encounter moisture.
Extruded Polystyrene (XPS)
XPS insulation boards offer superior compressive strength and moisture resistance, making them ideal for under-slab applications. The closed-cell structure prevents water absorption while maintaining consistent R-values over time.
Key advantages:
- High compressive strength (250kPa to 500kPa)
- Excellent moisture resistance
- Maintains R-value in wet conditions
- Long-term durability
- Easy to cut and install
Expanded Polystyrene (EPS)
EPS provides cost-effective thermal performance with adequate compressive strength for many residential applications. While slightly more susceptible to moisture than XPS, properly installed EPS performs reliably under concrete slabs.
Notable features:
- Lower cost per square metre
- Good thermal resistance
- Lightweight and easy to handle
- Suitable for most residential slabs
- Environmentally friendly manufacturing process
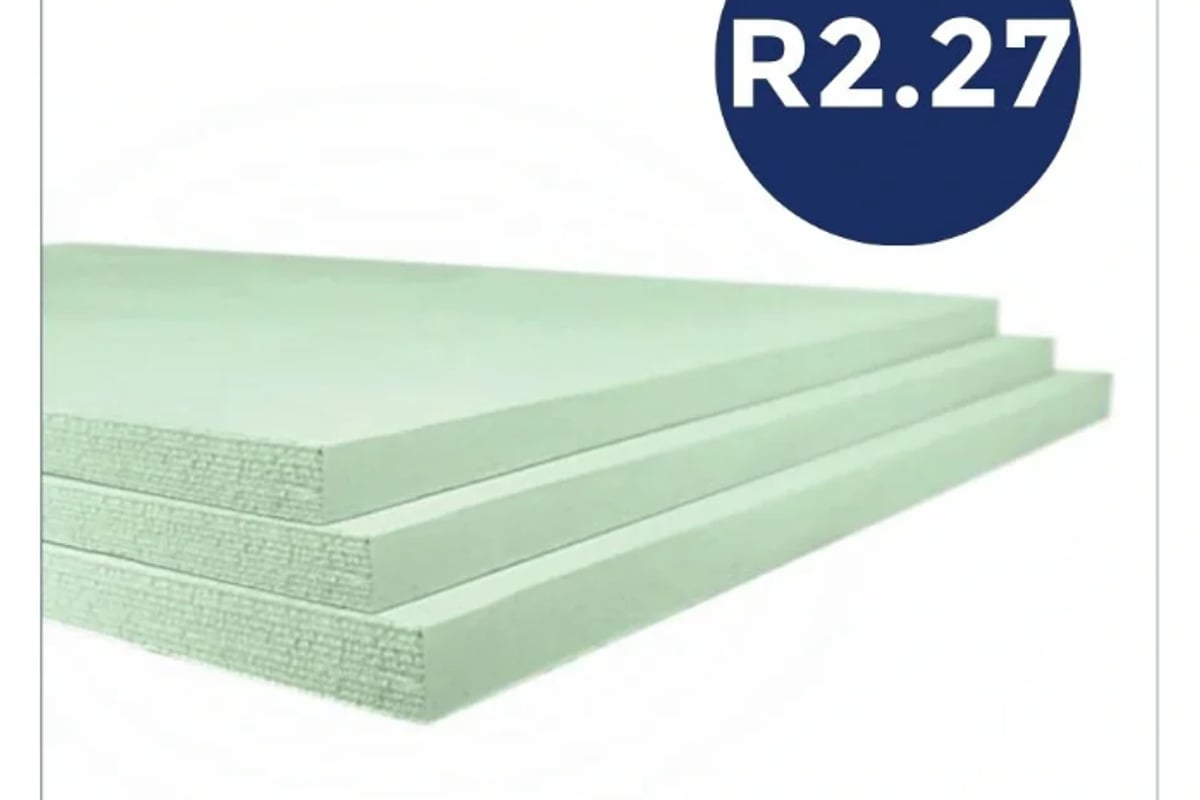
For demanding applications requiring exceptional load-bearing capacity and moisture resistance, the Styroboard XPS Insulation Board 75mm delivers R2.27 thermal performance with 350kPa compressive strength, ensuring your insulation maintains its integrity beneath the concrete slab for decades.
Installation Process and Best Practices
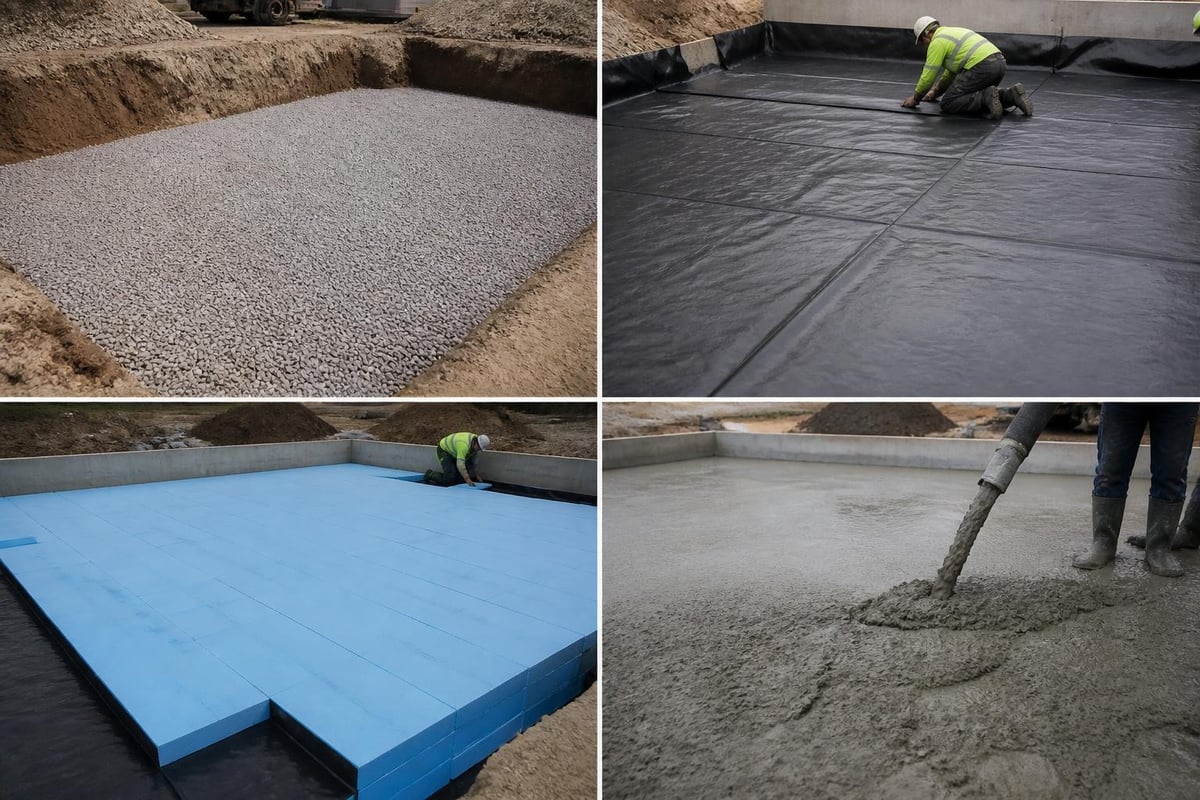
Proper installation of insulation for under concrete slab requires careful attention to site preparation, board placement, and edge detailing. The installation sequence typically follows these stages during new construction or major renovation projects.
Site Preparation Steps
- Level and compact the base: Ensure the soil or base material is properly compacted and level
- Install moisture barrier: Place a damp-proof membrane beneath the insulation layer
- Check for sharp objects: Remove rocks, debris, or anything that could puncture the insulation
- Verify levels: Confirm the base is at the correct height to accommodate insulation thickness
Board Placement and Securing
The insulation boards should be laid tightly together with staggered joints, similar to bricklaying patterns. This minimises thermal bridging and ensures consistent coverage across the entire slab area.
- Lay boards in a running bond pattern
- Tape or seal joints between boards
- Trim boards cleanly around service penetrations
- Ensure boards are flush and level before pouring
Edge Insulation Considerations
Edge insulation prevents thermal bridging around the slab perimeter where heat loss is typically greatest. Installing vertical edge insulation reduces heat transfer through the exposed slab edges, particularly important in colder regions.
Thickness and Coverage Requirements
Determining the correct insulation thickness depends on your target R-value and the material's thermal resistance properties. Different insulation materials achieve the same R-value at different thicknesses.
| Material Type | R1.5 Thickness | R2.0 Thickness | R2.5 Thickness |
|---|---|---|---|
| XPS (per m·K/W) | 50mm | 65mm | 80mm |
| EPS Standard | 60mm | 80mm | 100mm |
| EPS High Density | 55mm | 75mm | 90mm |
These measurements are approximate and vary slightly between manufacturers. Always verify the specific R-value per thickness from your supplier's technical specifications to ensure you're meeting your performance targets.
Calculating Material Quantities
Measure your slab area in square metres and add 5-10% for cutting waste and edge details. Most insulation boards come in standard sizes like 600mm x 1200mm or 600mm x 2400mm, allowing you to calculate how many boards you'll need.
Simple calculation method:
- Total slab area (length x width) = X square metres
- Add 10% waste allowance = X x 1.10
- Divide by board coverage area
- Round up to the nearest whole board
Moisture Management and Vapour Barriers
Managing moisture beneath and around concrete slabs is critical for preventing long-term problems. Even though XPS and EPS resist moisture absorption, you still need proper vapour barriers to protect your building structure.
The standard approach places a polyethylene damp-proof membrane (DPM) beneath the insulation layer. This prevents ground moisture from migrating upward through the insulation and into the concrete slab. Some builders prefer placing the DPM above the insulation instead, directly beneath the concrete.
Membrane Placement Options
Below insulation (more common):
- Protects insulation from ground moisture
- Easier to tape and seal
- Reduces moisture-related insulation degradation
Above insulation (alternative method):
- Prevents moisture reaching concrete directly
- May increase installation complexity
- Requires careful detailing around edges
Both methods work effectively when installed correctly. Discuss the preferred approach with your builder based on local soil conditions and building practices in your area.
Common Mistakes to Avoid
Even experienced DIYers and builders sometimes make errors when installing insulation for under concrete slab. Understanding these common pitfalls helps you avoid costly mistakes and performance problems.
Installation Errors
Gaps between boards: Even small gaps create thermal bridges that reduce overall insulation performance. Boards must fit tightly together with sealed joints.
Damaged or crushed boards: Walking on insulation boards or dropping materials on them can compress or damage the cells, reducing R-value and compressive strength.
Incorrect thickness: Installing thinner insulation than specified to save money compromises thermal performance and may fail to meet NCC requirements.
Design Oversights
Forgetting edge insulation around the slab perimeter creates a thermal bridge that significantly reduces the benefit of under-slab insulation. The edge area has the highest heat loss potential.
Insufficient coverage around plumbing penetrations and service entries allows heat to escape. These areas need careful detailing and proper sealing to maintain continuous insulation coverage.
Building Code Compliance in Victoria
The National Construction Code sets minimum energy efficiency standards for all new homes and major renovations across Australia. In Victoria, these requirements are enforced through the building permit and inspection process.
For floor insulation in Climate Zone 6 (Melbourne and surrounds), the NCC typically requires minimum R1.0 to R1.5 depending on slab type and building design. Higher-performance homes targeting 7-star or better energy ratings often specify R2.0 or higher.
Compliance verification includes:
- Detailed plans showing insulation type and R-value
- Material specifications and manufacturer data sheets
- Installation method statements
- Inspection sign-off before concrete pour
Your builder or building surveyor will confirm the specific requirements for your project. Many renovators and owner-builders find it helpful to review the NCC energy efficiency provisions before finalising their insulation specifications.
Cost Considerations and Long-Term Value
The upfront cost of insulation for under concrete slab represents a relatively small portion of your total slab construction budget, typically 3-8% depending on material choice and coverage area. However, the long-term energy savings and comfort benefits deliver strong return on investment.
Material Cost Comparison
| Material | Cost Range per m² | Typical R-Value | Installation Difficulty |
|---|---|---|---|
| EPS Standard | $8–$15 | R1.5–R2.0 | Easy |
| EPS High Density | $12–$20 | R2.0–R2.5 | Easy |
| XPS Premium | $18–$30 | R2.0–R2.5 | Easy |
These prices are indicative and vary based on thickness, quantity, and supplier. Buying directly from Insulation Supplies Australia often provides better value than retail hardware stores, especially for larger projects.
Energy Savings Analysis
A typical Melbourne home with 150m² of slab area and R2.0 under-slab insulation can save $300-$500 annually on heating costs compared to an uninsulated slab. Over a 20-year period, this represents $6,000-$10,000 in savings, far exceeding the initial insulation investment.
The payback period for under-slab insulation typically ranges from 3-7 years depending on energy prices, climate zone, and home design. Beyond the financial return, improved comfort and consistent indoor temperatures add significant lifestyle value that's harder to quantify.
Integration with Other Insulation Systems
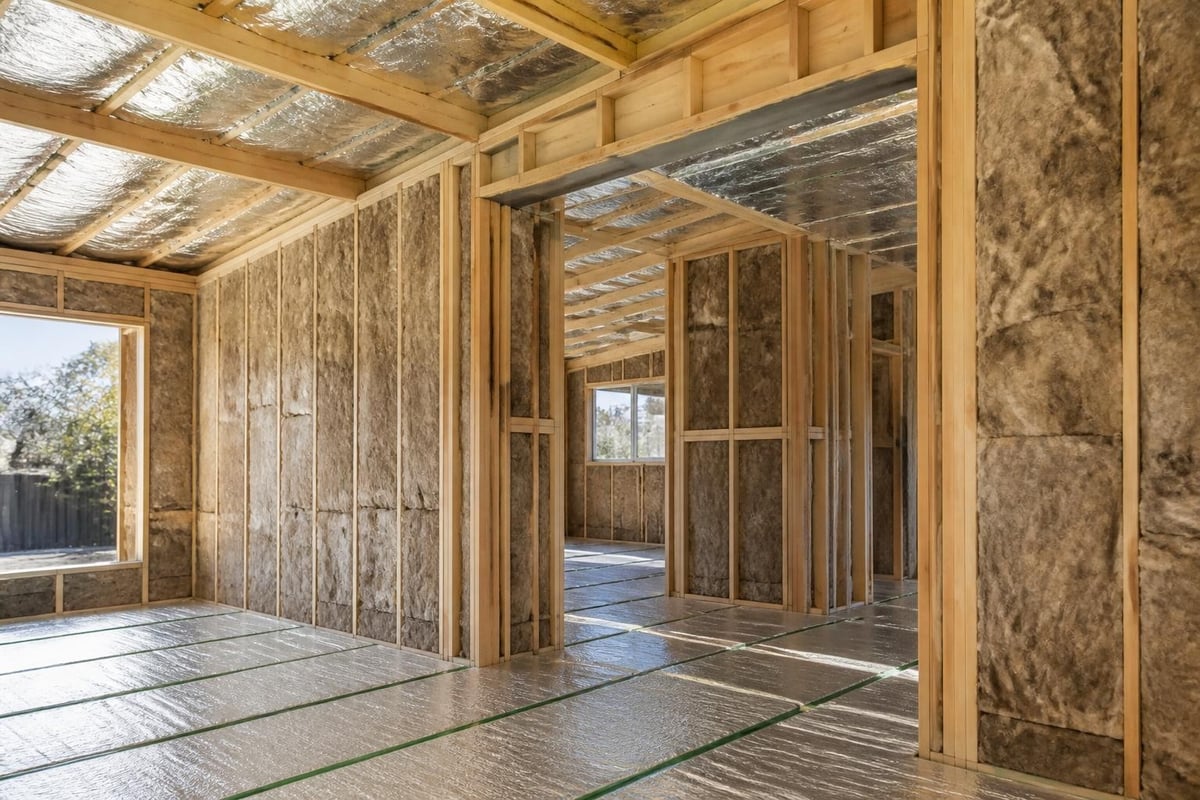
Under-slab insulation works most effectively as part of a comprehensive building envelope strategy. Combining floor insulation with proper wall insulation and ceiling insulation creates a complete thermal barrier that maximises energy efficiency.
Whole-home insulation benefits:
- Reduced thermal bridging between building elements
- More balanced heating and cooling loads
- Lower overall energy consumption
- Improved comfort in all living spaces
- Higher property value and market appeal
When planning your insulation strategy, consider how different building elements work together. Heat naturally moves through the path of least resistance, so insulating only one area while leaving others exposed provides limited benefit.
Renovations and Retrofit Challenges
Adding insulation for under concrete slab during renovation projects presents significant challenges since you can't access the underside of existing slabs without major demolition. However, several alternative approaches can improve thermal performance in existing homes.
Retrofit Options
Top-side rigid insulation: Installing rigid insulation boards on top of the existing slab beneath new flooring adds thermal resistance without excavation. This approach raises floor levels and requires careful detailing at doorways.
Perimeter insulation: Adding insulation around exposed slab edges reduces heat loss even when you can't insulate beneath the slab itself. This provides meaningful thermal improvement with manageable cost and disruption.
Underfloor insulation alternatives: For suspended timber floors rather than concrete slabs, products like underfloor insulation batts provide excellent thermal performance and are much easier to retrofit.
Professional Installation vs DIY
Installing insulation for under concrete slab falls within the capability range of experienced DIY renovators and owner-builders, but it requires careful planning and attention to detail. The work must be completed before the concrete pour, so timing and coordination are critical.
When to DIY
- You're managing your own construction project
- You have experience with building materials and site work
- The slab is relatively simple without complex service penetrations
- You can coordinate with concrete suppliers and pumpers
When to Hire Professionals
- Complex slab designs with multiple levels or service trenches
- Large commercial or multi-unit projects
- Limited construction experience or uncertainty about NCC requirements
- Tight construction timelines requiring multiple trades coordination
Whether you choose DIY or professional installation, sourcing quality materials from experienced suppliers ensures your project starts with the right foundation. For guidance on installation techniques and best practices, trusted suppliers provide valuable technical support throughout your project.
Selecting the Right Product for Your Project
With various insulation materials, thicknesses, and specifications available, choosing the optimal product for your specific application ensures you achieve your performance goals within budget. Consider these key selection criteria.
Decision Framework
Compressive strength requirements: How much load will the insulation bear? Standard residential slabs typically need 200-350kPa, while heavily loaded areas may require 500kPa or higher.
Moisture exposure level: Will the insulation be installed in areas with high water tables or poor drainage? Higher moisture environments benefit from XPS's superior water resistance.
Budget constraints: What's your total insulation budget? EPS provides cost-effective performance while XPS offers premium characteristics at higher cost.
Target R-value: What thermal performance do you need to achieve? Match material thickness to your required R-value using manufacturer specifications.
Product Specification Checklist
- Thermal resistance (R-value) per thickness
- Compressive strength rating (kPa)
- Moisture absorption characteristics
- Board dimensions and coverage per unit
- Compatibility with your slab design
- NCC compliance certification
Taking time to match your specific project requirements with the right insulation product prevents costly mistakes and ensures long-term performance.
Insulation for under concrete slab provides essential thermal performance that reduces energy costs, improves comfort, and helps your home meet modern building standards. By understanding material options, installation requirements, and performance characteristics, you can make confident decisions that deliver lasting value. Insulation Supplies Australia offers expert advice, competitive pricing, and fast delivery across Victoria to help you choose and purchase the right under-slab insulation for your project, whether you're building new, renovating, or managing a complex construction development.