

Choosing the right insulation wall system is one of the most important decisions you'll make when building or renovating your Melbourne home. A well-insulated wall doesn't just keep you comfortable year-round, it dramatically reduces your energy bills, protects your building envelope from moisture damage, and helps you meet current building standards. Whether you're working on a new build, retrofitting an older property, or planning a renovation, understanding how wall insulation works and which products suit your specific application will save you money and deliver lasting performance.
Why Your Insulation Wall Matters More Than You Think
Your walls represent the largest surface area of your home's building envelope, and without proper thermal resistance, they're responsible for up to 35% of heat loss in winter and unwanted heat gain during Melbourne's hot summers. An effective insulation wall system creates a continuous thermal barrier that keeps conditioned air inside where it belongs.
Beyond temperature control, wall insulation plays a critical role in managing condensation risk and maintaining healthy indoor air quality. When you understand the relationship between thermal performance, air barriers and vapour control, you can avoid costly moisture problems that plague poorly insulated or incorrectly detailed wall assemblies.
The Building Science Behind High-Performance Walls
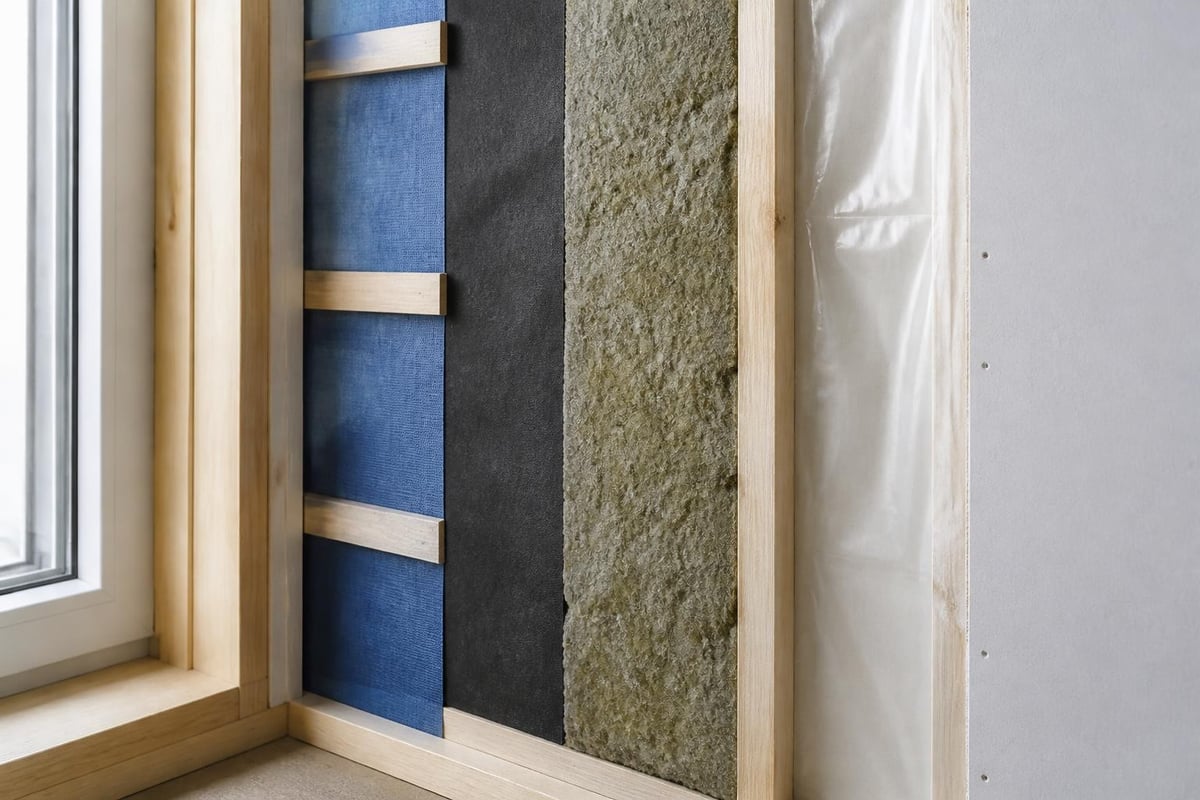
Modern building science recognises that a properly designed insulation wall system must manage four critical control layers: water (rain and groundwater), air, vapour and thermal energy. Each layer works together to create a durable, efficient wall assembly.
The thermal control layer is what most people think of when they hear "wall insulation," but it only performs well when combined with effective air sealing. Even a small gap in your insulation wall can create thermal bypasses that reduce the assembly's effective R-value by 30% or more.
Key control layers in every wall:
- Water control: External cladding, flashing and drainage planes
- Air control: Continuous air barrier on either the warm or cold side
- Vapour control: Strategic placement of vapour-permeable or impermeable materials
- Thermal control: Continuous insulation with minimal thermal bridging
Types of Insulation Wall Products and Where They Work Best
Australian builders and renovators have access to several proven insulation materials, each with distinct performance characteristics, installation methods and ideal applications. Your choice depends on your wall framing type, climate zone, budget and whether you're working on new construction or a retrofit.
Glasswool and Polyester Batts
Glasswool batts remain the most popular insulation wall product for timber-framed construction across Melbourne and regional Victoria. They're cost-effective, easy to cut and fit, and deliver reliable thermal performance when properly installed in standard stud cavities.
Modern glasswool products manufactured with ECOSE® Technology are soft to handle, generate minimal dust, and contain recycled content. They're available in a range of R-values and dimensions to suit 90mm and 70mm timber frames, as well as 90mm steel stud applications.
Advantages of glasswool batts:
- Excellent thermal performance across common R-values (R1.5 to R2.5)
- Friction-fit installation requires no fasteners or adhesives
- Non-combustible material adds passive fire resistance
- Acoustic performance helps reduce sound transmission
- Widely stocked and competitively priced
Polyester batts offer similar installation methods but appeal to those seeking a non-itch, fully synthetic alternative. They're particularly popular with owner-builders and DIY renovators who value handling comfort during installation.
Rigid Foam Board and XPS Panels
Extruded polystyrene (XPS) and expanded polystyrene (EPS) boards deliver high R-value per millimetre of thickness, making them ideal for continuous exterior insulation applications where space is limited. XPS boards offer superior moisture resistance and compressive strength compared to EPS, which makes them suitable for demanding applications.
Rigid foam boards can be installed as continuous external insulation over timber or steel framing, providing an unbroken thermal barrier that eliminates thermal bridging through studs. This approach, detailed in Building Science Corporation's measure guideline, delivers exceptional whole-wall performance.
| Material | R-Value per 25mm | Moisture Resistance | Compressive Strength | Best Application |
|---|---|---|---|---|
| XPS Foam Board | R0.7 – R0.8 | Excellent | 250 – 700 kPa | Exterior CI, below-grade |
| EPS Foam Board | R0.6 – R0.7 | Good | 70 – 150 kPa | Exterior CI, lightweight |
| Glasswool Batt | R0.4 – R0.5 | Poor (requires protection) | Minimal | Cavity insulation |
| Polyester Batt | R0.4 – R0.5 | Fair | Minimal | Cavity insulation |
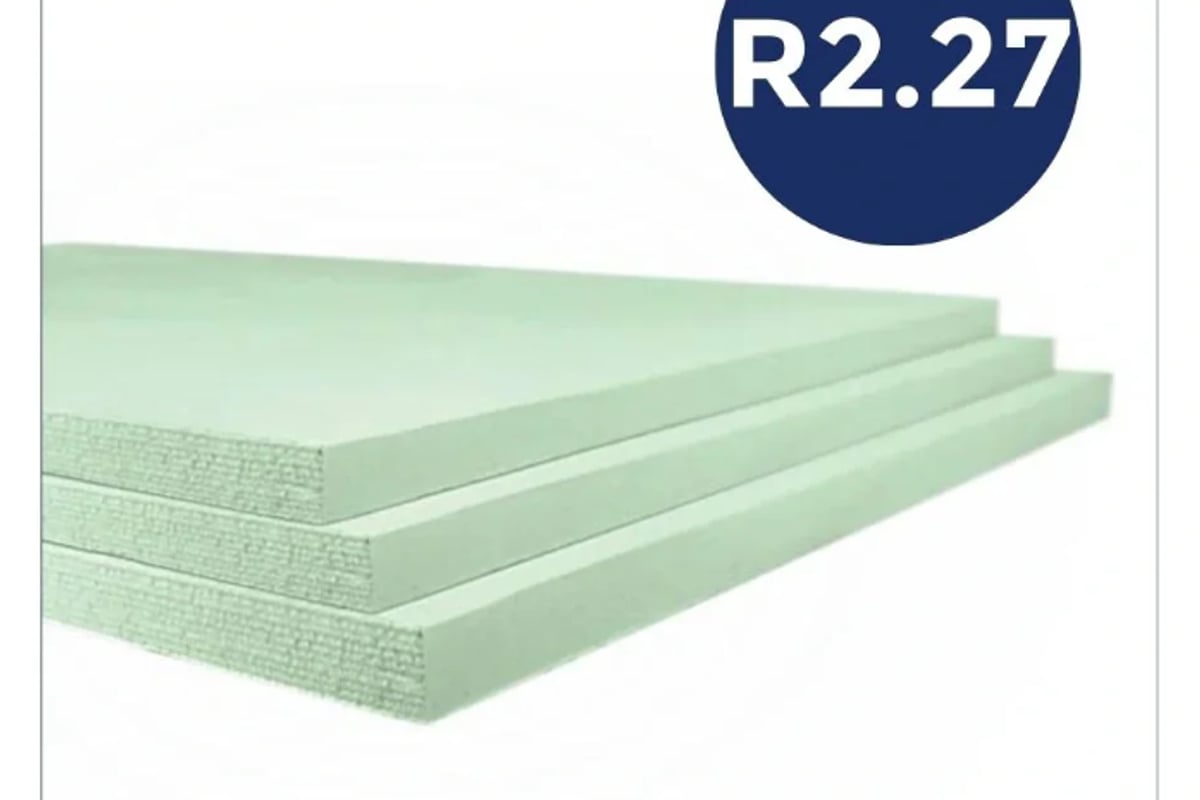
For those working with tight tolerances or retrofitting insulation into existing wall cavities, products like the Styroboard XPS Insulation Board 75mm offer reliable thermal performance with excellent dimensional stability and moisture protection, making them a practical choice for continuous insulation strategies.
Cavity Wall Insulation for Masonry Construction
Double-brick and brick-veneer construction require specific insulation wall products designed for masonry cavities. Water-repellent cavity slabs shed moisture while maintaining thermal performance, which is essential in exposed wall applications where cavity drainage occurs.
These specialised batts must maintain their shape and thickness when partially wetted, then dry out without permanent compression or degradation. Standard glasswool batts are not suitable for exposed cavity applications unless they're specifically engineered for water-repellent performance.
Understanding R-Values and Building Code Requirements
The National Construction Code (NCC) sets minimum thermal performance requirements for external walls based on your climate zone. Melbourne sits primarily in Climate Zone 6, though some outer areas fall into Zone 7, each with specific R-value requirements for different building elements.
What R-Value Does Your Insulation Wall Need?
For most Melbourne residential construction in Climate Zone 6, external walls require a minimum of R1.5 total thermal resistance. Climate Zone 7 areas bump this requirement to R2.0. These are minimum standards, and exceeding them delivers better comfort and lower ongoing energy costs.
When calculating total wall R-value, you must account for all materials in the assembly (cladding, cavity air space, insulation, plasterboard and finishes), not just the insulation product alone. ASHRAE Handbook resources provide detailed calculation methods for complex wall assemblies.
Common wall R-values by application:
- Standard timber frame (90mm) + R1.5 batt = Total wall R1.8 – R2.0
- Standard timber frame (90mm) + R2.5 batt = Total wall R2.8 – R3.0
- Steel frame (90mm) + R2.5 batt = Total wall R2.2 – R2.5 (lower due to thermal bridging)
- Brick veneer + cavity + R1.5 batt = Total wall R1.9 – R2.2
- Continuous exterior insulation (50mm XPS) + frame + cavity batt = Total wall R4.0+
The Hidden Impact of Thermal Bridging
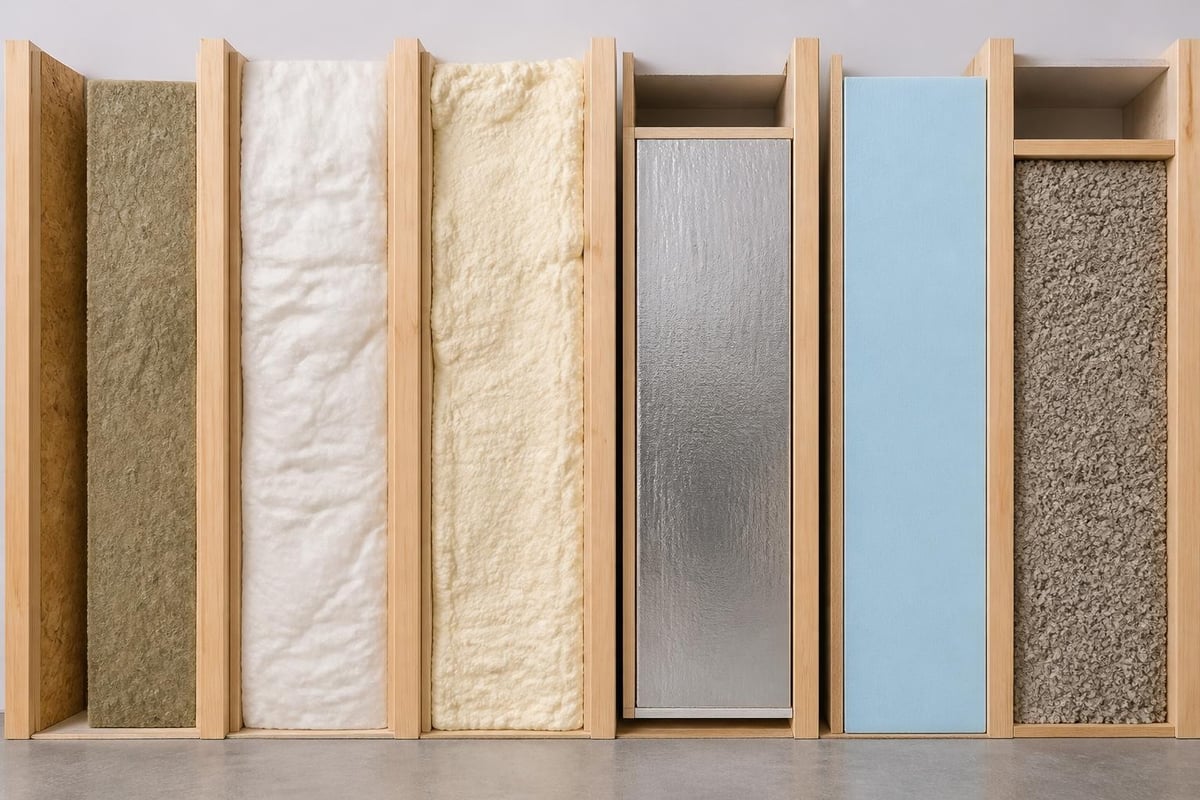
Timber and steel studs create thermal bridges that bypass your insulation wall and significantly reduce the assembly's effective R-value. Steel studs are particularly problematic, conducting heat roughly 400 times more efficiently than glasswool insulation.
A 90mm steel-framed wall with R2.5 batts might only achieve an effective whole-wall R-value of R2.0 to R2.3 once you account for thermal bridging through the framing members. Detailed research on wall performance demonstrates how framing fraction and material choice impact real-world thermal resistance.
Continuous exterior insulation eliminates this thermal bridging by wrapping the entire frame in an unbroken thermal barrier. Even a modest thickness of rigid foam board on the outside of your frame can boost effective R-value by 30% to 50% compared to cavity-only insulation.
Installation Best Practices for Maximum Performance
Your insulation wall will only perform as well as the quality of installation allows. Gaps, compression, misalignment and poor air sealing can reduce effective thermal performance by 30% or more, even when using premium products with high rated R-values.
Cavity Insulation Installation Fundamentals
Friction-fit batts must fill the entire stud cavity from top to bottom without gaps or compression. Cut batts slightly oversize (5mm to 10mm wider than the cavity) so they compress gently when installed, creating continuous contact with the framing members.
Never compress batts to fit into undersized cavities, as this reduces the trapped air space that provides insulating value. If your cavity depth is less than the batt thickness, use a product designed for that specific dimension rather than forcing a thicker product into the space.
Critical installation details:
- Cut around electrical boxes and plumbing penetrations, filling all voids completely
- Split batts to fit behind pipes and conduits, maintaining full cavity fill
- Extend batts the full height of the wall from bottom plate to top plate
- Ensure batts fit snugly against window and door framing
- Avoid leaving gaps at wall/ceiling junctions or internal wall intersections
Air Sealing Makes or Breaks Performance
An effective air barrier is just as important as the insulation wall itself. Air leakage through wall assemblies carries both sensible heat and moisture, reducing energy efficiency and creating condensation risk on cold surfaces.
The U.S. Department of Energy's comprehensive insulation guide emphasises that air sealing must occur on at least one side of the wall assembly, either at the interior (warm side) or exterior (cold side) surface. The location depends on your wall design and climate considerations.
Common air leakage paths include:
- Bottom plate to subfloor junctions
- Top plate to ceiling frame connections
- Around window and door rough openings
- Electrical and plumbing penetrations through plates
- Service cavities and bulkheads
- Internal wall to external wall intersections
Modern wall wraps and membranes provide both weather protection and air barrier functions when properly detailed and sealed at all penetrations and overlaps. These products work alongside your insulation wall to create a complete building envelope system.
Moisture Management and Condensation Control
Every insulation wall must manage water vapour movement to prevent condensation forming within the wall assembly. When warm, moist air contacts cold surfaces, condensation occurs, potentially leading to mould growth, timber decay and insulation degradation.
Understanding Vapour Drive and Dew Point
In Melbourne's climate, vapour drive is primarily outward during winter (warm, humid interior air moving toward cold exterior) and inward during summer (hot exterior air moving toward cool, air-conditioned interior). Your wall assembly must handle both directions without trapping moisture.
The key is ensuring that any moisture that does enter the wall assembly can dry out before accumulating to problematic levels. This means avoiding "vapour sandwich" designs where impermeable barriers exist on both sides of the insulation wall, trapping any moisture that gets in.
Moisture-safe wall design principles:
- Use vapour-permeable wall wraps on the exterior
- Position vapour-resistant layers (if required) on the warm side only
- Ensure adequate ventilation behind external cladding for drying
- Avoid interior vinyl wallpaper or impermeable paint in bathrooms and kitchens
- Consider climate-specific guidance from building science resources
Research from EPA guidance on weatherization and indoor air quality highlights that improperly detailed insulation retrofits can worsen moisture problems if air sealing and vapour control aren't addressed alongside thermal upgrades.
Breathable vs Impermeable Barriers
External wall wraps serve multiple functions: weather resistance, air barrier and vapour management. Permeable (breathable) wall wraps allow water vapour to escape from the wall cavity while still blocking bulk water penetration and wind washing through the insulation.
For standard timber and brick-veneer construction in Melbourne, breathable wraps are generally the safest choice, allowing the wall assembly to dry to the exterior. Impermeable sarking may be appropriate in specific designs but requires careful engineering to prevent condensation issues.
If you're looking at breathable membrane options for protecting your insulation wall assembly, wall wrap products designed for Australian conditions offer the weather protection and vapour permeability needed for long-term durability.
Acoustic Performance: The Secondary Benefit
While thermal performance is the primary function of most insulation wall systems, sound reduction is a valuable secondary benefit that improves comfort and privacy in both residential and commercial buildings. The same materials that slow heat transfer also absorb and dampen sound energy.
How Wall Insulation Controls Sound Transmission
Sound travels through walls via two mechanisms: airborne sound (voices, music, traffic noise) passes through air gaps and vibrates the wall assembly, while structure-borne sound (footsteps, impacts) travels through solid materials. Your insulation wall primarily controls airborne sound transmission.
Adding glasswool or polyester batts to an otherwise empty stud cavity typically improves the Sound Transmission Class (STC) rating by 5 to 10 points, which represents a noticeable reduction in sound transmission. For reference, an STC improvement of 10 points reduces perceived loudness by approximately 50%.
Higher-density insulation products deliver better acoustic performance than standard thermal batts. Specialised acoustic batts with densities of 20 kg/m³ to 32 kg/m³ provide superior sound absorption while maintaining excellent thermal properties.
STC improvements by wall type:
| Wall Assembly | Typical STC Rating |
|---|---|
| 90mm timber frame, no insulation, single-layer plasterboard each side | STC 33 – 35 |
| Same wall + R2.5 standard glasswool batt | STC 38 – 42 |
| Same wall + high-density acoustic batt | STC 42 – 48 |
| Same wall + acoustic batt + double plasterboard | STC 50 – 55 |
For walls separating living spaces from noisy areas, or between units in multi-residential buildings, combining a quality insulation wall system with resilient channels or double-stud framing delivers professional-grade acoustic separation. More information on sound insulation wall strategies can help you understand advanced acoustic design principles.
Retrofitting Insulation into Existing Walls
Adding insulation to an existing uninsulated wall is one of the most cost-effective energy retrofits available, but it presents unique challenges compared to new construction. Access limitations, existing services, and moisture considerations require careful planning.
Retrofit Options and Access Methods
For renovations where wall linings are being replaced anyway, retrofitting becomes straightforward: simply install batts or boards before installing new plasterboard. The challenge arises when you want to add insulation without removing finished wall surfaces.
Blown-in insulation (cellulose or loose-fill glasswool) can be installed through small access holes drilled in either the interior plasterboard or exterior cladding. Professional installers use specialised equipment to ensure complete cavity fill and consistent density throughout the wall height.
Alternatively, injectable foam insulations (though less common in Australia than overseas markets) can fill irregular cavities and work around services. These products require experienced installers and careful moisture management to avoid trapped condensation.
Retrofit considerations:
- Existing wall cavities may contain asbestos, knob-and-tube wiring, or other hazards requiring professional assessment
- Cavity depth and stud spacing may not match current standard dimensions
- Adding insulation changes the temperature profile within the wall, potentially moving the dew point
- Existing air leakage paths must be sealed before or during the insulation upgrade
- Wall-mounted services (electrical, plumbing) may require modification or protection
When planning a retrofit, it's worth reviewing comprehensive weatherization guidance that covers air sealing priorities, diagnostic testing, and installation sequencing to ensure your insulation upgrade delivers the expected performance and doesn't create unintended moisture or air quality problems.
Special Applications and Advanced Wall Systems
Beyond standard timber or steel-framed walls, several specialised insulation wall applications require different products, installation methods, and performance considerations.
Masonry Cavity Walls and Brick Veneer
The air cavity in brick-veneer and double-brick construction provides a drainage plane for any water penetrating the external wythe. Insulation installed in this cavity must be water-repellent and able to shed moisture without degrading or losing thermal performance.
Standard glasswool batts are not suitable for exposed cavity applications. Purpose-engineered cavity slabs with hydrophobic treatment maintain their insulating value even when partially wetted, then dry out once the moisture source is removed.
Proper cavity width is essential: a 50mm minimum clear cavity should remain even after insulation installation to ensure adequate drainage and drying. Partial-fill cavity insulation is the norm in Australian masonry construction.
Continuous Exterior Insulation Systems
Wrapping the exterior of your frame with rigid foam board creates an unbroken thermal barrier that dramatically improves whole-wall performance. This approach, sometimes called "outsulation" or exterior continuous insulation (CI), virtually eliminates thermal bridging through framing members.
Exterior insulation moves the framing assembly to the warm side of the insulation layer, keeping timber or steel studs above the dew point and reducing condensation risk. However, it requires careful detailing of window returns, flashing, cladding attachment and service penetrations.
Thick exterior rigid insulation assemblies (75mm to 150mm) can achieve remarkable thermal performance (total wall R-values of R4.0 to R6.0), approaching Passive House performance standards that represent the pinnacle of building envelope efficiency.
Modern cladding systems accommodate thick exterior insulation through extended brackets, rainscreen furring, or specialised attachment systems that fasten through the insulation back to the structural frame without creating significant thermal bridges.
Choosing the Right Products for Your Project
With numerous insulation wall products available, selecting the optimal solution depends on your specific project requirements, budget, installation method and performance goals. No single product suits every application.
Matching Products to Applications
For standard residential timber-framed construction in Melbourne, R1.5 to R2.5 glasswool batts in 430mm or 580mm widths suit 600mm stud spacing perfectly. These products deliver code-compliant performance at competitive pricing, with easy DIY installation and wide availability.
Steel-framed walls benefit from higher R-value products (R2.5 to R3.0) to compensate for increased thermal bridging through the frame. Consider combining cavity batts with external rigid insulation for steel-framed homes to achieve better whole-wall performance.
Masonry construction requires water-repellent cavity slabs rather than standard batts. These specialised products maintain performance in the harsher environment of an exposed cavity while providing the necessary drainage and drying capacity.
Product selection decision tree:
- What's your framing type? (Timber, steel, masonry)
- What's your cavity depth? (70mm, 90mm, 140mm, or external)
- What's your performance target? (Code minimum, comfort upgrade, high performance)
- What's your budget? (Economy, mid-range, premium)
- Who's installing? (DIY, trades, specialist)
When evaluating specific products for your insulation wall project, consider factors beyond just R-value per dollar: handling characteristics, acoustic performance, environmental credentials, and local availability all influence the real-world value proposition.
For homeowners and renovators sourcing materials online, Insulation Supplies Australia provides product specifications, R-values, dimensions and application guidance to help you make informed decisions and purchase the right insulation for your specific wall assembly.
Common Mistakes and How to Avoid Them
Even experienced builders occasionally make insulation wall installation errors that compromise performance. Understanding these common pitfalls helps you avoid costly mistakes and ensure your insulation delivers the expected energy savings and comfort improvements.
The Top Five Installation Errors
Compression reduces the thickness and therefore the R-value of your insulation. Never force batts into cavities that are too shallow, and avoid compressing insulation behind services or wall-mounted fixtures. Compressed insulation loses the air pockets that provide insulating value.
Gaps and voids create thermal bypasses where heat escapes freely. Even small gaps totalling just 5% of wall area can reduce effective R-value by 25% or more. Take time to cut and fit insulation around every obstacle, penetration and irregular cavity.
Insufficient air sealing allows air to wash through or around your insulation, carrying heat and moisture while rendering the insulation almost useless in extreme cases. Air barriers must be continuous and sealed at all penetrations and junctions.
Vapour barrier errors occur when impermeable membranes are installed on the wrong side of the insulation, or when vapour barriers exist on both sides of the wall, creating a "vapour sandwich" that traps moisture. Follow climate-specific guidance for vapour control layer placement.
Ignoring thermal bridging by focusing only on cavity R-value while neglecting the impact of framing, especially steel studs, leads to disappointing real-world performance. Consider continuous exterior insulation or thermal breaks at framing members for high-performance assemblies.
Quality Control During Installation
Inspect insulation work before closing walls to ensure complete coverage and proper installation. Look for compression, gaps around penetrations, incomplete coverage at wall/ceiling junctions, and missing pieces around windows and doors.
Thermal imaging surveys after construction can identify insulation voids and thermal bridges that aren't visible with conventional inspection. Many energy assessors offer diagnostic testing that reveals exactly where your insulation wall is underperforming.
A well-designed and properly installed insulation wall system delivers lasting comfort, energy savings and building envelope durability. Understanding the interaction between insulation products, air sealing, vapour management and thermal bridging helps you make informed decisions that optimise performance and avoid common pitfalls. Whether you're building new, renovating an existing home, or upgrading an uninsulated wall assembly, choosing quality materials and following best-practice installation methods ensures your investment delivers the expected returns for decades to come. Insulation Supplies Australia stocks a comprehensive range of wall insulation products suitable for every application, with detailed specifications, expert guidance and delivery across Melbourne and Victoria to help you achieve your project goals.