

Installing insulation batts yourself can save money and give you control over your home's comfort and energy efficiency. Whether you're tackling a renovation, building an extension, or upgrading an existing space, proper insulation batts installation makes a real difference to heating and cooling costs. This guide walks you through the preparation, tools, techniques, and tips you need to install batts correctly and safely, helping Victorian homeowners and DIY renovators achieve professional results without the guesswork.
Understanding Insulation Batts and Where They Go
Insulation batts are pre-cut sections of thermal or acoustic insulation designed to fit snugly between wall studs, ceiling joists, or floor frames. They come in various thicknesses and R-values to suit different climates and building requirements.
In Victoria, batts are commonly used in:
- Ceiling cavities to prevent heat loss in winter and heat gain in summer
- External walls to improve thermal performance and reduce noise
- Internal walls for acoustic control between rooms
- Underfloor spaces in suspended timber floors to stop cold air rising
Choosing the right R-value is essential. For ceiling insulation in Melbourne and regional Victoria, R4.0 to R6.0 is typical, while wall insulation usually ranges from R1.5 to R2.5 depending on stud depth. Underfloor batts often sit around R1.5 to R2.5.
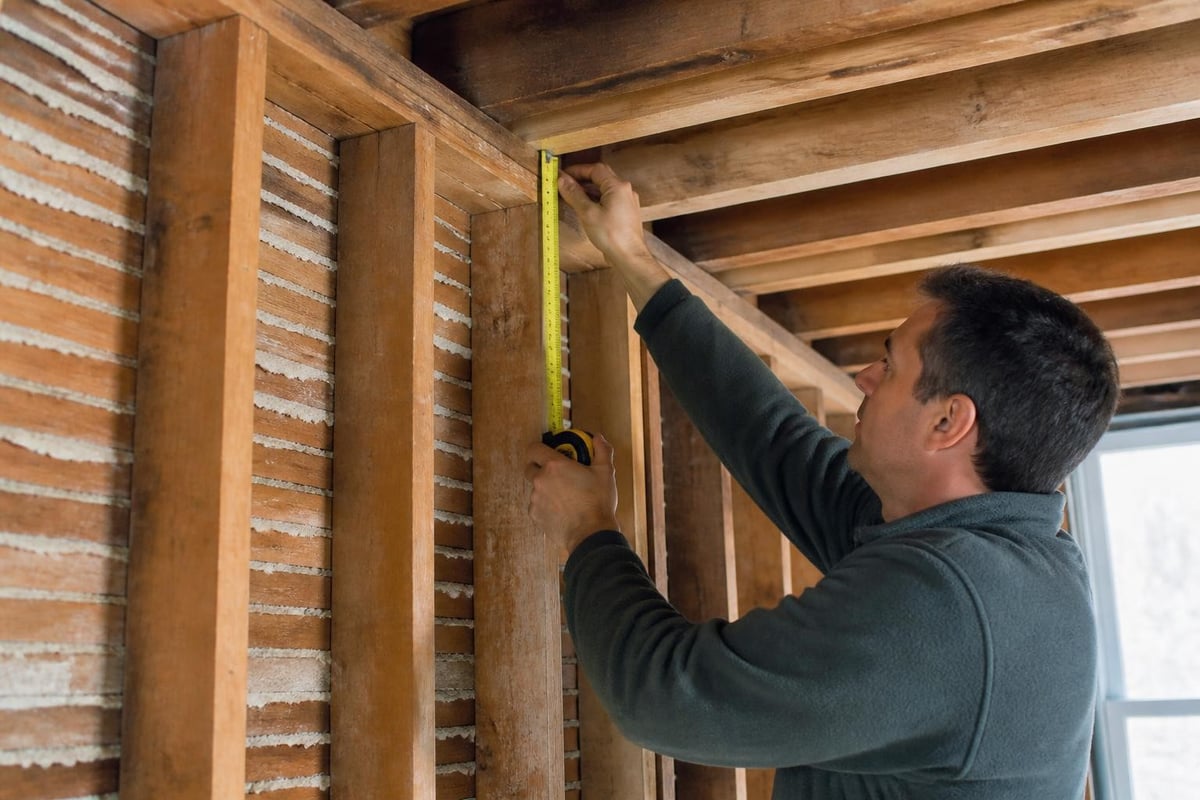
Before starting any insulation batts installation, measure your cavity depth and stud spacing carefully. Australian homes typically use 90mm or 70mm wall studs and 90mm floor joists, but this can vary. Ceiling joists are often 190mm to 240mm deep, allowing for higher R-value products.
Selecting the Right Batt Material
Glasswool and polyester are the two main batt materials available in Australia. Glasswool batts, such as those made with ECOSE® Technology, are soft to handle, low in dust, and offer excellent thermal and acoustic performance. Polyester batts are non-itch, hypoallergenic, and ideal for people with sensitive skin.
Both materials perform well when installed correctly, but installation technique matters more than material choice. Gaps, compression, and poor fitting reduce R-value and let air bypass the insulation, cutting efficiency by up to 50%. The Building Science Corporation highlights how gaps and voids drastically undermine batt performance.
Tools and Safety Gear You'll Need
Proper preparation makes insulation batts installation faster, safer, and more effective. Gather your tools and safety equipment before you start.
Essential tools:
- Long straightedge or insulation ruler
- Sharp utility knife with spare blades
- Tape measure (at least 5m)
- Staple gun (for faced batts)
- Work light or headlamp for dark roof spaces
- Stepladder or scaffold
- Dust mask or respirator (P2 rated)
- Safety glasses
- Long-sleeved shirt and long pants
- Gloves (optional for glasswool, recommended for roof spaces)
| Tool | Purpose | Why It Matters |
|---|---|---|
| Utility knife | Cutting batts to size | Clean cuts prevent compression and gaps |
| Straightedge | Guiding cuts | Ensures straight, accurate sizing |
| Staple gun | Securing faced batts | Holds vapor barriers and facings in place |
| P2 dust mask | Breathing protection | Prevents dust inhalation in confined spaces |
| Work light | Visibility | Essential for ceiling and underfloor work |
Even modern low-dust glasswool products produce some airborne particles during cutting and handling. Wear a P2-rated dust mask at minimum, and ensure good ventilation in the work area. Roof spaces in summer can exceed 50°C, so plan ceiling work for early morning or late afternoon, and take regular breaks.
If you're working in a ceiling cavity, walk only on joists or install temporary boards across them. Stepping between joists can break through plaster ceilings and cause injury. Natural Resources Canada's wall insulation guide emphasises safe access and movement during installation.
Preparing the Work Area
Before installing any batts, inspect cavities for moisture, pests, or electrical hazards. Repair leaks, remove old damaged insulation, and ensure wiring is secure and safe to work around.
Pre-installation checklist:
- Check ceiling, wall, or floor cavities for water stains or mould
- Seal any air leaks around windows, doors, and penetrations
- Inspect electrical cables and ensure they're clipped securely
- Remove debris, old insulation, or loose materials
- Install any required ventilation baffles or air gaps
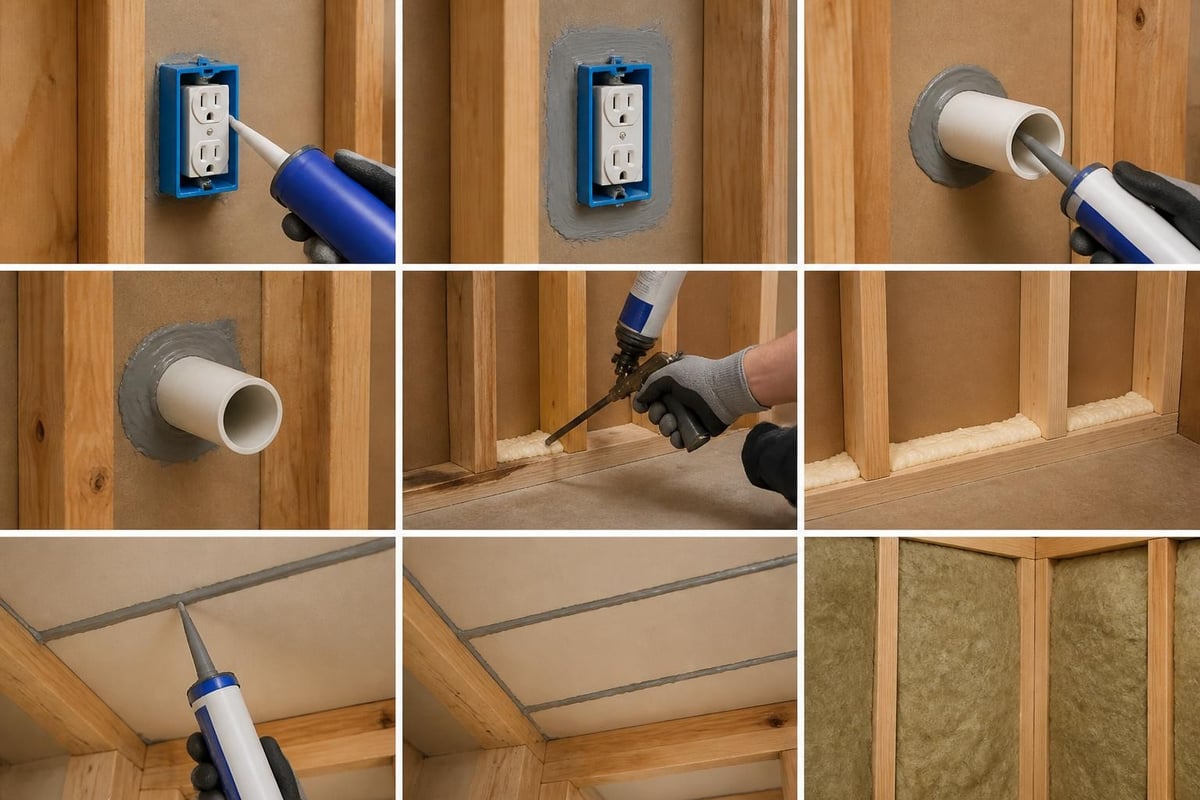
Air sealing before insulation batts installation is critical. Even the best insulation won't perform if air leaks past it. Seal gaps around pipes, cables, exhaust fans, and downlights with caulk, expanding foam, or appropriate fire-rated sealants. The U.S. Department of Energy's contractor guide underscores that air sealing and insulation work hand in hand.
For ceiling installations, ensure adequate roof ventilation. Insulation should not block eave vents or ridge ventilation. Use baffles or spacers to maintain airflow between the roof deck and insulation, preventing condensation and moisture build-up.
Step-by-Step Insulation Batts Installation Process
Correct installation technique ensures batts deliver their full R-value and last for decades. Follow these steps for walls, ceilings, and floors.
Installing Batts in Walls
Wall cavities are typically 90mm or 70mm deep with studs spaced at 450mm or 600mm centres. Most wall batts are sized to friction-fit between these spacings without cutting.
Wall installation steps:
- Measure cavity height from bottom plate to top plate
- Cut batts to length if needed, using a straightedge and sharp knife
- Push batt gently into cavity, starting at the top and working down
- Ensure full contact with the back of the cavity (usually external wall lining or brick)
- Trim around obstacles like electrical boxes, pipes, or bracing
- Split batts behind cables rather than compressing them in front
- Fill gaps at edges with offcuts, ensuring no voids
Never compress batts to fit them into undersized cavities. Compression reduces R-value because insulation works by trapping still air. If a batt is too thick, trim it down or choose a thinner product.
For faced batts with a vapor barrier, position the facing toward the heated (interior) side of the wall in Victoria's climate. Staple the facing to studs, overlapping joins by at least 50mm. Vapor retarder guidance from the Insulation Institute explains climate-specific facing orientation.
When working around electrical cables, slice the batt and tuck it behind the cable so the cable sits on the warm side. This prevents overheating and maintains full insulation thickness.
Installing Batts in Ceilings
Ceiling insulation batts installation requires careful handling in confined, often hot spaces. Batts sit between or over ceiling joists, depending on the system.
Ceiling installation steps:
- Start at the eaves and work toward the center or access hatch
- Lay batts perpendicular to joists, ensuring they butt tightly together
- Do not compress batts into ceiling joist depth; they should sit lightly on top of plasterboard
- Trim around downlights and exhaust fans, maintaining required clearances (typically 50mm to 200mm depending on fitting type)
- Overlap joins by at least 50mm to eliminate gaps
- Extend batts fully to the external wall line without blocking eave vents
For ceilings with recessed downlights, check whether they're IC-rated (insulation contact). Non-IC-rated lights require clearance around them, and special covers may be necessary. This is both a fire safety and insulation performance issue.
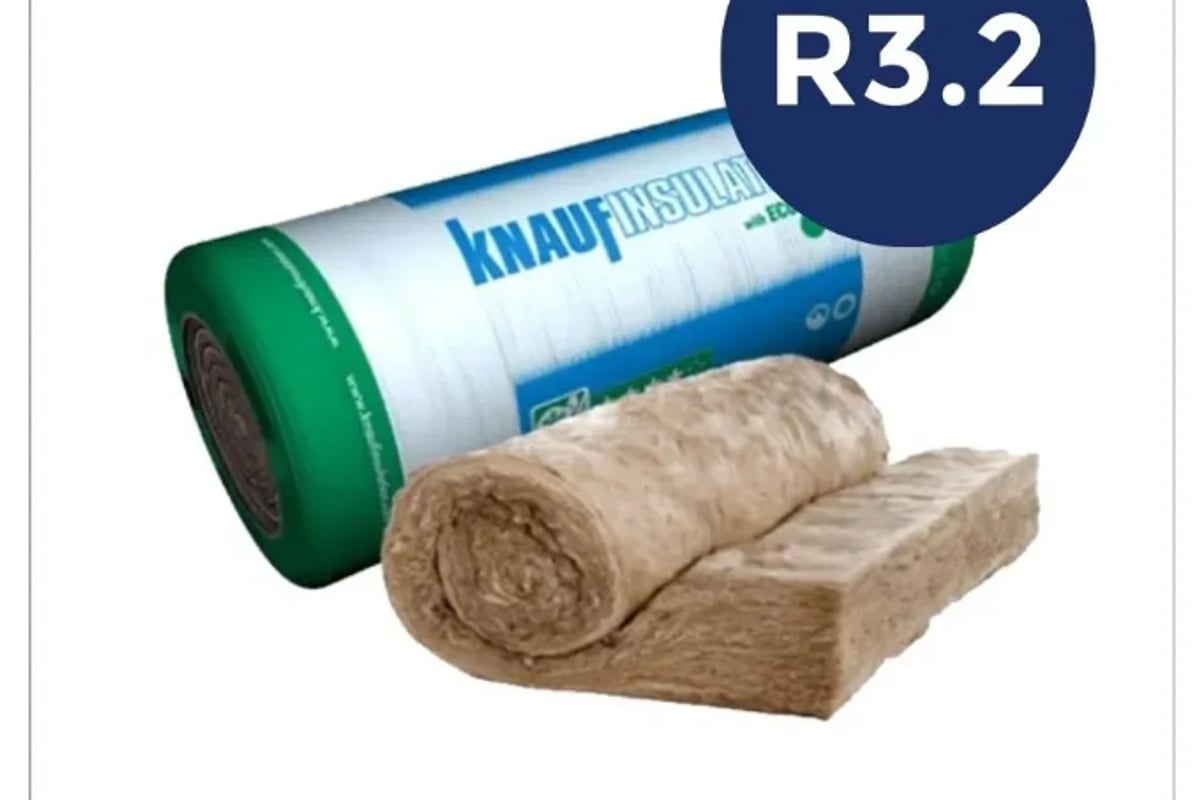
In larger ceiling spaces or when you need higher R-values, consider using R3.2 or R3.7 ceiling blankets that roll out continuously and minimize joins. The Earthwool Blanket Unfaced R3.2 130mmx1200mmx13.5m 16.2m² by Knauf delivers strong thermal performance and fast installation with fewer seams and gaps, making it a popular choice for Melbourne renovators.
Installing Batts in Underfloor Spaces
Underfloor insulation batts installation in suspended timber floors prevents cold air rising from below and improves comfort in winter. Batts are usually held in place with mesh, strapping, or support rods.
Underfloor installation steps:
- Access the underfloor space safely via hatch or external entry
- Measure joist spacing and cavity depth (commonly 90mm with 450mm or 600mm spacing)
- Cut batts to length to span from bearer to bearer or wall to wall
- Push batts up into cavity between floor joists, ensuring full contact with underside of floorboards
- Secure with wire mesh, plastic strapping, or galvanized support rods stapled or nailed to joists
- Ensure no gaps at edges or around pipes and services
Underfloor batts must remain in full contact with the floor above. Sagging or falling insulation creates air gaps and loses R-value. PNNL's Building America Solution Center explains correct fitting and securing techniques that prevent common voids.
Common Mistakes and How to Avoid Them
Even experienced DIYers can make insulation batts installation errors that reduce performance. Here's what to watch for.
| Mistake | Impact | Solution |
|---|---|---|
| Compressing batts | Reduces R-value by up to 50% | Use correct thickness; never force batts into tight spaces |
| Gaps and voids | Allows air leakage and convection loops | Trim offcuts to fill all gaps; butt joins tightly |
| Facing wrong direction | Moisture control failure | Face vapor barriers toward heated side (interior in Victoria) |
| Blocking ventilation | Causes condensation and mould | Maintain eave vent clearance; use baffles where needed |
| Poor cutting technique | Uneven edges and gaps | Use sharp knife and straightedge; replace blades often |
One of the most common issues is leaving gaps around the edges of cavities. These "thermal bypasses" let warm or cool air escape, drastically cutting insulation performance. The North American Insulation Institute's installation guidance stresses that gaps smaller than 2% of cavity area can reduce effective R-value by over 30%.
Cutting and Fitting Around Obstacles
Pipes, cables, bracing, and fixtures interrupt clean cavity spaces. Proper trimming maintains insulation continuity.
How to fit batts around obstacles:
- Electrical cables: Slice batt horizontally and tuck cable behind so it sits between insulation and wall lining
- Pipes: Cut batt in half depth-wise and wrap both halves around pipe
- Electrical boxes: Trim batt neatly around box perimeter; fill gaps with offcuts
- Diagonal bracing: Slice batt and tuck it behind or in front, maintaining full thickness where possible
Never leave voids. Even small gaps let convection currents form, moving warm air past the insulation and reducing its effectiveness.
Inspecting Your Work and Achieving Grade 1 Installation
After completing insulation batts installation, inspect your work to ensure it meets best-practice standards. In Australia, insulation performance is verified through ratings and careful installation, similar to the RESNET grading used internationally.
Grade 1 installation criteria (adapted for Australian practice):
- Batts fill cavity completely with no gaps or voids
- Insulation is not compressed more than 10% of its thickness
- Insulation is in complete contact with the back of the cavity
- No gaps exist around electrical boxes, pipes, or other penetrations
- Facing (if present) is installed correctly and overlapped at joins
- Ventilation pathways remain clear
Walk through the space and visually check each cavity. Use a torch or work light to inspect dark areas. If you spot gaps, trim offcuts and fill them immediately.
The Whole Building Design Guide's residential enclosure resources provide detailed checklists for verifying insulation and air barrier continuity, ensuring long-term thermal performance.
Combining Insulation with Air Sealing and Vapor Control
Insulation works best as part of a complete building envelope system. Air barriers, vapor control, and insulation must all work together.
In Victoria's climate (temperate with cold winters), vapor barriers typically face inward to prevent warm, moist interior air from condensing inside wall or ceiling cavities. However, modern buildings often use breathable membranes or "smart" vapor retarders that adapt to conditions.
If you're installing unfaced batts, consider whether your wall or ceiling construction includes a separate vapor control layer. Plasterboard with painted surfaces provides some vapor resistance, but may not be sufficient in high-humidity areas like bathrooms or kitchens.
Layered building envelope checklist:
- External cladding and weatherproofing (bricks, weatherboards, cladding)
- Wall wrap or sarking (breathable, water-resistant membrane)
- Insulation batts filling cavity completely
- Vapor control layer (facing, membrane, or plasterboard with paint)
- Internal lining (plasterboard, timber lining)
For more on building wraps and sarking, see ISA's guide on build wrap and how it integrates with insulation systems.
Maintaining and Upgrading Your Insulation Over Time
Properly installed insulation batts last 50 years or more, but performance can decline if moisture, pests, or physical damage occur. Regular inspections help catch problems early.
Maintenance tips:
- Inspect ceiling insulation every 3-5 years for sagging, moisture stains, or pest damage
- Check underfloor insulation for sagging or detachment after heavy rain or flooding
- Look for compressed or displaced batts after roof or wall repairs
- Replace damaged batts promptly to maintain thermal performance
If you're adding insulation to an existing ceiling, you can layer new batts over old ones, provided the existing insulation is in good condition. This is common when upgrading from R2.5 to R4.0 or higher. Always maintain ventilation clearances and avoid compressing the lower layer.
When to Call a Professional
While insulation batts installation is well within the reach of confident DIYers, some situations call for professional help:
- High or steep roofs where safe access is difficult
- Complex roof structures with multiple levels, valleys, or penetrations
- Asbestos present in walls, ceilings, or old insulation (never disturb asbestos yourself)
- Large commercial or multi-story projects requiring scaffolding and specialized equipment
- Uncertainty about building codes, R-value requirements, or vapor barrier placement
Licensed insulation installers bring experience, speed, and insurance, and can often source materials at competitive rates. However, for straightforward residential projects like a single-story ceiling, standard walls, or underfloor spaces, DIY installation is achievable with the right preparation and attention to detail.
Tips for Different Insulation Applications
Different parts of the building require slightly different techniques. Here's a quick breakdown.
Ceiling Batts
- Work early morning or late afternoon to avoid extreme heat
- Start from eaves and work inward to avoid trapping yourself
- Maintain 50mm to 200mm clearance around downlights (check manufacturer specs)
- Don't block eave vents; use baffles if needed
Wall Batts
- Fit batts from top to bottom, ensuring full contact with back of cavity
- Split batts behind cables; never compress in front
- Trim around electrical boxes and fill gaps with offcuts
- Secure faced batts with staples on studs, overlapping joins
Underfloor Batts
- Support with mesh, strapping, or wire rods to prevent sagging
- Ensure full contact with underside of floorboards
- Seal gaps around pipes and penetrations
- Check subfloor ventilation remains adequate
| Application | Typical R-Value | Batt Thickness | Common Challenges |
|---|---|---|---|
| Ceiling | R4.0 to R6.0 | 190mm to 240mm | Heat, confined space, downlights |
| Walls | R1.5 to R2.5 | 70mm to 90mm | Electrical cables, bracing |
| Underfloor | R1.5 to R2.5 | 90mm | Access, support, moisture |
Choosing the right R-value for your application is key. Victoria's climate and building codes guide minimum requirements, but higher R-values deliver better comfort and energy savings.
Maximising Comfort and Energy Savings
Insulation batts installation is one of the most cost-effective ways to improve your home's energy efficiency and comfort. Proper installation delivers year-round benefits: cooler in summer, warmer in winter, and lower heating and cooling bills.
Beyond thermal performance, insulation also reduces noise transfer between rooms and from outside, creating a quieter, more peaceful living environment. Acoustic insulation batts are specifically designed for sound control and are ideal for media rooms, bedrooms, and walls between living spaces.
The investment in quality insulation and careful installation pays back through reduced energy bills, improved comfort, and increased property value. Studies show well-insulated homes can reduce heating and cooling costs by 40% to 50% compared to poorly insulated homes.
Proper insulation batts installation is a straightforward, high-impact project that improves comfort, cuts energy costs, and adds value to your home. With the right preparation, tools, and technique, DIY renovators and owner-builders across Victoria can achieve professional results. Whether you're insulating a ceiling, walls, or underfloor space, Insulation Supplies Australia offers a wide range of quality batts, expert advice, and fast delivery to help you choose the right products and complete your project with confidence.