

Build wrap is one of those essential building materials that most homeowners never see once construction is finished, yet it plays a crucial role in protecting your home from moisture damage, improving energy efficiency, and extending the life of your walls. Whether you're planning a new build, tackling a major renovation, or just trying to understand what went into your existing home, knowing how build wrap works and why it matters can save you thousands of dollars in repairs down the track.
What Is Build Wrap and Why Does Your Home Need It
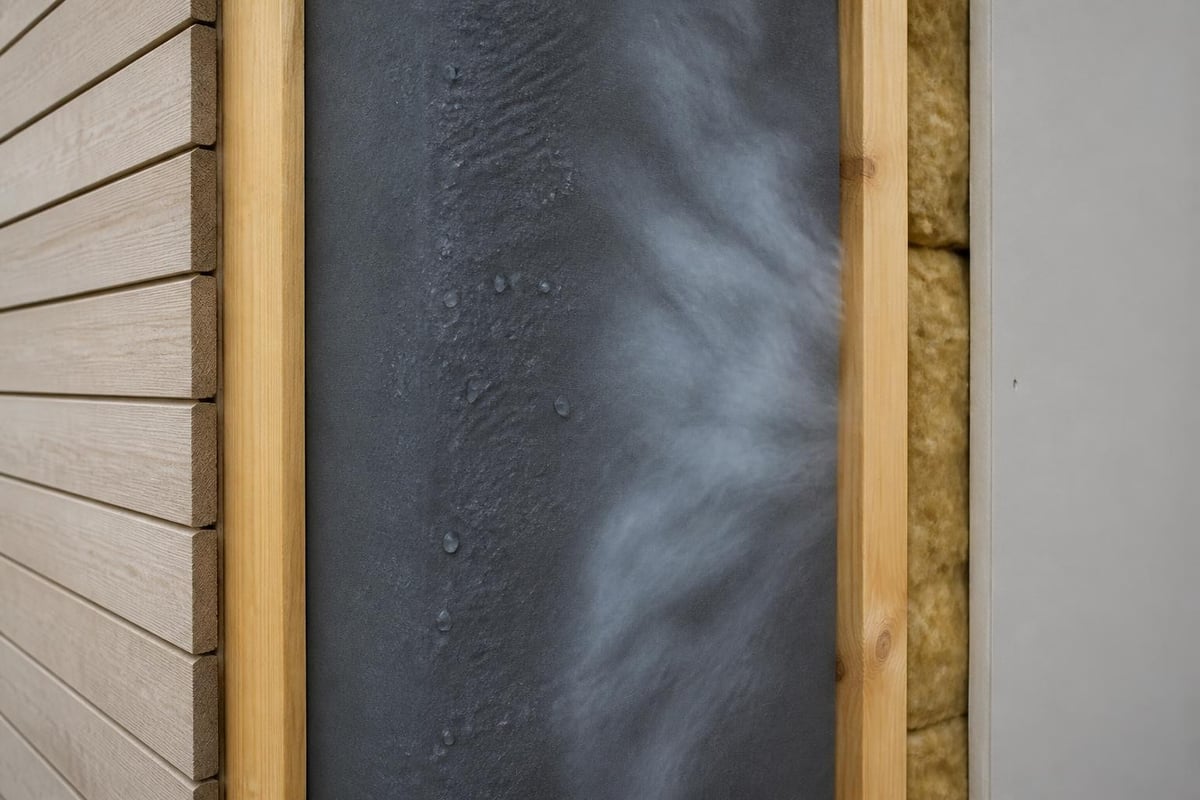
Build wrap is a specialised membrane installed on the exterior side of your wall frame, beneath the cladding. Its primary job is to act as a water-resistive barrier (WRB) that stops wind-driven rain from penetrating your wall cavity while allowing water vapour to escape from inside the wall system.
Think of it as a one-way valve for moisture. Rain and external water can't get in, but any moisture that does find its way into the wall cavity (from inside the home or construction moisture) can escape outward as vapour. This breathability is what separates modern build wrap from old-fashioned plastic sheeting.
Key Functions of Build Wrap
Build wrap delivers several critical functions in your wall assembly:
- Moisture protection: Stops bulk water from wind-driven rain entering the wall cavity
- Wind barrier: Reduces air infiltration and drafts, improving energy efficiency
- Drainage plane: Creates a path for any water that does get behind the cladding to drain safely away
- Vapour permeability: Allows moisture vapour to escape, preventing condensation and mould growth inside walls
Without proper build wrap installation, your walls are vulnerable to water damage, rot, mould growth, and thermal performance loss. The drainage plane principles outlined by building science experts show how critical this layer is to long-term building durability.
Types of Build Wrap Available in Australia
Not all build wrap products are created equal. The Australian market offers several categories, each suited to different applications and climate conditions.
| Build Wrap Type | Permeability | Best Application | Key Features |
|---|---|---|---|
| Permeable (breathable) | High vapour transmission | Most residential walls | Allows moisture escape, prevents condensation |
| Low-permeability | Limited vapour transmission | Specific climate zones | Added water resistance, slower drying |
| Self-adhered | Variable | High-wind areas, complex details | Sticks directly to substrate, excellent seal |
| Mechanically attached | Variable | Standard timber frame | Stapled or nailed, most common installation |
Permeable Build Wrap
Permeable build wrap is the most common choice for Victorian homes and the standard specified in the National Construction Code (NCC) for most climate zones. These products have a high moisture vapour transmission rate, typically measured according to Australian Standards.
The Drystud Wall Wrap Permeable is a great example of this category, designed specifically to protect wall cavities from wind and moisture while allowing water vapour to escape. When you're working with timber frames and standard insulation batts, permeable build wrap gives your walls the best chance to dry out if they ever get wet during construction or from a minor leak.
Understanding Vapour Permeability Ratings
Vapour permeability is measured in perms or metric perms. Higher numbers mean more vapour can pass through. For Victorian climate conditions, you generally want build wrap with good permeability (typically above 10 metric perms) to ensure walls can dry to the outside.
The ASTM guidance on water-vapour transmission properties provides standardised testing methods that manufacturers use to rate their products. When comparing build wrap options, check the technical specifications for vapour permeability ratings.
How to Choose the Right Build Wrap for Your Project
Selecting build wrap isn't complicated once you understand your specific needs. Start with these key considerations.
Climate and exposure: Melbourne's weather can throw everything at your walls-driving rain from winter storms, hot dry summers, and everything in between. Choose build wrap rated for high UV exposure if it will be left exposed for extended periods during construction.
Wall assembly type: Timber frame walls with cavity insulation have different requirements than masonry veneer or steel frame construction. Your build wrap needs to work with your entire wall system, not just sit on the surface.
Cladding choice: Brick veneer, weatherboard, fibre cement-each cladding type affects how water drains behind the facade. Some claddings need larger drainage gaps, which influences your flashing and build wrap installation details.
Installation Timing and Protection
Build wrap performance depends heavily on proper installation. Here's what affects your choice:
- Construction timeline: Will the wrap be exposed to weather for weeks or months before cladding goes on?
- Site conditions: Coastal exposure, bushfire risk, or extreme wind zones need tougher specifications
- Builder experience: Some products are more forgiving during installation than others
- Budget constraints: Premium build wraps cost more upfront but may save money on labour and callbacks
The Building America Solution Center guidance on wall flashing shows how build wrap integrates with other water management components-it's not a standalone solution.
Installing Build Wrap: Getting It Right the First Time
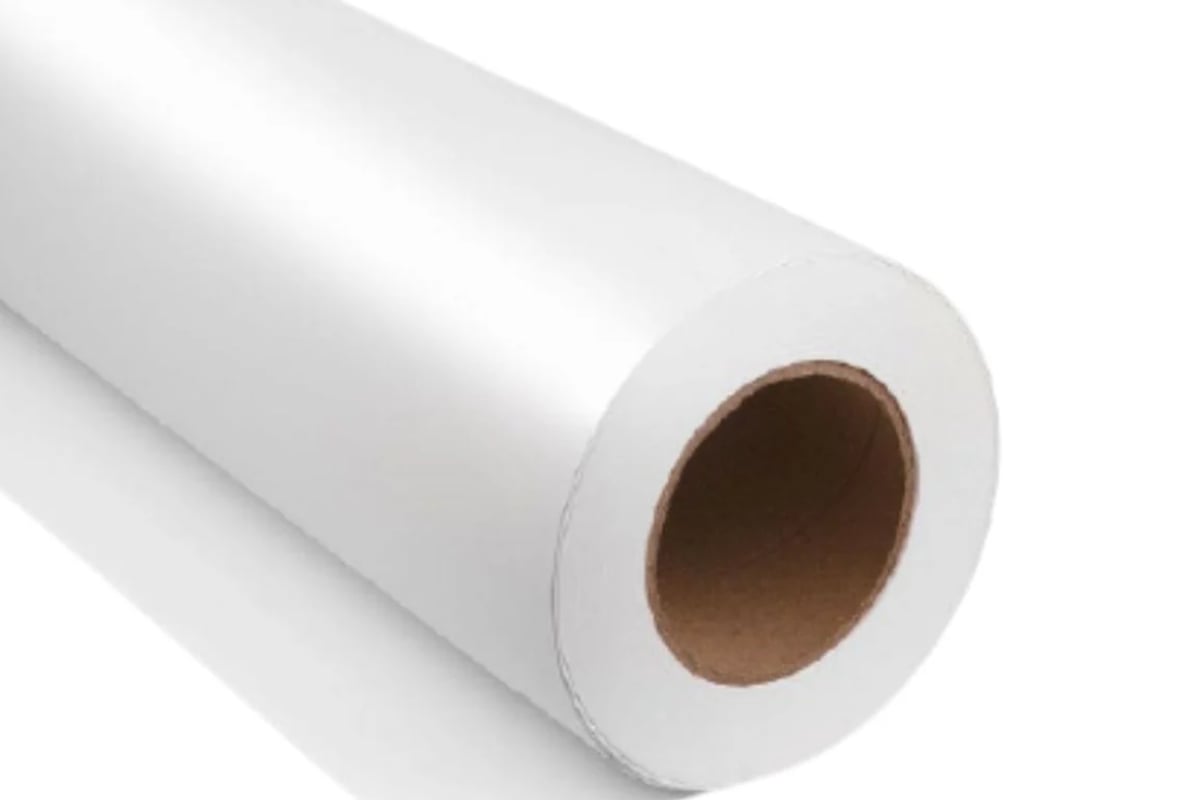
Proper installation makes the difference between build wrap that protects your home for decades and build wrap that fails within years. Even the best product won't perform if it's installed incorrectly.
Essential Installation Steps
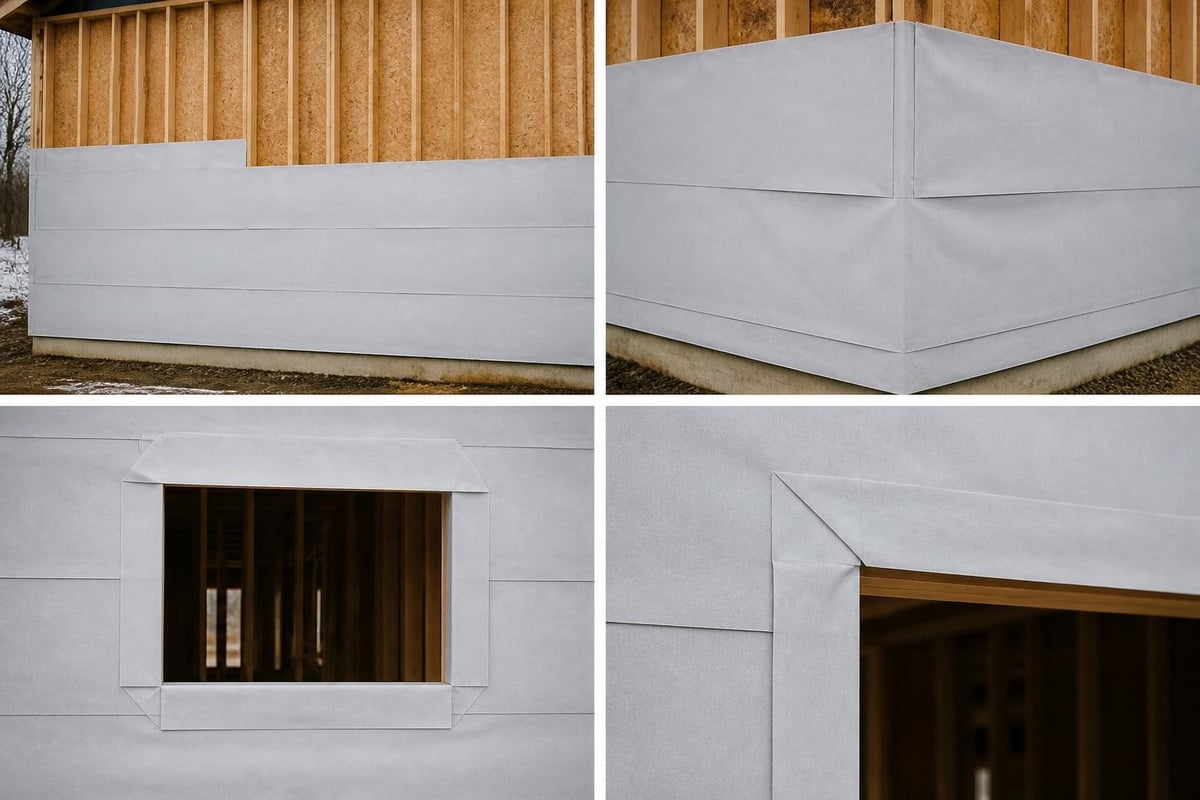
Start at the bottom: Always begin installation at the lowest point of the wall and work upward. This creates a shingle effect where upper courses overlap lower ones, directing water down and out.
Overlap generously: Horizontal overlaps should be at least 150mm, vertical overlaps at least 100mm. More is better, especially in high-wind or high-rainfall areas. Check your specific product's installation guide for minimum requirements.
Seal all penetrations: Every window, door, pipe, vent, or service that penetrates the wall needs proper flashing and sealing where it meets the build wrap. This is where most water entry problems occur.
Maintain the drainage cavity: The gap between build wrap and cladding is crucial. Use cavity battens or ensure your cladding system maintains at least a 10mm gap for drainage and ventilation.
Common Installation Mistakes to Avoid
- Installing build wrap backwards (some products have specific inside/outside faces)
- Leaving gaps or tears unsealed
- Wrapping build wrap around window and door frames instead of proper flashing integration
- Over-stapling or tearing the material with fasteners
- Leaving the wrap exposed to UV for too long without cladding protection
The DOE guidance on housewrap as a continuous air barrier emphasises the importance of continuity-every gap, tear, or missed overlap creates a potential entry point for water and air.
Build Wrap Integration with Insulation Systems
Build wrap doesn't work in isolation. It's part of a complete wall system that includes framing, insulation, internal lining, and external cladding. Understanding how these layers work together helps you make better decisions.
The Complete Wall Assembly
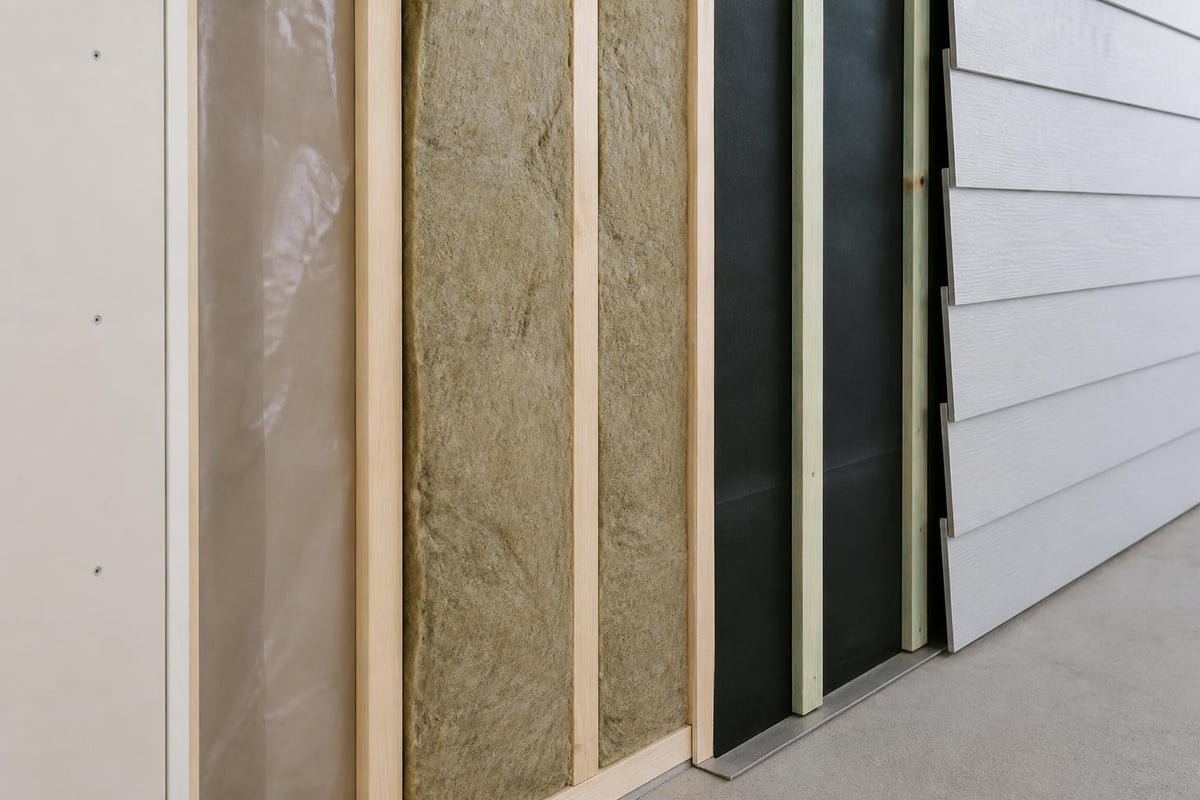
Here's how a typical insulated timber frame wall goes together from inside to outside:
- Internal lining (plasterboard)
- Vapour control layer (if required by NCC for your climate zone)
- Insulation batts between studs
- Timber frame (90mm or 70mm studs)
- Build wrap (the focus of this article)
- Drainage cavity (battens or cavity system)
- External cladding
Each layer has a job. The insulation provides thermal resistance, reducing heat flow. Products like the Earthwool range fit snugly between studs, filling the cavity. Build wrap then protects that insulation from getting wet, which would dramatically reduce its effectiveness.
Why Dry Insulation Matters
Wet insulation loses much of its R-value. Glasswool or polyester batts rely on trapping air to slow heat transfer. When moisture fills those air spaces, thermal performance drops significantly-sometimes by 50% or more for saturated material.
Build wrap prevents bulk water from reaching your insulation during rain events. Just as importantly, its vapour permeability allows any construction moisture or minor leaks to dry out rather than accumulating in the wall cavity. This keeps your insulation performing as designed year after year.
Building Code Requirements for Build Wrap in Victoria
The National Construction Code (NCC) and Australian Standards set minimum requirements for build wrap installation in new construction and major renovations. Understanding these requirements helps ensure your project meets compliance and performs properly.
NCC Compliance Essentials
Build wrap installation must comply with NCC Section J (energy efficiency) and Section B (structure and moisture management). For Victorian climate zones, this typically means:
- Water resistance: Build wrap must prevent water penetration under test conditions
- Vapour permeability: Must allow vapour transmission appropriate for climate zone
- Durability: Must maintain performance for the design life of the building
- Installation standards: Must be installed according to manufacturer specifications and good building practice
The WBDG guidance on WRB and rainscreen principles provides detailed technical requirements used in high-performance building envelope design, many of which align with Australian best practices.
Local Council Variations
Some Victorian councils have additional requirements, particularly in bushfire-prone areas or coastal zones. Always check with your local building surveyor about specific requirements for your location and project type.
Troubleshooting Build Wrap Problems and Solutions
Even with careful installation, issues can arise. Recognising problems early and knowing how to address them saves time and money.
Visual Inspection Checklist
Before cladding goes on, do a thorough walk-around inspection:
- Tears and holes: Mark and repair with approved tape or patches
- Loose areas: Re-staple or fasten as needed, ensuring proper tension
- Missing overlaps: Add additional strips to achieve minimum overlap requirements
- Penetration sealing: Check every window, door, and service penetration for proper flashing
- Bottom edge protection: Ensure the lowest edge has proper flashing to direct water away from the slab
Water Staining After Installation
If you notice water staining on framing timber after build wrap installation, it doesn't necessarily mean the wrap has failed. During construction, some water entry is almost inevitable. The key question is whether the wall system can dry out.
Normal: Light surface staining that dries within days of dry weather
Concerning: Deep penetration, persistent wetness, or water pooling at the base of walls
If you find persistent moisture issues, check for installation defects, damaged wrap, or inadequate flashing details. The AWCI resource on water-resistive and air barriers covers common failure modes and remediation strategies.
Build Wrap Maintenance and Long-Term Performance
Once installed and covered with cladding, build wrap requires minimal maintenance. However, understanding its long-term performance characteristics helps with renovation planning and troubleshooting.
Expected Service Life
Quality build wrap products installed correctly should last the life of the building-typically 50+ years in Australian conditions. The membrane itself is UV-stabilised and resistant to degradation from moisture exposure.
Failure, when it occurs, usually results from:
- Physical damage during construction or renovation: Punctures from services, tears from rough handling
- Prolonged UV exposure: Leaving wrap uncovered for many months beyond manufacturer recommendations
- Improper installation: Inadequate overlaps, missing fasteners, or poor integration with flashings
- Building movement: Differential movement in the structure causing tears at stress points
When to Consider Build Wrap Replacement
If you're renovating an older home (pre-1990s), it may not have modern build wrap at all. Older homes often used kraft paper, tar paper, or nothing beyond the cladding itself. When undertaking major exterior renovations-replacing cladding, adding insulation, or addressing moisture problems-it's worth installing proper build wrap even if it wasn't there originally.
Signs that existing build wrap needs replacement include visible deterioration, extensive tearing, or evidence of persistent moisture problems inside wall cavities. During re-cladding projects, upgrading to modern permeable build wrap significantly improves wall performance and durability.
Build Wrap vs Other Moisture Barriers: Understanding the Differences
Confusion often arises between build wrap, sarking, vapour barriers, and other membrane products. Each serves different purposes in building construction.
| Product Type | Primary Function | Position in Wall | Permeability | Typical Application |
|---|---|---|---|---|
| Build wrap | Water-resistive barrier | Outside of frame | High | Under cladding, outside of insulation |
| Sarking (reflective) | Thermal + condensation barrier | Under roof | Variable | Roof cavity, sometimes walls |
| Vapour barrier | Stops vapour transmission | Inside of frame | Very low | Cold climates, specific applications |
| Underfloor wrap | Moisture + draught barrier | Under suspended floors | Variable | Underfloor insulation systems |
Why Build Wrap Isn't a Vapour Barrier
This distinction matters. Vapour barriers (also called vapour retarders) are designed to stop moisture vapour from moving through them. They have very low permeability ratings-typically less than 1 metric perm.
Build wrap does the opposite on the vapour question. While it stops liquid water, it needs to be vapour-permeable (high perm rating) to allow walls to dry outward. Installing a vapour barrier where you need build wrap, or vice versa, can create serious moisture problems.
For most Victorian homes, you need permeable build wrap on the outside of the frame and either no vapour control or a "smart" vapour retarder on the inside, depending on your specific climate zone and wall assembly. The Construction Specifier article on specifying building wrap discusses these material selection considerations in detail.
Cost Considerations and Value for Money
Build wrap represents a relatively small percentage of total building costs but delivers outsized value in protecting your investment. Understanding cost factors helps you budget appropriately and make informed choices.
Typical Pricing Factors
Build wrap costs vary based on several factors:
- Product quality and brand: Premium products with superior UV resistance, tear strength, or warranty coverage cost more
- Roll size and coverage: Larger rolls typically offer better per-square-metre pricing
- Special features: Self-adhering products, printed guidelines for overlap, or enhanced drainage features increase cost
- Market availability: Standard permeable wraps are competitively priced; specialty products may have longer lead times and higher costs
For a typical single-storey home (150-200m² of wall area), expect to budget $800-1500 for build wrap material alone. Installation labour typically adds another $800-1200, depending on wall complexity and local labour rates.
Return on Investment
The value of build wrap becomes clear when you consider the alternative. Water damage from failed moisture management can cost tens of thousands to remediate:
- Replacing rotted timber framing: $5,000-15,000+ per affected wall
- Mould remediation: $2,000-8,000+ depending on extent
- Replacing damaged insulation: $1,500-4,000 for a typical home
- Re-cladding after structural repairs: $10,000-30,000+
Spending $1,500-2,500 on quality build wrap and proper installation is excellent value insurance against these potential costs.
DIY Installation vs Professional Installation
For confident DIY renovators and owner-builders, installing build wrap is within reach. It doesn't require specialised tools or trade certification. However, understanding when to DIY and when to call professionals saves frustration and ensures proper performance.
When DIY Makes Sense
Consider DIY build wrap installation if:
- You're comfortable working at heights and on scaffolding
- The wall design is straightforward (rectangular walls, minimal windows)
- You have time to research and follow manufacturer specifications carefully
- You're detail-oriented and patient with cutting, fitting, and sealing
- You can work with a helper (build wrap installation is difficult alone)
When to Hire Professionals
Professional installation is worth the investment for:
- Complex wall designs with numerous penetrations, angles, or features
- Multi-storey construction requiring extensive scaffolding
- Projects where building insurance or warranty requires trade certification
- Tight timelines where professional speed and efficiency matter
- Situations where proper flashing integration requires specialised knowledge
Many experienced builders recommend DIY for the main wall runs and professional help for complex details like window and door flashings, where mistakes are most costly.
Build wrap is a small investment that delivers enormous protection for your home's structure and insulation systems. Getting it right means choosing the appropriate product for your climate and wall assembly, installing it according to manufacturer specifications and building codes, and ensuring proper integration with flashings and drainage details. Whether you're building new, renovating, or simply maintaining your property, Insulation Supplies Australia helps Victorian homeowners, renovators, and builders find quality building materials with expert advice and fast delivery across Melbourne and regional Victoria.