

Noise from neighbouring rooms, traffic, or upstairs footfalls can turn a comfortable home into a stressful environment. Sound insulation batts offer a practical, affordable solution for homeowners, renovators, and builders looking to create quieter, more peaceful living spaces. These specialised insulation products work by absorbing sound energy and blocking its transmission through walls, floors, and ceilings. Whether you're renovating a terrace in Fitzroy, building a new home in Geelong, or improving an older property in Ballarat, understanding how sound insulation batts work and where to use them will help you make smarter decisions and achieve better results.
What Are Sound Insulation Batts and How Do They Work
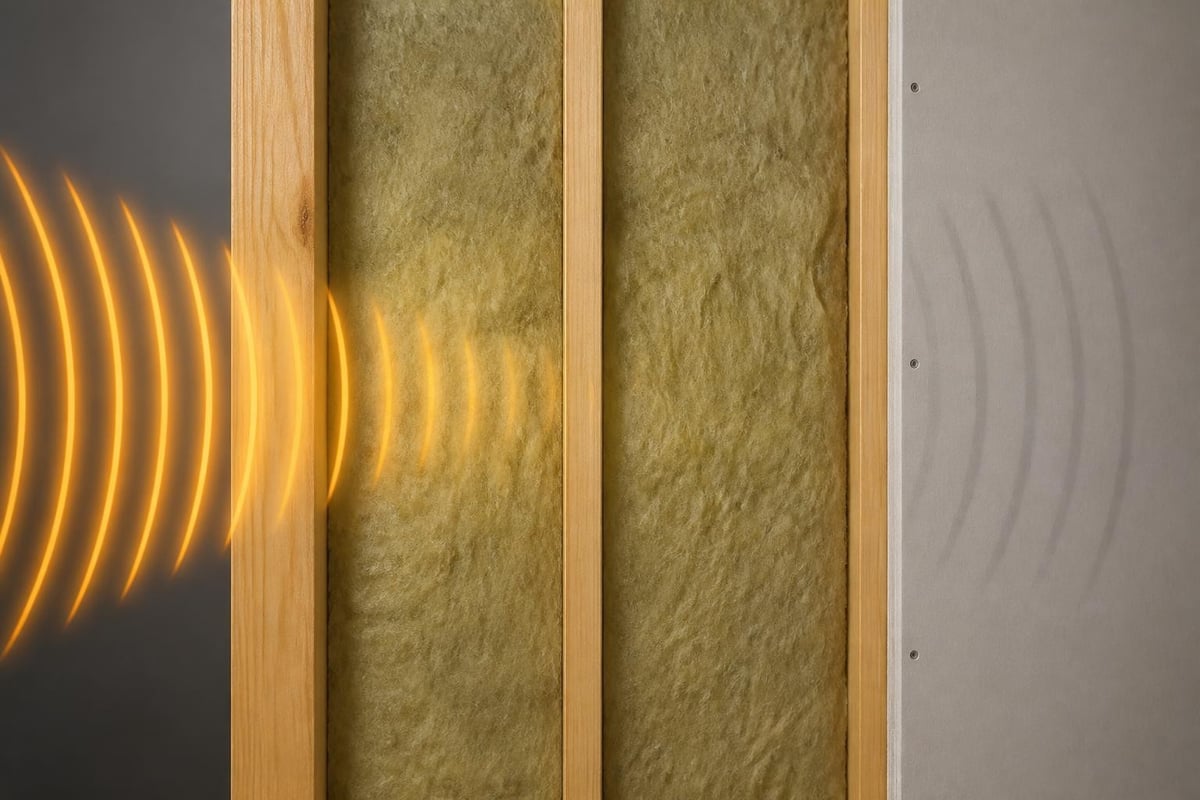
Sound insulation batts are purpose-designed fibrous insulation materials that reduce noise transfer between spaces. Unlike thermal insulation, which primarily slows heat movement, acoustic batts are engineered to absorb sound waves and dampen vibrations as they pass through building structures.
Most sound insulation batts are made from glasswool or rockwool fibres with higher density than standard thermal products. This increased mass and fibre structure helps trap sound energy within the batt, converting it into tiny amounts of heat through friction. The thicker and denser the batt, the more effectively it absorbs sound across a wider range of frequencies.
The Science Behind Acoustic Performance
When sound waves hit a wall or ceiling, they cause the structure to vibrate. These vibrations travel through studs, joists, and plasterboard, radiating noise into adjacent rooms. Sound insulation batts work by:
- Absorbing sound energy within the cavity space before it can resonate through the structure
- Adding mass to wall and ceiling assemblies, making them harder to vibrate
- Damping vibrations within the framing, reducing sound transmission paths
- Improving overall assembly performance when combined with proper detailing and resilient mounting
The effectiveness of sound insulation batts is measured using standardised laboratory tests. In Australia, the ASTM E90 test method determines Sound Transmission Class (STC) ratings for complete wall and floor assemblies, while the ASTM C423 reverberation-room method measures how much sound energy a material absorbs, expressed as the Noise Reduction Coefficient (NRC).
Key Performance Metrics for Sound Insulation Batts
Understanding acoustic ratings helps you choose the right product for your project. Unlike R-values for thermal performance, sound insulation uses different metrics that tell you how well a product blocks or absorbs noise.
Sound Transmission Class (STC)
STC measures how much sound a complete wall or floor assembly blocks. Higher numbers mean better performance:
| STC Rating | Performance Level | Typical Application |
|---|---|---|
| 25-30 | Poor | Normal conversation clearly heard |
| 30-35 | Fair | Loud speech audible, normal speech faint |
| 35-40 | Good | Loud speech heard as murmur |
| 40-45 | Very Good | Loud speech barely audible |
| 45-50 | Excellent | Loud speech not heard |
| 50+ | Superior | High privacy, studio-grade |
For most Victorian homes, targeting STC 40-45 for bedroom walls and STC 45-50 for party walls in duplexes or townhouses provides comfortable noise control.
Noise Reduction Coefficient (NRC)
NRC measures how much sound a material absorbs, on a scale from 0 (reflects all sound) to 1 (absorbs all sound). Sound insulation batts typically achieve NRC values between 0.70 and 1.00, meaning they absorb 70-100% of sound energy hitting them. The ASHRAE Handbook chapter on noise control provides detailed guidance on using these metrics in building design.
Density and Thickness Considerations
Higher density sound insulation batts (typically 18-26 kg/m³) outperform standard thermal batts (9-14 kg/m³) because the additional mass and fibre content absorb more sound energy. Thickness also matters: a 90mm acoustic batt will generally outperform a 60mm version of the same density, especially at lower frequencies where noise is hardest to control.
Where to Install Sound Insulation Batts in Your Home
Strategic placement of sound insulation batts maximises their effectiveness and delivers better value than trying to insulate every wall and ceiling.
Internal Walls Between Bedrooms and Living Areas
Internal wall cavities between bedrooms, bathrooms, and living spaces are prime locations. Sound travels easily through timber or steel-framed walls with standard plasterboard on each side. Adding sound insulation batts to these cavities significantly reduces noise transfer.
For timber-framed walls, install batts friction-fit between studs before hanging the second layer of plasterboard. The combination of mass (plasterboard), separation (cavity space), and absorption (batts) creates an effective sound barrier.
Ceilings Under Upper Floors
Footfall noise from upstairs rooms can be intrusive. Installing sound insulation batts between floor joists helps absorb impact sound before it radiates through the ceiling below. For best results, combine batts with resilient ceiling channels that decouple the plasterboard from the joists, breaking the direct vibration path.
Shared Walls in Townhouses and Duplexes
Party walls between attached dwellings require higher performance. Building regulations typically require these walls to achieve minimum STC ratings, and sound insulation batts are essential to meeting these standards. Consider double-stud or staggered-stud wall systems with batts in each cavity for superior isolation.
Home Theatres and Music Rooms
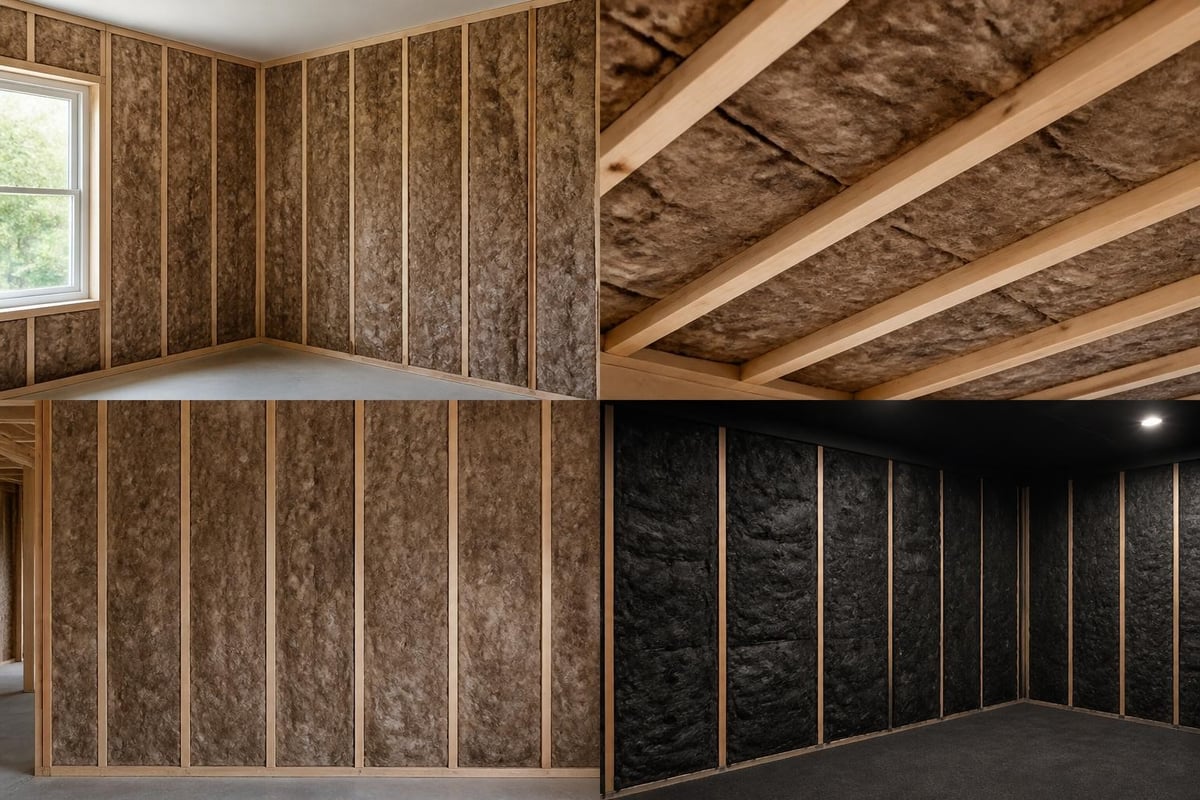
Dedicated entertainment spaces benefit from comprehensive acoustic treatment. Use high-density sound insulation batts in all walls and ceilings, combined with multiple layers of plasterboard and resilient mounting systems. This layered approach controls both airborne noise (dialogue, music) and low-frequency sound (bass, explosions).
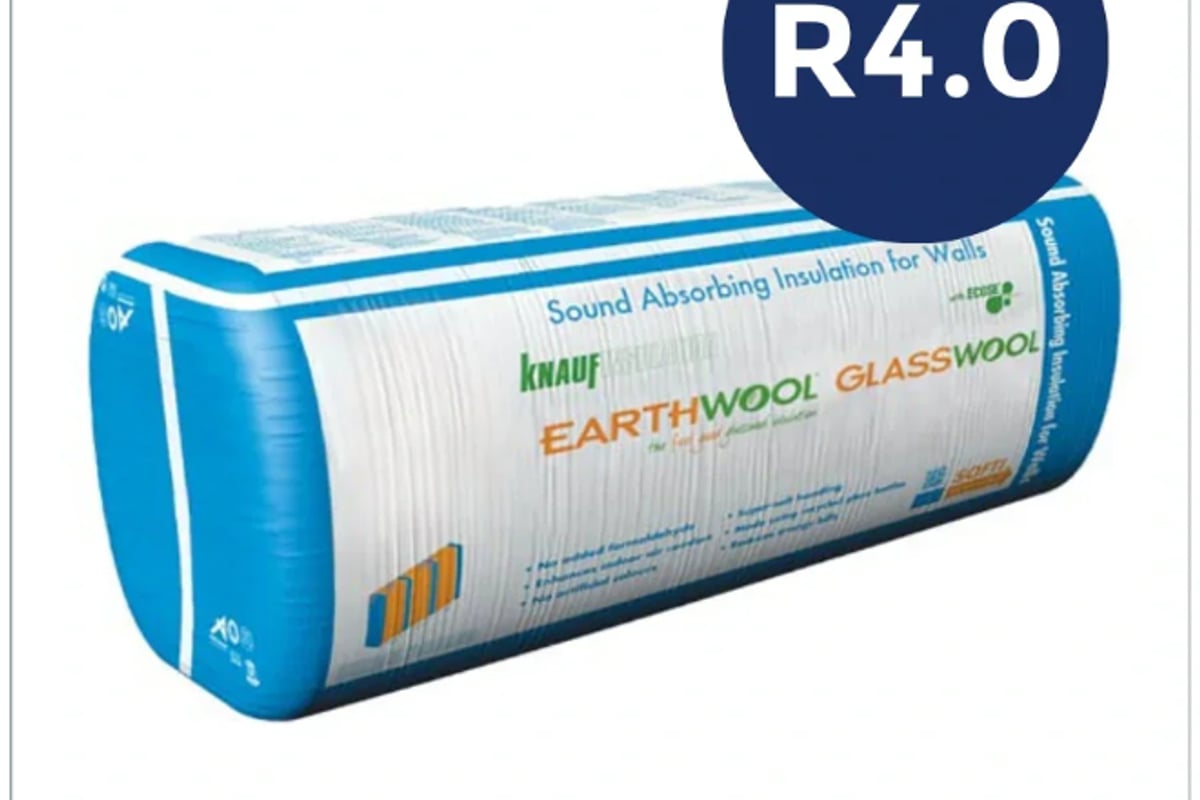
The Earthwool Sound Shield R4.0 is specifically engineered for applications requiring premium acoustic performance, with a density of 22.6 kg/m³ and 140mm thickness that excels at absorbing mid and low-frequency noise.
Choosing the Right Sound Insulation Batts for Your Project
Selecting appropriate batts depends on your specific noise problem, wall or ceiling construction, and budget. Not all acoustic products are equal, and matching the product to the application ensures you get value for money.
Match Batt Density to Noise Type
Different noise sources require different solutions:
- Airborne noise (voices, TV, music): Mid-density batts (18-22 kg/m³) work well
- Low-frequency noise (bass, traffic rumble): High-density batts (22-26 kg/m³) plus thick installations perform better
- Impact noise (footsteps, dropped objects): Batts combined with floating floors or resilient mounting systems
Consider Your Wall or Ceiling Construction
Framing type affects your batt choice:
| Construction Type | Recommended Batt Width | Installation Notes |
|---|---|---|
| 90mm timber studs (400mm centres) | 370-430mm | Friction-fit between studs |
| 90mm timber studs (600mm centres) | 580-600mm | Standard spacing, easy installation |
| 70mm steel studs (600mm centres) | 580-600mm | May need batts with foil facing |
| Double-stud or staggered-stud | Fill both cavities | Maximum performance, more expensive |
Always check actual stud spacing before ordering. Victorian homes built before 1980 may have non-standard framing spacing.
Balance Acoustic and Thermal Performance
Many sound insulation batts also provide thermal benefits. In Victoria's variable climate, choosing products that deliver both acoustic and thermal performance gives you year-round comfort. The acoustic insulation range at Insulation Supplies Australia includes options with R-values from R2.0 to R4.0, providing sound control plus energy efficiency.
Installation Ease and Safety
Modern sound insulation batts manufactured with ECOSE technology are softer to handle, generate less dust, and don't contain formaldehyde. This makes installation more pleasant and safer for DIY renovators. However, always wear gloves, long sleeves, and a dust mask when handling any fibrous insulation product. Recent respiratory health research confirms that proper PPE minimises any potential health risks during installation.
Installation Best Practices for Maximum Performance
Even premium sound insulation batts won't deliver their rated performance if poorly installed. Attention to detail during installation makes the difference between disappointing results and genuinely quiet rooms.
Prepare the Cavity Before Installing Batts
- Remove debris from stud spaces and ensure services (electrical, plumbing) are properly installed
- Check framing alignment and fix any bowed or twisted studs that will create gaps
- Identify and seal air gaps around penetrations, outlets, and switches before insulating
- Plan your installation sequence to minimise handling and compression of batts
Install Batts Correctly for Full Contact
Sound insulation batts must fill the entire cavity without gaps or compression:
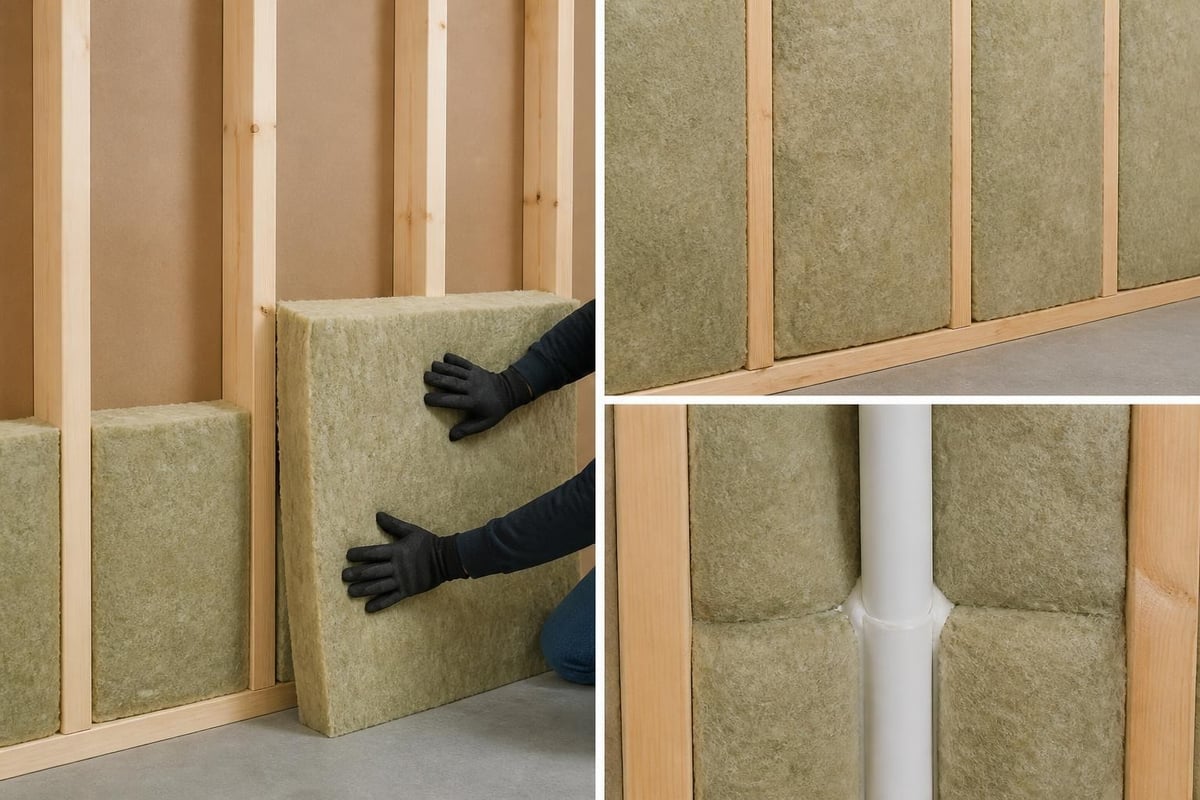
- Cut batts slightly oversize (5-10mm wider than the cavity) so they friction-fit snugly
- Push batts fully forward against the back plasterboard layer, ensuring complete contact
- Split batts around services rather than compressing them behind pipes or cables
- Fill narrow spaces at top and bottom plates using offcuts cut to fit
Gaps as small as 5mm around the perimeter of a batt can reduce the assembly's STC rating by several points. The NRC Canada soundPATHS documentation demonstrates how flanking paths and installation gaps significantly degrade real-world performance.
Don't Compress or Squash Batts
Compression reduces both acoustic and thermal performance. If you must run services through the cavity, split the batt and work around them, or consider running services in a separate service cavity rather than compressing acoustic batts.
Detail Around Penetrations and Services
Every electrical outlet, light switch, and cable penetration creates a potential sound leak. Use putty pads behind outlets, seal cable entries with acoustic sealant, and maintain batt coverage right up to penetrations. Small details matter enormously for acoustic performance.
Combine Batts with Proper Wall Construction
Sound insulation batts are just one component of an effective acoustic assembly. For best results:
- Use minimum 13mm plasterboard (16mm is better)
- Consider two layers of plasterboard with staggered joints
- Apply acoustic sealant where plasterboard meets framing
- Use resilient channels or resilient mounts to decouple linings from studs
- Ensure the wall assembly matches tested configurations shown in product literature
The UK Approved Document E provides excellent practical guidance on achieving tested STC values through proper detailing.
Common Mistakes That Reduce Acoustic Performance
Even experienced builders sometimes make errors that compromise sound insulation. Avoiding these common mistakes ensures your investment delivers the expected results.
Leaving Gaps and Voids
The single biggest mistake is incomplete cavity filling. Every gap, void, or compressed area creates a path for sound to travel. Sound finds the easiest route, so a wall with 95% excellent coverage and 5% gaps will perform far worse than expected.
Using Thermal Batts Instead of Acoustic Products
Standard thermal insulation batts provide some acoustic benefit, but purpose-designed sound insulation batts with higher density deliver significantly better performance. The density difference (often 50-100% higher) translates directly to better sound absorption and transmission loss.
Ignoring Flanking Paths
Sound doesn't only travel through walls directly. It also travels around edges (flanking) through floors, ceilings, adjacent walls, and service penetrations. The best sound insulation batts in the world won't stop noise travelling through gaps under doors, through ceiling plenums, or via ductwork.
Expecting Miracles from Batts Alone
Sound insulation batts are highly effective but not magic. They work as part of a complete acoustic assembly. Expecting batts alone to create studio-grade silence without addressing wall construction, doors, windows, and flanking paths leads to disappointment.
Skimping on Coverage to Save Money
Installing sound insulation batts only in some walls, or using thinner products than recommended, usually delivers disappointing results. Noise will find the uninsulated path. For bedrooms, treat all walls that separate sleeping areas from noise sources. For home theatres, treat all six surfaces (four walls, ceiling, and floor if possible).
Comparing Sound Insulation Batts with Other Acoustic Solutions
Sound insulation batts compete with and complement other noise-control products. Understanding how they compare helps you choose the right mix of solutions.
Batts vs. Rigid Foam Boards
Rigid foam insulation boards like expanded polystyrene (EPS) or extruded polystyrene (XPS) provide excellent thermal performance but limited acoustic benefit. They reflect sound rather than absorbing it, and their low mass doesn't add much transmission loss. Sound insulation batts are far superior for noise control, while foam boards excel at thermal and moisture resistance.
Batts vs. Dense Mass Products
Mass-loaded vinyl (MLV), cement-fibre sheets, and additional plasterboard layers add mass to block sound transmission. They work differently to batts: mass blocks sound, while batts absorb it. The best assemblies combine both: high-density sound insulation batts for absorption plus multiple plasterboard layers for mass.
Batts vs. Resilient Mounting Systems
Resilient channels and isolation clips decouple plasterboard from framing, breaking vibration transmission paths. They're highly effective for impact noise and low frequencies, and they work synergistically with sound insulation batts. Use both together for maximum performance.
| Solution Type | Strengths | Limitations | Best Application |
|---|---|---|---|
| Sound insulation batts | Excellent absorption, mid-high frequency control, easy installation | Limited impact noise control alone | All acoustic cavities |
| Mass-loaded vinyl | High mass, thin profile | Expensive, installation challenging | High-performance walls |
| Resilient channels | Excellent decoupling, impact noise control | Adds cost, reduces cavity depth | Ceilings under upper floors |
| Additional plasterboard | Adds mass cheaply | Increases weight, costs | All walls needing extra STC |
Understanding Frequency Response and Limitations
Sound insulation batts don't perform equally across all frequencies. Understanding their frequency response helps set realistic expectations and plan appropriate solutions.
High Frequency Performance
Sound insulation batts excel at absorbing high-frequency sounds like voices, birdsong, and mechanical noise. Their fibrous structure traps and dissipates these shorter wavelengths effectively. Most acoustic batts achieve NRC values above 0.90 at frequencies above 1000 Hz.
Mid-Range Frequency Performance
Speech intelligibility occurs primarily in the 250-4000 Hz range. Quality sound insulation batts provide strong absorption across this range, which is why they're so effective at reducing conversation noise and television sound.
Low Frequency Challenges
Bass frequencies (below 250 Hz) have longer wavelengths that are harder to absorb. Standard sound insulation batts provide less absorption at these frequencies. Recent acoustic research on mineral-based materials explores ways to improve low-frequency performance through structural modifications and increased thickness.
For better low-frequency control:
- Use thicker batts (130-140mm rather than 75-90mm)
- Increase batt density (22+ kg/m³)
- Combine with mass layers (multiple sheets of plasterboard)
- Add resilient mounting to decouple surfaces
Real-World vs. Laboratory Performance
Laboratory STC ratings represent ideal conditions: sealed assemblies, no flanking paths, expert installation. Real-world performance is typically 5-10 STC points lower due to installation imperfections, services, and flanking. Plan accordingly and don't expect perfection.
Regulations and Standards for Acoustic Insulation in Victoria
Victorian building projects must comply with the National Construction Code (NCC), which includes requirements for sound insulation in certain circumstances.
NCC Requirements for Attached Dwellings
The NCC requires party walls and party floors in Class 1a attached dwellings (townhouses, duplexes) to achieve minimum Rw+Ctr ratings (the Australian adaptation of STC). Current minimums are typically:
- Party walls: Rw+Ctr 50 (equivalent to roughly STC 50)
- Party floors: Rw+Ctr 45 for airborne sound, plus impact insulation class Ln,w ≤ 62
These requirements ensure reasonable acoustic privacy between attached homes. Meeting them usually requires high-density sound insulation batts plus proper wall construction with two layers of plasterboard and resilient mounting.
Requirements for Multi-Residential Buildings
Apartment buildings (Class 2 and 3) have similar or more stringent requirements depending on the state and building type. Wall and floor assemblies must be tested or follow deemed-to-satisfy construction methods detailed in NCC specifications.
No Mandatory Requirements for Detached Dwellings
Detached houses aren't subject to mandatory acoustic performance requirements, but installing sound insulation batts between bedrooms, bathrooms, and living areas is considered good practice and adds value to the home.
Always check current NCC requirements through the Australian Building Codes Board or consult with your building surveyor or certifier before starting construction.
Sound Insulation Batts for Renovations and Retrofits
Adding acoustic insulation to existing homes presents unique challenges but delivers worthwhile benefits.
Assessing Existing Wall and Ceiling Construction
Before buying insulation, determine what you're working with:
- Check cavity depth by removing an electrical outlet cover and measuring
- Identify framing material (timber vs. steel) and spacing
- Look for existing insulation that might need removal or supplementing
- Assess access (can you remove one plasterboard layer, or must you work through small openings?)
Full Renovation: Removing One Plasterboard Layer
If you're gutting rooms or happy to remove and replace one side of plasterboard, installation is straightforward. Remove one layer, install sound insulation batts as in new construction, then hang fresh plasterboard with acoustic sealant at all joints.
This approach delivers the best results and allows you to address services, framing, and air sealing at the same time.
Retrofit Through Small Openings
Adding insulation to closed walls without full renovation is possible but challenging:
- Cut access holes at top and bottom of each stud bay
- Use blown-in cellulose or special retrofit batts designed to compress and expand
- Seal holes with plasterboard patches
Standard sound insulation batts don't work well for this approach; they're designed for open-cavity installation. Blown cellulose provides some acoustic benefit (though less than purpose-designed batts) and is easier to retrofit.
Improving Existing Insulated Walls
If your walls already have thermal insulation but you want better acoustic performance, your options include:
- Add a second layer of plasterboard (often the most cost-effective improvement)
- Install resilient channels between existing plasterboard and a new layer
- Replace lightweight thermal batts with high-density acoustic batts if you can access the cavity
Combining solutions usually delivers the best results for the investment.
Cost Considerations and Value for Money
Sound insulation batts represent a modest investment that delivers long-term comfort and property value.
Product Cost Ranges
Acoustic batts typically cost 20-50% more than equivalent thermal insulation due to higher density and specialized manufacturing:
- Standard acoustic batts (18-20 kg/m³): $10-15 per m²
- High-density acoustic batts (22-26 kg/m³): $15-20 per m²
- Premium systems with multiple layers and resilient mounting: $40-80 per m²
These figures are approximate and vary by brand, thickness, and order volume. Buying directly from Insulation Supplies Australia often provides better value than retail hardware stores.
Installation Cost if Hiring Professionals
Professional installation typically costs $20-40 per m² for labor, depending on project complexity, access, and location. A standard bedroom with four walls (30-40 m²) might cost $600-1,200 for materials and $800-1,600 for installation.
DIY installation saves labor costs but requires time, tools, and attention to detail.
Return on Investment
While acoustic improvement doesn't reduce energy bills like thermal insulation, it delivers value through:
- Improved quality of life (better sleep, less stress, more privacy)
- Increased property value (buyers value quiet homes)
- Better building performance (many acoustic batts also provide thermal benefits)
- Regulatory compliance (meeting NCC requirements for attached dwellings)
Most homeowners who invest in quality sound insulation batts report high satisfaction and wish they'd done it sooner.
Maintenance and Long-Term Performance
Once installed correctly, sound insulation batts require essentially no maintenance and will perform effectively for the life of the building.
Durability and Lifespan
Quality glasswool and rockwool batts don't degrade, sag, or lose performance over time when protected from moisture and physical damage. They don't attract pests, support mould growth, or settle significantly.
Moisture Management
While sound insulation batts themselves resist moisture, cavities can develop condensation if vapour barriers aren't correctly installed. In Victoria's climate, moisture management typically involves:
- Installing vapour-permeable wall wraps on the exterior
- Ensuring good ventilation in roof spaces and underfloor areas
- Avoiding vapour barriers on the interior of walls (which can trap moisture)
Damp batts lose some acoustic performance until they dry, but quality products recover fully once dry.
When to Replace or Supplement Insulation
Sound insulation batts rarely need replacement. Consider supplementing or replacing only if:
- Batts have been damaged during subsequent renovation work
- Water damage has caused mould growth in the cavity (address moisture source first)
- You're upgrading the entire wall or ceiling assembly to higher performance
In most cases, the original installation will continue performing well for decades.
Sound insulation batts transform noisy houses into peaceful homes by absorbing sound energy and reducing noise transmission between rooms. Choosing the right density, installing batts carefully without gaps, and combining them with proper wall construction delivers quiet, comfortable living spaces. Whether you're building new, renovating, or improving an existing home, Insulation Supplies Australia stocks a comprehensive range of high-performance acoustic insulation products with expert advice, competitive pricing, and fast delivery across Victoria to help you create the quiet home you deserve. Insulation Supplies Australia makes choosing and buying the right sound insulation batts simple and hassle-free.