Installing roof insulation is one of the smartest investments you can make in your home. Whether you're building new, renovating, or simply upgrading your existing insulation, proper roof insulation installation can dramatically reduce your energy bills, improve indoor comfort, and add value to your property. For homeowners across Melbourne and Victoria, understanding the installation process helps you decide whether to tackle it yourself or work with a professional installer. This guide walks you through everything you need to know about roof insulation installation, from planning and preparation to the final installation steps.
Why Roof Insulation Installation Matters in Melbourne
Melbourne's climate presents unique challenges with hot summers and cold winters. Without proper roof insulation installation, your home can lose up to 35% of its heating and cooling energy through the roof space.
The right insulation creates a thermal barrier that keeps heat out during summer and warmth in during winter. This means your air conditioner and heater work less, cutting your energy bills significantly.
Understanding R-Values for Roof Applications
Choosing the correct R-value is essential for effective roof insulation installation. The R-value measures thermal resistance, with higher numbers indicating better insulation performance.
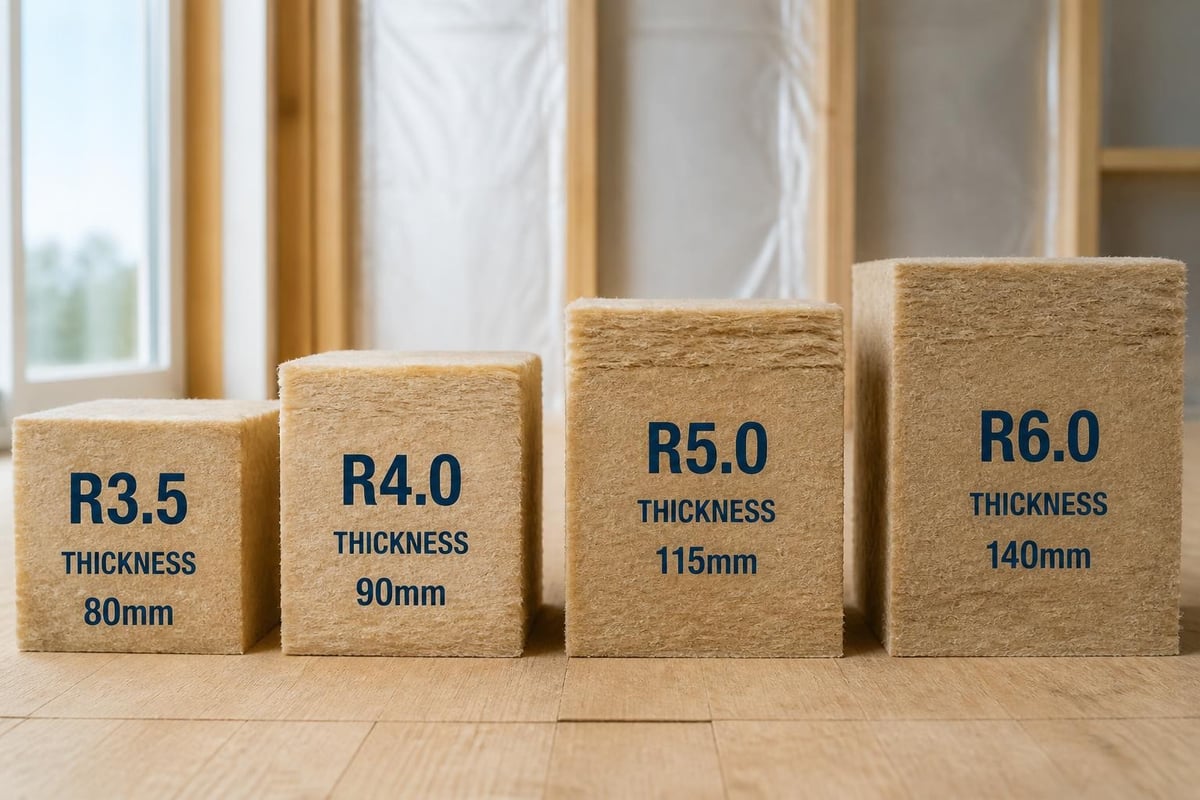
Recommended R-values for Melbourne roofs:
- Minimum: R3.5 for ceiling insulation
- Better: R4.0 to R5.0 for superior performance
- Best: R6.0 for maximum energy efficiency
Climate zone plays a crucial role in determining the right R-value. Melbourne sits in climate zone 6, which experiences moderate to cold winters and warm to hot summers. For detailed information about your specific location, check out the climate zones across Australia.
Types of Roof Insulation Materials
Different insulation materials suit different installation scenarios. Understanding your options helps you make the best choice for your roof insulation installation project.
| Material Type | Best For | R-Value Range | Key Benefits |
|---|---|---|---|
| Glasswool Batts | DIY installation, standard joist spacing | R3.5 - R6.0 | Affordable, fire-resistant, easy to cut |
| Earthwool Batts | Health-conscious homeowners | R3.5 - R6.0 | Low dust, soft to handle, sustainable |
| Polyester Batts | Moisture-prone areas | R2.5 - R4.0 | Non-allergenic, recyclable, won't sag |
| Reflective Foil | Under metal roofs | Combined systems | Radiant heat reflection |
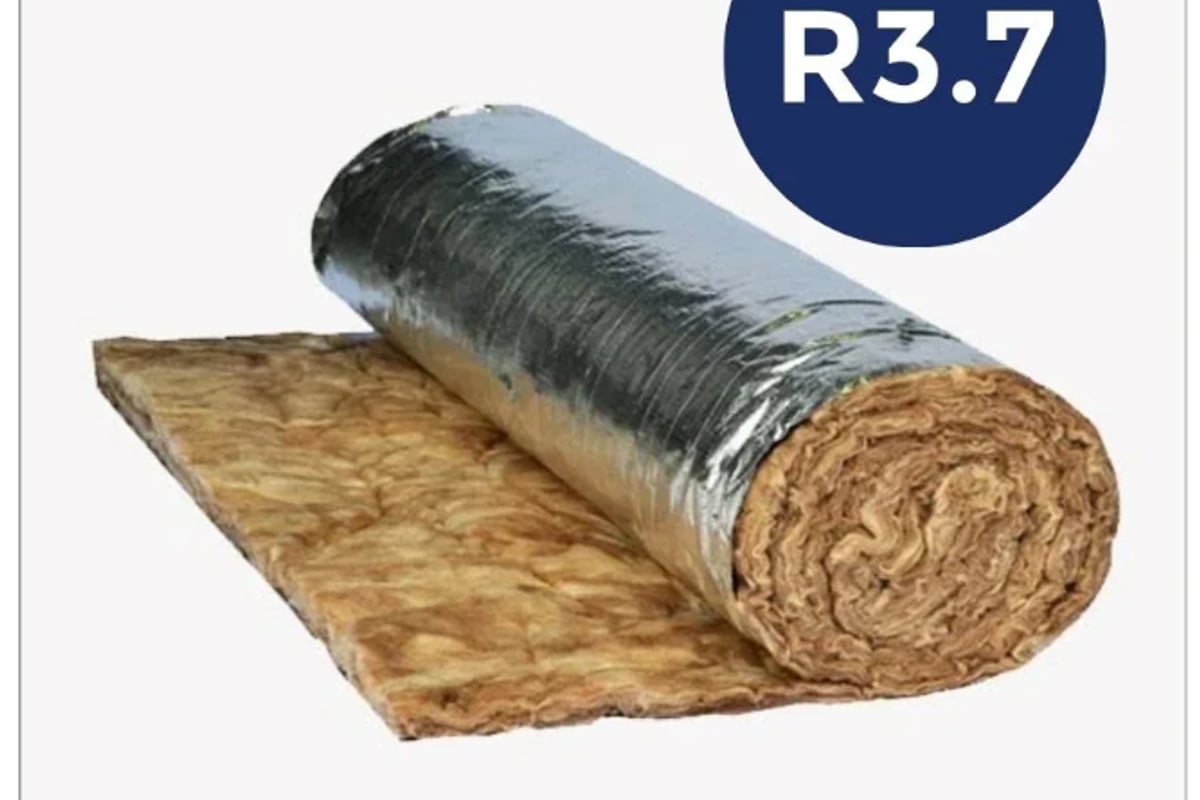
Glasswool and Earthwool products dominate the Australian market because they offer excellent thermal performance, fire resistance, and value for money. The Thermal Blanket R3.7 Roof Insulation provides premium performance with higher-density construction, making it ideal for roof applications where maximum thermal resistance matters.
Choosing Between Batts and Blankets
Batts come pre-cut to standard sizes, typically 430mm or 580mm wide to fit between joists. They're perfect for smaller roof spaces and straightforward installations.
Blankets (or rolls) offer continuous coverage, ideal for larger areas with consistent joist spacing. They reduce joins and gaps, potentially improving overall thermal performance.
Essential Safety Precautions for Roof Insulation Installation
Safety must be your top priority when installing roof insulation. Roof cavities present multiple hazards that require careful preparation and protective equipment.
Critical safety equipment:
- Sturdy ladder with someone holding it steady
- Proper lighting (battery-powered LED work lights)
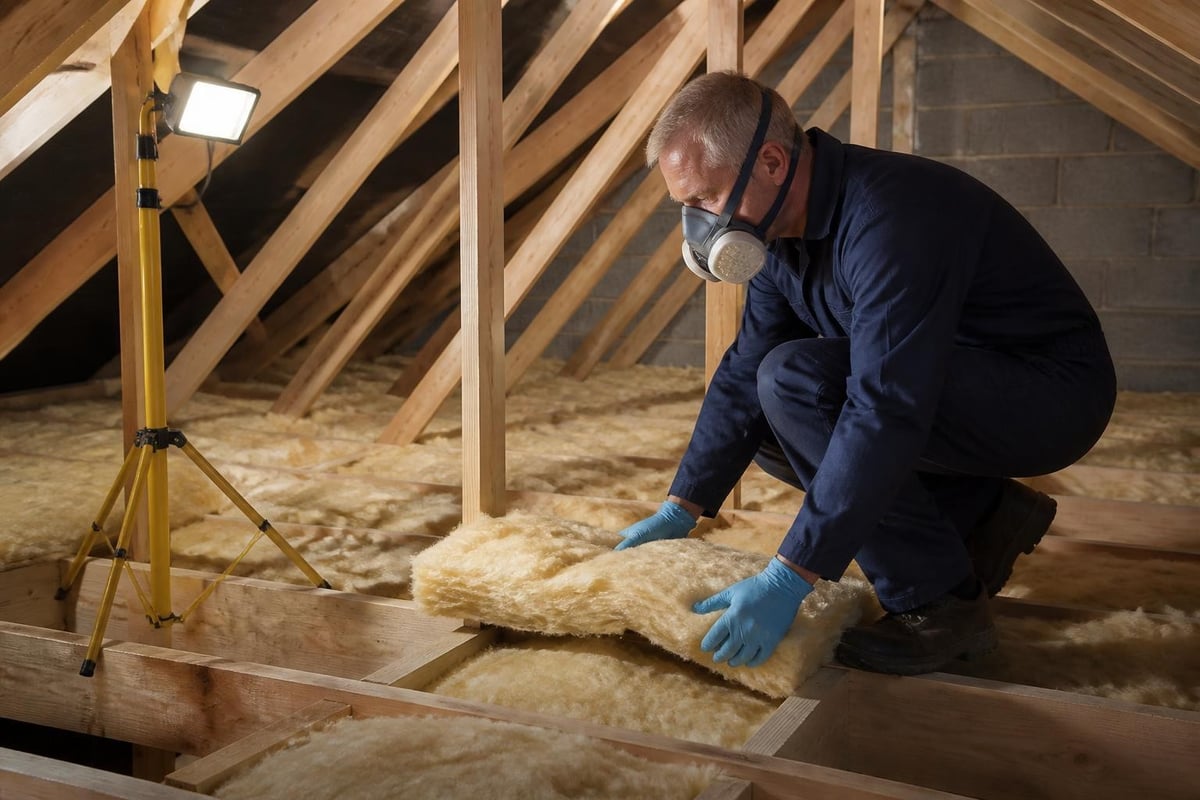
- Dust mask or respirator rated P2 or better
- Safety glasses or goggles
- Long sleeves, long pants, and gloves
- Hard hat for low ceiling spaces
- Non-slip footwear
Never stand directly on ceiling plasterboard. Only step on ceiling joists or use temporary boards across joists to distribute your weight. One wrong step can send you through the ceiling, causing injury and expensive damage.
Managing Heat and Ventilation
Roof spaces in summer can exceed 60°C. Plan your roof insulation installation for early morning or late afternoon during warmer months.
Take regular breaks outside the roof space. Drink plenty of water before, during, and after installation. Heat exhaustion is a real danger in Australian roof cavities.
Ensure adequate ventilation while working. If possible, create cross-ventilation by opening access points at both ends of the roof space.
Preparing Your Roof Space for Installation
Proper preparation makes roof insulation installation faster, easier, and more effective. Start by inspecting your roof cavity thoroughly before buying materials.
Measuring and Calculating Requirements
Accurate measurements prevent material shortages and excessive waste. Measure your roof space systematically to determine how much insulation you need.
Step-by-step measuring process:
- Measure the total length and width of your roof cavity
- Calculate total square metres (length × width)
- Measure joist spacing (typically 450mm or 600mm centres)
- Count the number of joist spaces
- Note any irregular areas, skylights, or obstacles
- Add 10% extra for cutting waste and mistakes
Different joist spacing requires different batt widths. Standard Australian framing uses 450mm centres (430mm batts) or 600mm centres (580mm batts).
Clearing and Cleaning the Roof Space
Remove old or damaged insulation if you're replacing existing materials. Check for signs of moisture damage, roof leaks, or pest activity.
Clear away any stored items, building debris, or electrical cables lying across joists. Create a clear, safe working area before bringing insulation materials into the roof space.
Inspect electrical wiring for damage. Never cover recessed downlights without proper clearance covers. Insulation touching hot electrical fittings creates a serious fire risk.
Step-by-Step Roof Insulation Installation Process
Follow this systematic approach for professional-quality roof insulation installation results. Working methodically ensures complete coverage without gaps or compression.
Starting Your Installation
Begin at the furthest point from your access hatch, working backwards towards your exit. This prevents you from crawling over freshly installed insulation.
Installation sequence:
- Pass batts or blanket sections into the roof space
- Position yourself safely on joists
- Start fitting insulation from the far end
- Work systematically across each section
- Move backwards towards the access point
- Check coverage as you go
For batt installation, friction-fit each piece between ceiling joists. Push gently until the batt sits snugly without compression or gaps.
Cutting and Fitting Techniques
Use a long serrated bread knife or insulation cutting tool for clean cuts. Compress the insulation slightly while cutting for easier, more accurate cuts.
Cutting tips for professional results:
- Measure twice, cut once
- Cut batts 5-10mm wider than the gap for snug fit
- Use straight edge or timber as cutting guide
- Support the insulation while cutting
- Save offcuts for filling small gaps
When installing ceiling insulation across Melbourne homes, achieving complete coverage without gaps is crucial. Even small gaps significantly reduce overall thermal performance.
Fit insulation around obstacles carefully. Cut neat slits for pipes and cables rather than leaving gaps. Insulation should cover the entire ceiling area except required clearances around heat sources.
Managing Downlights and Electrical Fixtures
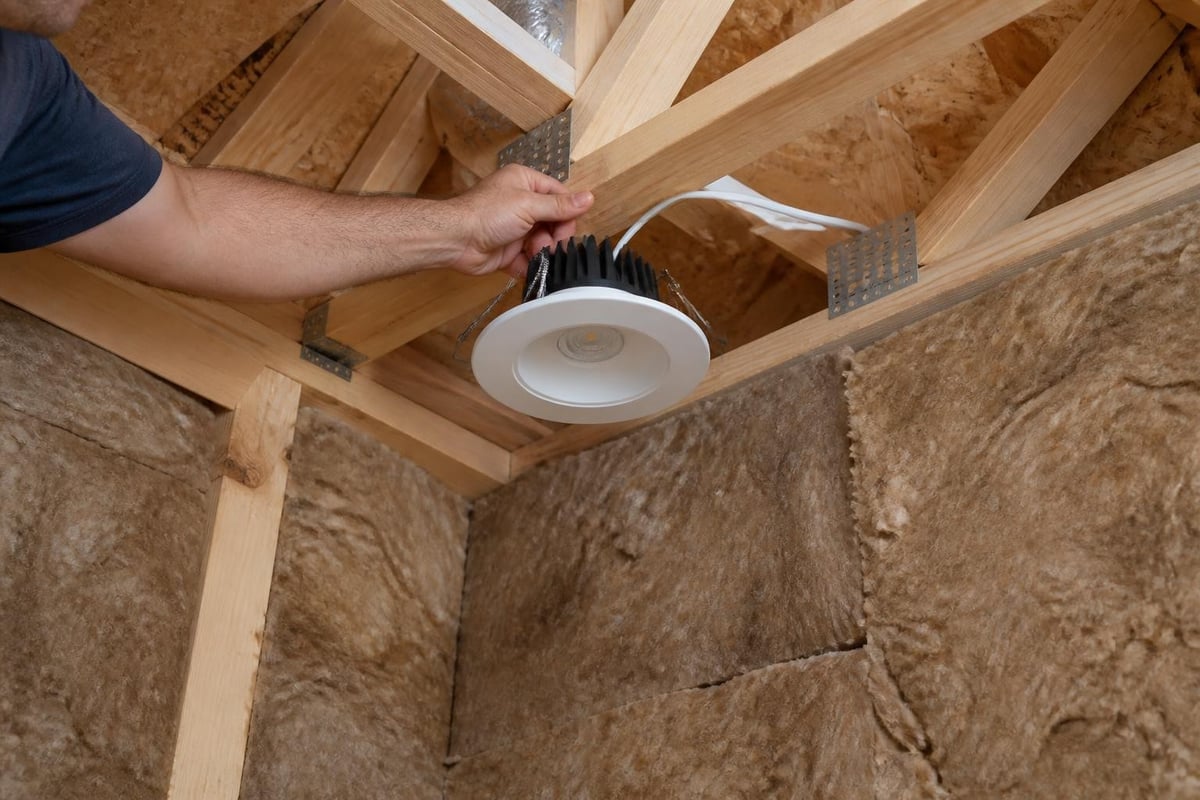
Recessed downlights generate heat that can ignite insulation. Always maintain required clearances unless fixtures are rated IC-F (Insulation Contact - Fire Rated).
Standard downlights require a minimum 200mm clearance around the fixture and 50mm above. Install metal or fibreglass covers over non-IC-F downlights before installing insulation.
IC-F rated downlights allow direct insulation contact, eliminating gaps in your thermal barrier. If you're renovating, consider upgrading to IC-F rated LED downlights for better energy efficiency and complete insulation coverage.
Common Roof Insulation Installation Mistakes to Avoid
Even experienced DIYers make mistakes during roof insulation installation. Learning from others' errors saves time, money, and improves performance.
Compression and Gaps
Compressing insulation reduces its R-value significantly. Squashing R4.0 insulation to half its thickness can reduce performance by 50% or more.
Never force insulation into spaces too small. Don't compress insulation around pipes, in eaves, or when closing access hatches. Compressed insulation loses the air pockets that provide thermal resistance.
Gaps are equally problematic. Even small gaps allow heat transfer, creating cold spots in winter and hot spots in summer. Ensure complete coverage across the entire ceiling plane.
Ignoring Ventilation Requirements
Roof spaces need adequate ventilation to prevent moisture buildup and heat accumulation. Your roof insulation installation should never block soffit vents, ridge vents, or gable vents.
Maintain clear airflow paths from eaves to ridge. In eaves areas, use baffles or spacers to keep insulation back from soffit vents while maintaining coverage.
Overlooking Safety Requirements
Rushing the job increases accident risk. Take your time, follow safety procedures, and never work alone in roof spaces.
Don't skip safety equipment to save time or money. A dust mask costs a few dollars but protects your respiratory health for years. Safety glasses prevent eye injuries from insulation fibres and roof cavity debris.
Insulating Different Roof Types
Not all roofs are the same. Your roof insulation installation approach depends on your roof construction and design.
Pitched Roofs with Accessible Ceiling Cavities
Standard pitched roofs with accessible ceiling cavities are the easiest for DIY roof insulation installation. You install batts or blankets between ceiling joists from above.
This is the most common scenario in Australian homes. The process follows the standard installation steps outlined above.
Cathedral Ceilings and Raked Ceilings
Cathedral or raked ceilings follow the roof line without a flat ceiling cavity. Installing insulation requires working between roof rafters, which is more challenging.
You may need to install insulation from inside the room during construction or renovation. This often requires professional installation unless you have building experience.
Ensure adequate ventilation gaps remain above the insulation when installing between rafters. Building codes require specific air gaps for moisture management.
Flat or Low-Pitch Roofs
Flat roofs require different insulation approaches. Installation often occurs above the roof deck rather than below, using rigid board insulation.
This specialized roof insulation installation typically requires professional expertise and different materials than standard batt insulation.
When to Consider Professional Installation
DIY roof insulation installation suits many homeowners, but some situations warrant professional help.
Consider professional installation if:
- Your roof cavity is difficult to access safely
- You have complex roof geometry with multiple levels
- Electrical work needs modification
- You're unsure about ventilation requirements
- You lack confidence working at heights
- You have health concerns about dust exposure
- Your insurance requires licensed tradespeople
Professional installers complete jobs faster and ensure compliance with building codes. They carry insurance covering damage or injuries during installation.
However, many homeowners successfully complete their own roof insulation installation with proper preparation, safety equipment, and quality materials.
Verifying Installation Quality
After completing your roof insulation installation, verify the work meets required standards.
Post-Installation Checklist
| Check Item | What to Look For | Why It Matters |
|---|---|---|
| Complete coverage | No visible gaps or missing sections | Prevents heat loss through thermal bridges |
| No compression | Insulation at full loft | Maintains rated R-value performance |
| Downlight clearances | Required spacing around fixtures | Fire safety compliance |
| Ventilation paths | Clear airflow from eaves to ridge | Prevents moisture and heat buildup |
| Access hatch | Properly insulated with seal | Eliminates major heat loss point |
| Electrical safety | No cables buried or damaged | Prevents fire risk and failures |
Take photos of your completed installation for future reference. These records help with insurance claims, building modifications, or property sales.
Testing Performance
The true test comes with your energy bills. Monitor heating and cooling costs in the months following roof insulation installation.
You should notice improved comfort immediately. Rooms feel more consistent in temperature, with less drafts and hot or cold spots.
Within the first full billing cycle, most homeowners see reduced energy consumption. The exact savings depend on your previous insulation levels, home size, and climate control habits.
Maintaining Your Roof Insulation
Quality roof insulation installation should last 40 years or more with minimal maintenance. However, periodic checks ensure continued performance.
Annual maintenance tasks:
- Inspect for signs of moisture or roof leaks
- Check for pest damage or nesting
- Verify insulation hasn't shifted or settled
- Ensure ventilation paths remain clear
- Look for any compression from stored items
Never store heavy items on top of ceiling insulation. This compresses the material and reduces its effectiveness.
If you notice moisture, water stains, or dampness, address the source immediately. Wet insulation loses thermal performance and can develop mould problems.
Successful roof insulation installation improves your home's comfort and energy efficiency for decades. With proper planning, safety precautions, and quality materials, many homeowners can achieve professional results. Whether you're tackling the project yourself or working with installers, Insulation Supplies Australia provides the expert advice, premium products, and competitive pricing you need. Our extensive range includes everything from high-performance glasswool batts to specialized roof blankets, all backed by fast delivery across Victoria and knowledgeable customer support to guide your insulation journey.