

Your roof and ceiling represent the largest surface area of heat exchange in most Australian homes. During summer, an uninsulated roof cavity can reach temperatures exceeding 65°C, pushing that heat down into your living spaces. In winter, warm air naturally rises and escapes through poorly insulated ceilings, forcing your heating system to work overtime. Proper roof and ceiling insulation addresses both scenarios, creating a thermal barrier that keeps conditioned air where it belongs and dramatically reduces your energy bills year-round.
Understanding Roof and Ceiling Insulation Systems
Roof and ceiling insulation works by slowing the transfer of heat between your living spaces and the outside environment. The effectiveness of any insulation material is measured by its R-value, which indicates thermal resistance. Higher R-values provide better insulation performance.
In Australian homes, we typically distinguish between two key insulation zones:
Ceiling insulation sits directly above your ceiling plasterboard, in the roof cavity or attic space. This is the most common and cost-effective location for thermal insulation in residential buildings.
Roof insulation is installed directly under the roof structure, either between rafters or attached to the underside of the roofing material. This approach is common in cathedral ceilings, skillion roofs, or homes where the roof space is used for storage or living.
Climate Zone Requirements
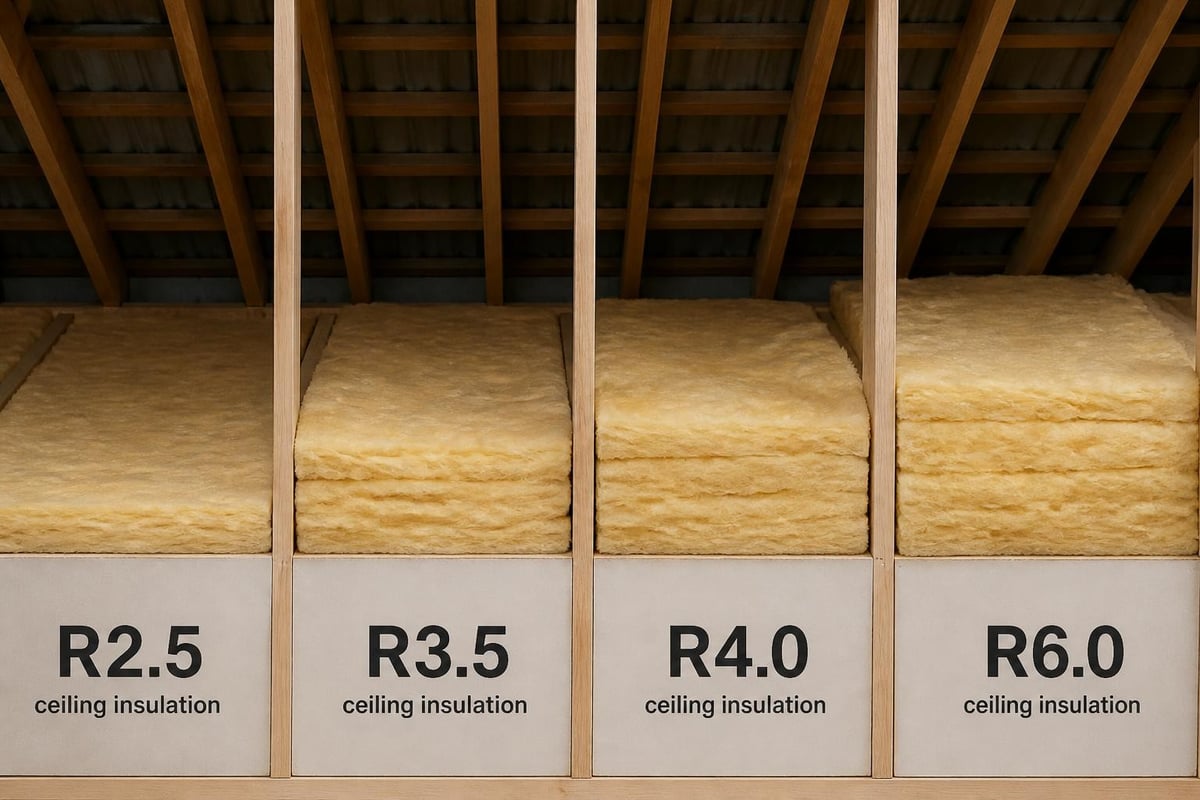
Australia's diverse climate zones demand different R-value standards. Melbourne and Victoria fall primarily into climate zones 6 and 7, which typically require:
- Ceiling insulation: R4.0 to R6.0 for optimal performance
- Roof insulation: R3.0 to R5.0 depending on application and ventilation
The ASHRAE standards provide detailed guidance on envelope U-factors and climate-specific R-value recommendations that align with Australian building code requirements.
Types of Roof and Ceiling Insulation Materials
Selecting the right insulation material depends on your budget, installation method, performance requirements and building design. Each material offers distinct advantages for different applications.
Glasswool Insulation Batts
Glasswool batts remain the most popular choice for ceiling insulation across Australia. Made from recycled glass and sand, modern glasswool products use advanced technologies like ECOSE® to reduce dust and improve handling.
Key characteristics:
- Excellent thermal and acoustic performance
- Non-combustible fire safety
- Resistant to moisture and mould
- Soft to handle with low-itch formulations
- Cost-effective for most applications
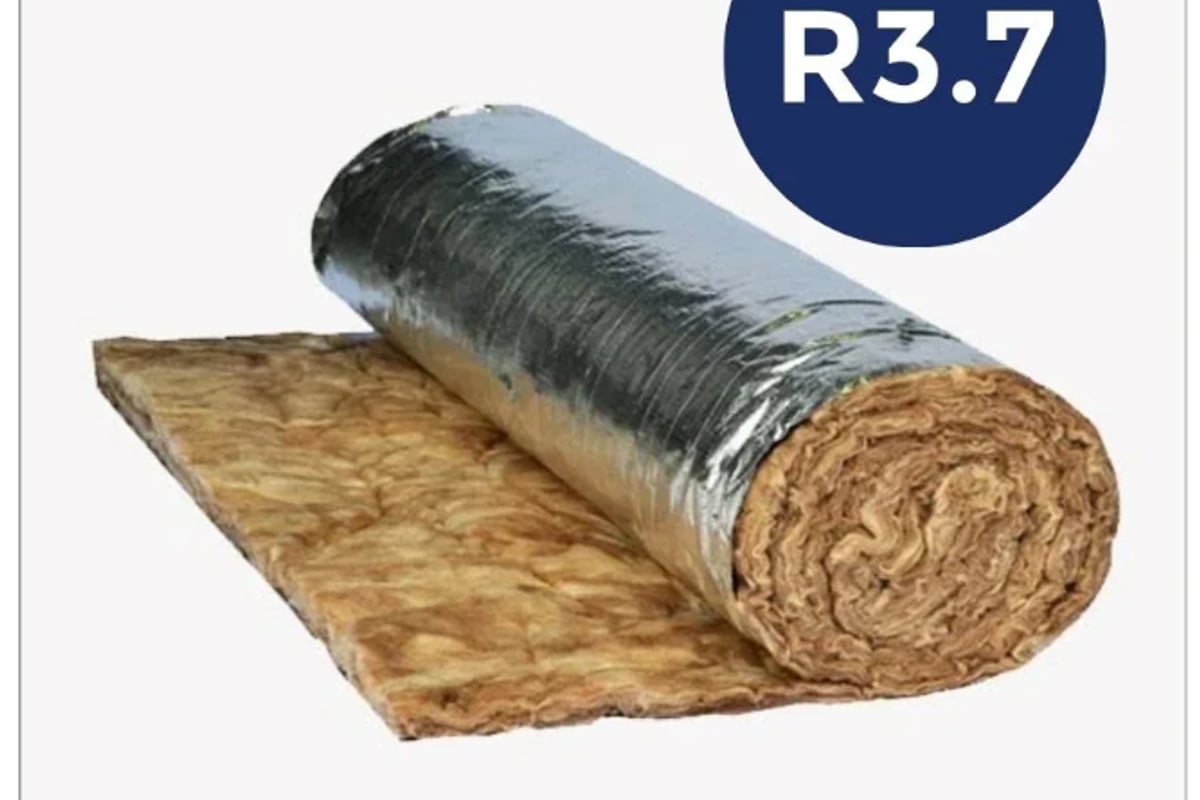
Glasswool batts come in various thicknesses and R-values to suit different ceiling joist spacings. The Thermal Blanket R3.7 22kg/m³ 130mm x 1.2m Roof Insulation Blanket offers higher-density construction for improved performance in metal roof systems where space between battens varies.
Polyester Insulation Batts
Polyester batts provide an alternative for those seeking low-allergen options. These synthetic fibre batts offer:
- Hypoallergenic properties
- No respiratory irritants
- Good thermal performance
- Lightweight and easy handling
- Suitable for DIY installation
Reflective Foil Insulation
Reflective foil products work by reflecting radiant heat rather than absorbing it. They're particularly effective in roof spaces where radiant heat from metal roofing is a major concern.
| Material Type | Primary Benefit | Best Application | R-Value Range |
|---|---|---|---|
| Glasswool Batts | Thermal + acoustic | Ceiling cavities | R2.5 - R7.0 |
| Polyester Batts | Low allergen | Sensitive environments | R2.5 - R4.0 |
| Reflective Foil | Radiant barrier | Under metal roofs | R0.5 - R2.0* |
| Combination Systems | Maximum performance | Premium builds | R3.0 - R8.0+ |
*Foil products require airspace to achieve stated R-values
Installation Considerations for Different Roof Types
The installation approach for roof and ceiling insulation varies significantly depending on your roof structure and construction method.
Flat or Low-Pitch Ceilings
Standard flat ceilings with accessible roof cavities represent the easiest installation scenario. Batts sit between ceiling joists, typically spaced at 450mm or 600mm centres.
Installation steps:
- Measure joist spacing and cavity depth
- Select appropriate batt width and R-value
- Cut batts to length (not width) if required
- Lay batts between joists without compression
- Ensure complete coverage without gaps
- Avoid covering downlights unless rated for insulation contact
The ENERGY STAR guide to adding attic insulation emphasises the importance of air sealing before installing insulation to maximise performance.
Cathedral and Skillion Ceilings
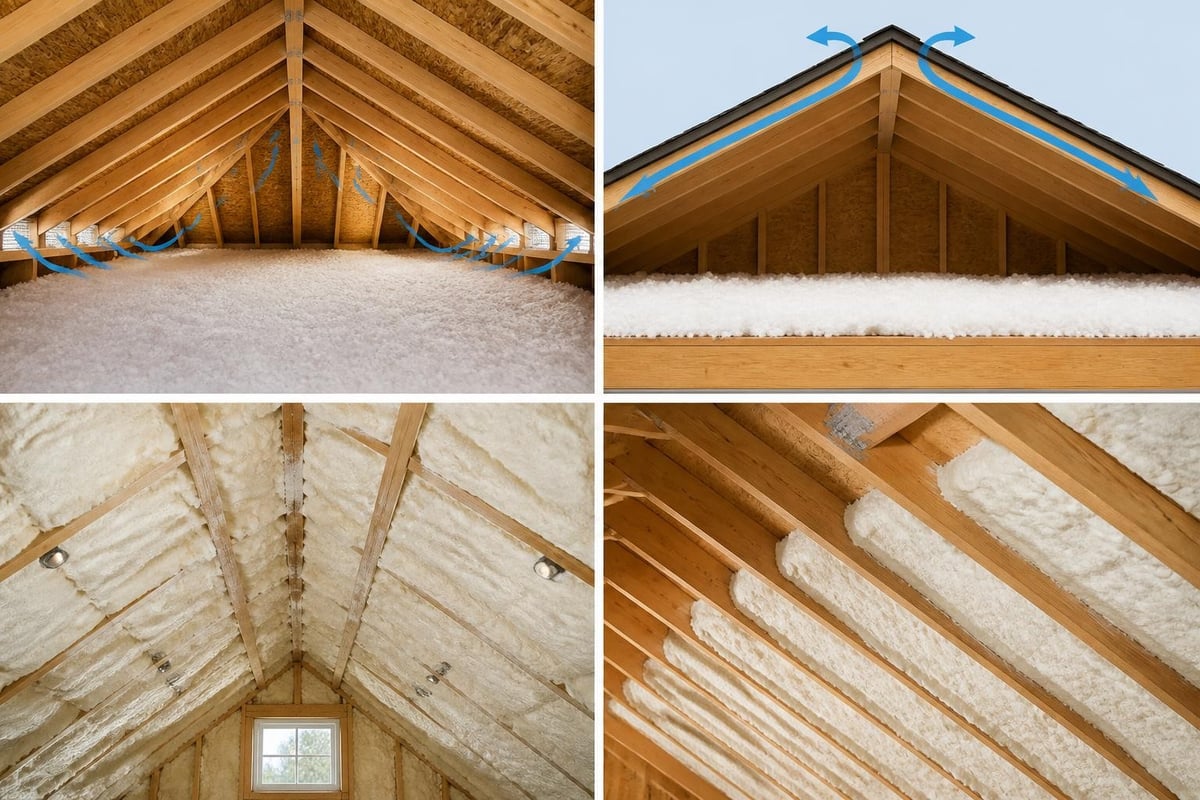
When ceiling plasterboard follows the roof pitch, insulation must fit between rafters. This scenario requires careful consideration of:
- Ventilation pathways to prevent moisture accumulation
- Airspace requirements for reflective products
- Compression impacts on R-value performance
- Fire safety in confined spaces
Building Science Corporation's technical digest provides detailed guidance on unvented roof assemblies for various climate conditions, including hygrothermal performance considerations.
Metal Roof Considerations
Metal roofing presents specific challenges for roof and ceiling insulation due to radiant heat transfer and condensation risks. Effective strategies include:
- Combining bulk insulation (batts) with reflective foil
- Maintaining airspace above foil products
- Installing sarking or roof blankets under battens
- Ensuring adequate ventilation to manage moisture
Condensation management becomes critical in metal roof applications. Warm, moist air from living spaces can condense on cold metal surfaces, leading to dripping and potential water damage.
R-Values and Performance Selection
Choosing the correct R-value for your roof and ceiling insulation represents a balance between initial cost, energy savings and comfort. While higher R-values cost more upfront, they deliver greater long-term benefits.
Minimum vs. Optimal Performance
Australian building codes establish minimum R-value requirements, but optimal performance often exceeds these baselines:
| Application | Code Minimum | Recommended | Premium |
|---|---|---|---|
| Ceiling (Zone 6) | R3.5 | R5.0 - R6.0 | R7.0+ |
| Ceiling (Zone 7) | R4.0 | R6.0 | R7.0+ |
| Roof (all zones) | R2.5 | R3.5 - R4.0 | R5.0+ |
Investing in higher R-values makes particular sense when:
- You plan to stay in your home long-term
- Energy costs are rising
- Your home has large ceiling areas
- You're already accessing the roof cavity for renovations
- You want maximum comfort year-round
Climate-Specific Recommendations
Melbourne's temperate climate with hot summers and cold winters demands insulation that performs well in both heating and cooling seasons. Research from Lawrence Berkeley National Laboratory demonstrates that proper attic and roof insulation significantly reduces both winter heat loss and summer heat gain in similar climate zones.
For Victorian homes, R6.0 ceiling insulation represents the sweet spot between cost and performance, typically reducing heating and cooling energy consumption by 40-50% compared to uninsulated ceilings.
Health and Safety Considerations
Installing roof and ceiling insulation involves several safety considerations that protect both installers and building occupants.
Installation Safety
Working in roof spaces requires appropriate safety measures:
- Fall protection: Use secure boarding or planks, never step between joists
- Respiratory protection: Wear P2 masks when handling fibreglass or dusty materials
- Protective clothing: Long sleeves, gloves and eye protection prevent skin irritation
- Heat stress: Roof cavities in summer can exceed 60°C, work early or late
- Electrical awareness: Identify and avoid all electrical wiring
Indoor Air Quality
Proper insulation installation directly impacts indoor air quality. The EPA's guidance on remodeling and indoor air quality highlights moisture and ventilation considerations during insulation projects.
Common issues to avoid:
- Blocking eave vents or roof ventilation
- Covering recessed downlights not rated for insulation contact
- Compressing insulation, which reduces performance and can trap moisture
- Creating thermal bridges that allow heat transfer
Fire Safety
Fire safety has become increasingly important in roof and ceiling insulation selection and installation. UK government fire testing of various roof insulation types provides valuable insights for Australian applications.
Non-combustible materials like glasswool offer inherent fire resistance. Always verify fire ratings and compliance with Australian standards for your specific application.
Cost Factors and Return on Investment
Understanding the true cost of roof and ceiling insulation requires looking beyond initial material prices to include installation, performance and long-term savings.
Material and Installation Costs
DIY installation significantly reduces costs but requires time, physical capability and safety equipment. Professional installation ensures code compliance and proper coverage but adds labour costs.
Budget considerations:
- Material costs vary based on R-value, thickness and brand
- Coverage area determines total quantity required
- Roof access affects installation complexity and cost
- Existing insulation removal may be necessary in some renovations
- Safety equipment for DIY projects (ladder, mask, protective gear)
Energy Savings and Payback
Quality roof and ceiling insulation typically pays for itself through energy savings within 3-7 years, depending on:
- Your current insulation levels (or lack thereof)
- Local energy prices
- Heating and cooling usage patterns
- Home size and ceiling area
- R-value installed
A typical Melbourne home upgrading from no insulation to R6.0 ceiling batts can save $500-800 annually on energy bills, making the payback period approximately 4-6 years for a professionally installed system.
Common Installation Mistakes to Avoid
Even experienced DIYers can make errors that compromise insulation performance. Understanding these common mistakes helps ensure your roof and ceiling insulation delivers expected results.
Compression and Gaps
Compression reduces R-value proportionally. Batts designed for 90mm cavities must not be squeezed into 70mm spaces. Similarly, stuffing too much insulation into limited space actually reduces performance.
Gaps between batts or around obstacles create thermal bridges where heat bypasses the insulation entirely. Even a 5% gap can reduce overall performance by 25-35%.
Moisture and Ventilation Issues
- Blocking soffit vents prevents airflow and traps moisture
- Installing vapour barriers on the wrong side creates condensation problems
- Insufficient roof ventilation causes heat buildup and moisture accumulation
- Covering exhaust fans or vents compromises air quality
For detailed installation guidance, many manufacturers provide specific instructions for their products.
Downlight and Electrical Conflicts
Standard recessed downlights generate significant heat. Covering them with insulation creates fire risks unless they're specifically rated for insulation contact (IC-rated). Always:
- Identify all downlights before installing insulation
- Check ratings on existing fixtures
- Maintain clearance around non-IC-rated lights
- Consider upgrading to LED IC-rated downlights
- Keep insulation clear of electrical junction boxes unless rated
Upgrading Existing Insulation
Many Victorian homes built before 2000 have inadequate or deteriorated insulation. Upgrading delivers immediate comfort improvements and energy savings.
Assessment and Planning
Start by checking your existing insulation:
- Access your roof cavity safely during daylight
- Measure thickness of existing batts or loose-fill
- Check condition for water damage, compression or gaps
- Identify R-value from product markings if visible
- Assess coverage across the entire ceiling area
The BRE RdSAP guidance provides technical conventions for measuring and assessing existing insulation in retrofit scenarios.
Layering Strategies
When existing insulation is in good condition but has insufficient R-value, adding a layer on top can be cost-effective:
| Existing R-Value | Add Layer | Total R-Value |
|---|---|---|
| R1.5 - R2.0 | R2.5 batts | R4.0 - R4.5 |
| R2.5 - R3.0 | R3.5 batts | R6.0 - R6.5 |
| R3.5 | R2.5 batts | R6.0 |
Lay the second layer perpendicular to the first to cover gaps and reduce thermal bridging through joists.
When existing insulation is damaged, compressed or missing, complete replacement delivers better results than attempting repairs.
Selecting Products for Your Project
With numerous roof and ceiling insulation products available, selecting the right option requires matching product characteristics to your specific needs.
Performance Requirements
Define your priorities:
- Thermal performance: Higher R-values for extreme climates or energy efficiency goals
- Acoustic control: Denser products offer better soundproofing
- Fire safety: Non-combustible materials for high-risk areas
- Moisture resistance: Critical for bathrooms, kitchens or humid climates
- Handling characteristics: Low-itch products for DIY installation
Product Specifications
Always verify these details before purchasing:
- Exact R-value for your climate zone
- Dimensions match your joist spacing (typically 430mm or 580mm width)
- Thickness suits your cavity depth
- Coverage area per pack or roll
- Compliance with Australian standards (AS/NZS 4859.1)
For comprehensive product information and specifications, explore Insulation Supplies Australia's online brochure to compare options and technical details.
Quantity Calculations
Accurate quantity calculations prevent delays and additional delivery costs:
- Measure ceiling area in square metres (length × width)
- Add 5-10% for cutting waste and odd spaces
- Divide by coverage per pack to determine quantity needed
- Round up to whole packs
Most online retailers provide coverage calculators and quantity estimating tools to simplify this process.
Ventilation and Moisture Management
Effective roof and ceiling insulation works in concert with proper ventilation to manage moisture and maintain healthy roof spaces.
Ventilation Principles
Roof ventilation serves multiple purposes:
- Removes excess heat in summer, reducing cooling loads
- Prevents moisture accumulation that can damage structure and insulation
- Extends roof material lifespan by moderating temperature extremes
- Reduces ice damming in cold climates (less relevant in Victoria)
Passive ventilation using soffit and ridge vents creates natural airflow as warm air rises and exits through the ridge while cooler air enters through eaves.
Active ventilation with powered roof vents or whirlybirds increases airflow in hot weather but requires careful integration with insulation systems.
Moisture Control Strategies
Moisture in roof cavities comes from multiple sources:
- Internal humidity rising from living spaces
- Condensation on cold surfaces
- Roof leaks and weather penetration
- Inadequate bathroom and kitchen exhaust venting
Preventing moisture problems requires:
- Sealing penetrations between living spaces and roof cavity
- Properly venting all exhaust fans to outside (never into roof space)
- Maintaining roof weatherproofing and flashing
- Ensuring adequate ventilation for air changes
- Using vapour-permeable materials where appropriate
Professional vs DIY Installation
Deciding whether to install roof and ceiling insulation yourself or hire professionals depends on several factors beyond just cost savings.
DIY Advantages
- Cost savings of 40-60% on labour
- Schedule flexibility to work at your own pace
- Quality control over materials and workmanship
- Learning experience for future projects
Suitable DIY scenarios:
- Standard flat ceilings with good roof access
- Straightforward layouts without complex obstacles
- Adequate physical capability and safety awareness
- Availability of necessary equipment and helpers
Professional Installation Benefits
- Speed and efficiency from experienced installers
- Safety equipment and insurance protection
- Code compliance and quality guarantees
- Warranty coverage on workmanship
- Complex situations handled correctly
Best left to professionals:
- High-pitch or difficult access roofs
- Asbestos or hazardous material present
- Complex architectural features
- Commercial or multi-storey buildings
- Insurance or warranty requirements
Whether you choose professional installation or tackle the project yourself, understanding proper techniques ensures your roof and ceiling insulation performs as expected.
Selecting and installing the right roof and ceiling insulation transforms your home's comfort and energy efficiency while reducing ongoing costs. When you're ready to upgrade your insulation, Insulation Supplies Australia offers a comprehensive range of quality products with detailed specifications, competitive pricing and delivery across Victoria. Browse our online catalogue to find the perfect insulation solution for your project, or contact our team for personalised product recommendations based on your specific requirements.