

Getting your insulation install right is one of the most important decisions you'll make for your home's comfort and energy efficiency. Whether you're building new, renovating, or upgrading an older property, understanding the process helps you achieve better results, avoid costly mistakes, and create a more comfortable living environment year-round. This guide walks you through everything you need to know about planning and completing a successful insulation install in your Victorian home.
Understanding Your Insulation Install Options
Before you start any insulation install project, you need to understand which type of insulation suits your specific needs. Australian homes require different approaches depending on the area you're insulating and your climate zone.
Common Insulation Types for Australian Homes
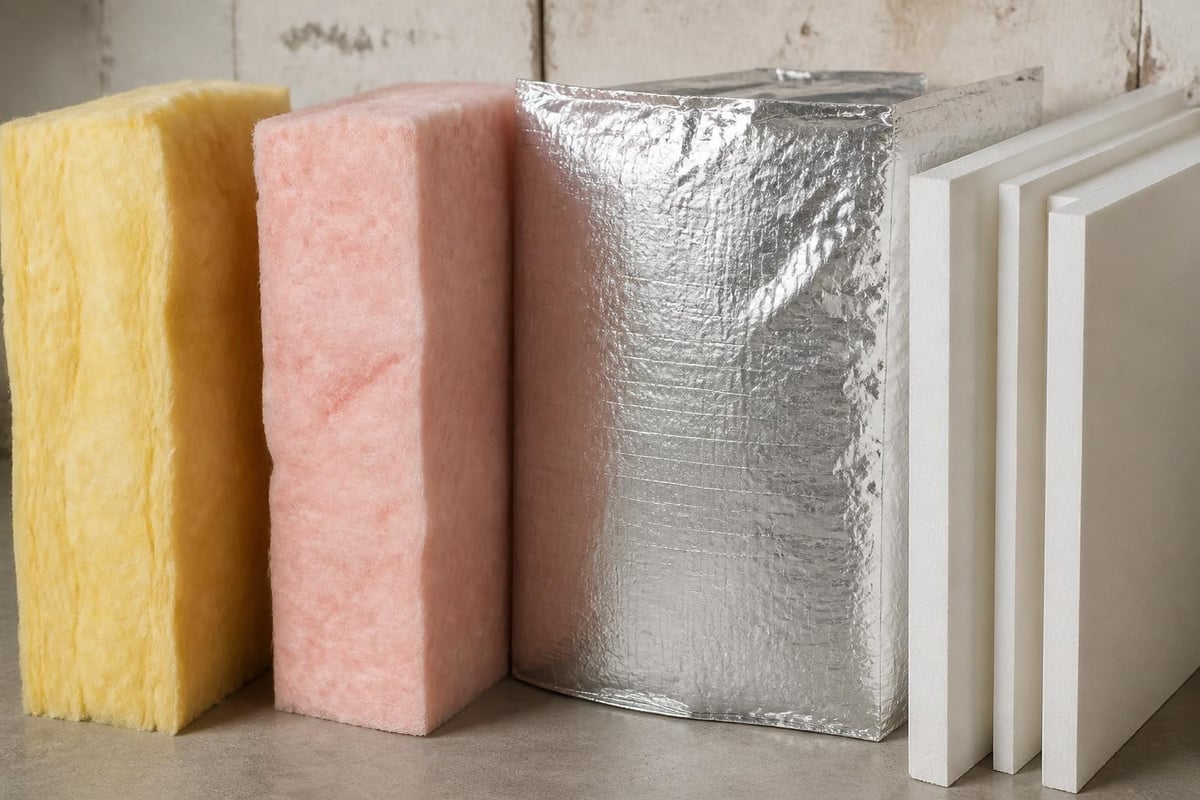
Glasswool batts remain the most popular choice for wall and ceiling insulation installs. They're affordable, easy to handle, and available in various R-values to suit different applications. Manufactured using advanced technologies like ECOSE®, modern glasswool products are softer, less dusty, and more comfortable to work with than older versions.
Polyester batts offer an excellent alternative for homeowners concerned about allergens or working in wet conditions. They don't absorb moisture and won't support mould growth, making them ideal for bathrooms, laundries, and coastal properties.
Reflective foil insulation works differently by reflecting radiant heat rather than trapping air. It's particularly effective in roof spaces and as underfloor wrap, where it creates a thermal barrier while also blocking moisture and draughts.
Rigid boards like XPS (extruded polystyrene) provide high compressive strength and moisture resistance. They're perfect for under-slab applications, perimeter walls, and anywhere you need load-bearing insulation that won't compress over time.
Understanding the different types of insulation available helps you choose the right product for each area of your home.
Planning Your Insulation Install Project
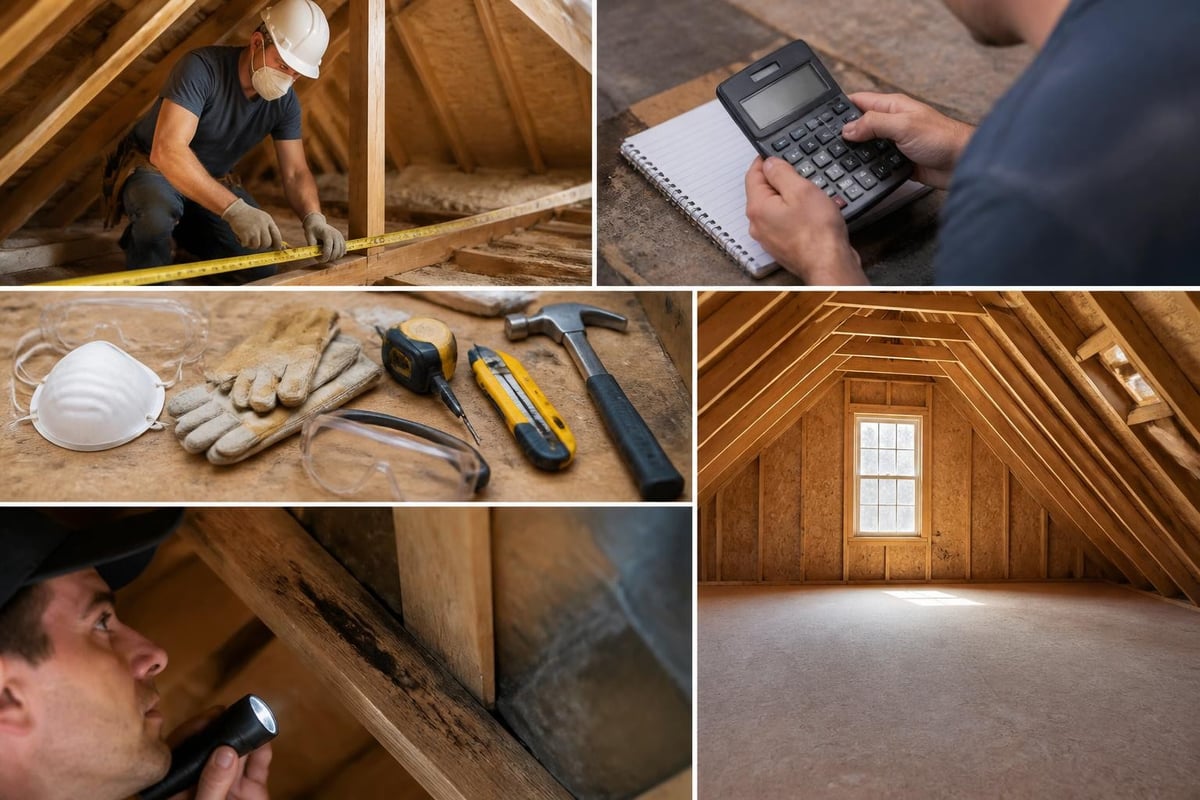
A successful insulation install starts with careful planning. Taking time to measure accurately, calculate quantities, and prepare properly saves time and money while ensuring better results.
Measuring and Calculating Coverage
Start by measuring the areas you plan to insulate. For walls, measure the height and total length, then subtract window and door openings. For ceilings, calculate the total floor area of the rooms below. Underfloor spaces require measuring the floor area above the suspended timber structure.
Area Type |
Measurement Method |
Key Considerations |
|---|---|---|
Walls |
Height × Length - Openings |
Account for stud spacing (usually 450mm or 600mm) |
Ceilings |
Room length × Width |
Include hallways and enclosed spaces |
Underfloor |
Floor area above suspended structure |
Measure joist spacing and direction |
Roof |
Rafter length × Number of spaces |
Account for pitch and valleys |
Most insulation products specify their coverage area per pack or roll. Divide your total area by the product coverage, then add 5-10% extra for cuts, offcuts, and mistakes.
Choosing the Right R-Value
Victoria's climate requires specific R-values in different parts of your home to meet National Construction Code requirements and achieve optimal energy efficiency. The minimum R-values vary by climate zone, but higher values deliver better performance.
For ceiling insulation, aim for R4.0 to R6.0 in Melbourne and regional Victoria. Wall insulation typically requires R1.5 to R2.5, while underfloor installations benefit from R1.5 to R2.5 depending on your specific situation.
The Insulation Institute's guide provides helpful context about where to focus your insulation efforts for maximum benefit.
Preparing for Your Insulation Install
Proper preparation makes the actual installation faster, safer, and more effective. Taking time to prepare your workspace and gather the right tools prevents frustration and ensures better results.
Essential Tools and Safety Equipment
You'll need basic tools for most insulation install projects:
Sharp utility knife or insulation saw for cutting batts
Measuring tape and straight edge for accurate cuts
Staple gun (for underfloor foil or blanket products)
Ladder or scaffolding for ceiling access
Lighting (especially for roof spaces and underfloor areas)
Dust mask or respirator rated for fibreglass
Safety glasses to protect eyes from fibres
Long-sleeved clothing and gloves
Kneepads for underfloor work
Safety comes first. Always turn off power to any electrical circuits in the work area before starting your insulation install. Never compress insulation around electrical cables or light fittings, as this creates fire hazards and reduces the insulation's effectiveness.
Workspace Preparation Checklist
Before bringing insulation products to the work area, complete these preparation steps:
Remove any existing damaged or ineffective insulation
Clear the area of stored items, boxes, or debris
Check for moisture problems, leaks, or pest issues
Repair any structural damage to studs, joists, or rafters
Install or verify ventilation meets building code requirements
Mark or identify any obstacles like pipes, cables, or ducts
Set up adequate lighting throughout the work area
Create clear access paths for moving materials safely
Weather-sealing the building envelope before insulation install delivers better results. Fix air gaps around windows, doors, and penetrations to prevent draughts that reduce insulation effectiveness.
Installing Wall Insulation
Wall insulation install requires attention to detail and proper technique to achieve the rated R-value. Gaps, compression, and poor fitting reduce performance significantly.
Measuring and Cutting Wall Batts
Measure the distance between studs at top, middle, and bottom, as timber framing isn't always perfectly straight or consistent. Most Australian homes use 90mm or 70mm studs with spacing of 450mm or 600mm centres.
Cut batts slightly wider than the measured space, typically 10-20mm oversize. This allows the batt to friction-fit snugly without gaps while avoiding compression that reduces R-value. Use a sharp knife and straight edge, cutting on a clean surface.
For quality wall insulation installation, the batts should fill the entire cavity depth without compressing, touching all six sides of the stud space.
Fitting and Securing Batts
Press batts gently into stud spaces, ensuring they sit flush against the wall sheathing or external cladding. The friction-fit should hold batts in place without additional fastening in most wall cavities.
Handle obstacles carefully. Cut neat openings around electrical boxes, pipes, and other penetrations. Split batts to fit around cables rather than compressing the insulation or leaving gaps.
Windows and doors require special attention. Cut batts to fit tightly against frames and jambs, filling all available space. Small gaps around openings create significant heat loss and air leakage.
Common Wall Installation Mistakes
Avoid these frequent problems during wall insulation install:
Compressing insulation around cables, pipes, or in cramped spaces
Leaving gaps at top plates, bottom plates, or between batts
Incomplete coverage behind plumbing, electrical boxes, or structural members
Mismatched R-values that create thermal bridges and condensation risks
Installing vapour barriers on the wrong side or in inappropriate climates
Australian homes generally don't require vapour barriers in walls unless specifically designed for certain climate conditions. Check local building requirements before adding any barrier products.
Ceiling and Roof Insulation Install
Ceiling insulation delivers the biggest energy efficiency improvement for most Australian homes. Hot air rises, making the ceiling the primary path for heat loss in winter and heat gain in summer.
Ceiling Batt Installation Techniques
Access your ceiling space safely using a sturdy ladder and adequate lighting. Place boards or planks across joists to create a safe working platform – never step between joists onto the ceiling material.
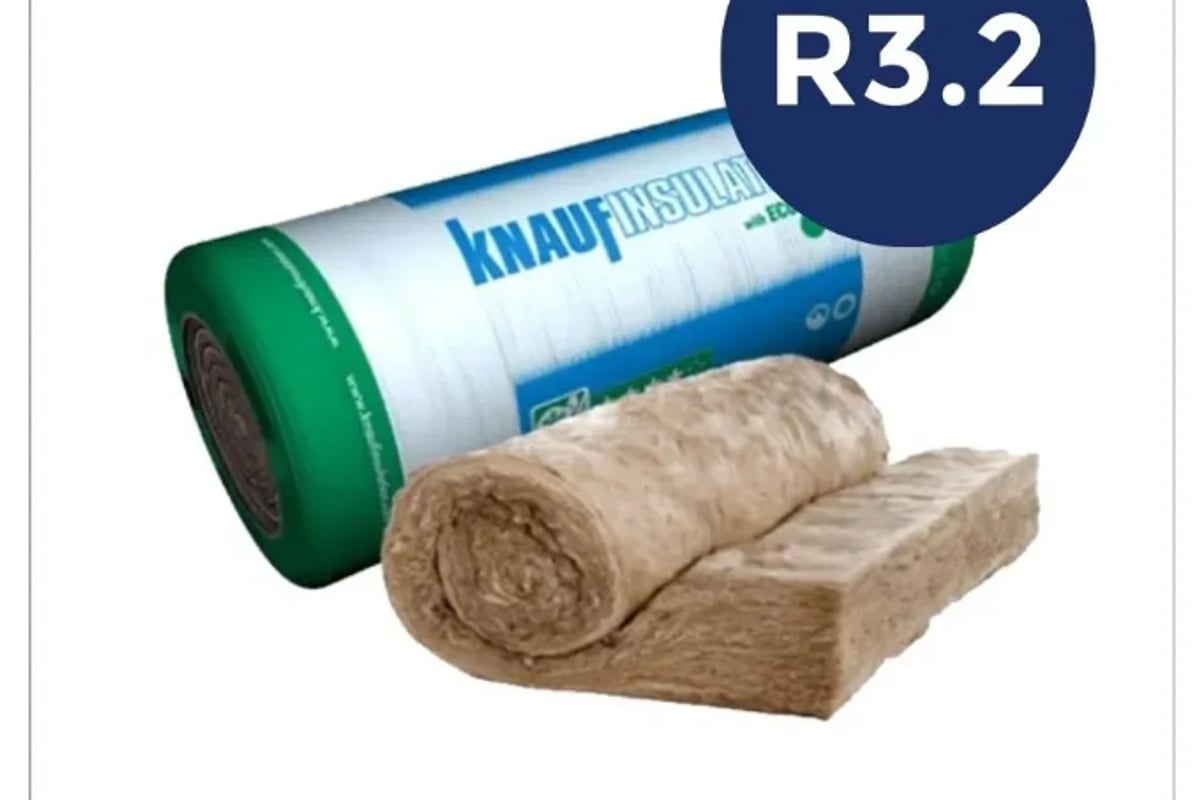
Lay batts perpendicular to ceiling joists, starting from the perimeter and working toward the centre. Ensure batts butt tightly together with no gaps. The Earthwool Blanket Unfaced R3.2 is particularly well-suited to ceiling insulation installs, offering strong thermal performance and easy handling in continuous roll format.
Maintain clearances around recessed lights (typically 200mm), exhaust fans, chimneys, and flues. These heat-producing fixtures require airflow for safe operation. Use appropriate barriers or guards to maintain separation.
Cover the entire ceiling area, including difficult spots above bathrooms, laundries, and hallways. Don't forget bulkheads, dropped ceilings, and storage areas – these spaces still transfer heat.
Working With Roof Blanket Products
Roof blanket insulation installs slightly differently than ceiling batts. These products typically sit directly under metal roofing, providing both thermal and acoustic benefits.
Unroll blankets across rafters, working from eave to ridge. Overlap edges by at least 100mm and ensure the product drapes between rafters without compression. Secure with battens or fixings according to manufacturer specifications.
Ventilation remains critical. Never block eave vents, ridge vents, or gable vents. Proper airflow prevents moisture accumulation and extends roof life while maintaining insulation performance.
Underfloor Insulation Install Methods
Underfloor insulation dramatically improves comfort in homes with suspended timber floors. It reduces heat loss, blocks draughts, and creates a warmer floor surface during winter.
Installing Underfloor Batts
Access underfloor areas through existing vents, hatches, or removable sections. Work carefully in confined spaces, watching for sharp nails, pipes, and electrical cables.
Push batts up between floor joists until they press against the underside of the floorboards. They should friction-fit without additional support in many cases. For R2.5 products like the Floorshield R2.5 Underfloor Batts, the right width ensures a snug fit that stays in place without sagging.
Support Method |
Best For |
Installation Notes |
|---|---|---|
Friction fit |
Standard joist spacing, appropriate batt width |
Quick installation, no fixings required |
Wire mesh/netting |
Wide joist spacing, windy locations |
Prevents sagging, requires stapling |
Plastic clips |
Retrofit situations, easy access |
Simple to install, reusable |
Garden stakes |
Ground-level access, temporary support |
Quick field solution |
Reflective Foil Underfloor Applications
Reflective foil products provide thermal and moisture control in one installation. They're particularly effective in underfloor spaces where radiant heat loss occurs through floor surfaces.
Staple foil to the underside of floor joists, ensuring the reflective surface faces up toward the floor. Overlap joints by at least 100mm and tape seams for continuous coverage. Leave a small air gap between the foil and flooring for optimal radiant heat reflection.
This approach works well in combination with batts for maximum performance, or alone in situations where ceiling height, access, or budget constraints limit options.
Installing Cavity Wall Insulation
Cavity walls in brick veneer construction require specific insulation products and techniques. The cavity typically ranges from 40mm to 90mm wide, creating unique installation challenges.
Choosing Cavity-Suitable Products
Not all insulation works in cavity walls. Products must be water-repellent, maintain their position when installed vertically, and fit the cavity width without compressing.
Partial-fill cavity batts like glasswool slabs are specifically designed for this application. They're cut to suit standard cavity widths and treated to resist moisture while maintaining thermal performance.
Installation During Construction
For new builds, install cavity insulation as walls progress. Place batts against the inner leaf (typically brick or blockwork), ensuring they don't protrude into the cavity drainage space. Maintain a clear 25mm minimum gap to the outer veneer for moisture drainage.
Proper cavity wall installation prevents dampness issues and ensures long-term performance. Never bridge the cavity with mortar droppings, ties covered in mortar, or compressed insulation.
Quality Installation Standards
The difference between adequate and excellent insulation install comes down to attention to detail and quality standards. Poor installation can reduce effectiveness by 30% or more.
The Grade 1 Installation Standard
Professional installers aim for Grade 1 installation, which means:
Complete coverage with no gaps, voids, or compressions
Proper fitting around obstacles and penetrations
Correct R-value for the application and climate zone
Appropriate air sealing and vapour management
Safe clearances maintained around heat sources
Following fundamentals of proper insulation installation ensures your project meets these standards and delivers the expected energy savings.
Self-Assessment Checklist
After completing your insulation install, check these quality markers:
Batts fill entire cavity depth without compression or gaps
All edges and perimeters are fully covered
No insulation touches or covers heat-producing equipment
Ventilation pathways remain clear and unobstructed
All penetrations and obstacles are properly fitted
Joins between batts are tight with no visible gaps
Appropriate R-value used for each application area
No moisture, sagging, or damaged insulation visible
Visual inspection reveals most installation problems. Look for light gaps showing through insulation in walls or ceilings – these indicate missing coverage that reduces performance.
Avoiding Common Installation Mistakes
Learning from common mistakes helps you avoid problems and achieve better results with your insulation install project.
Where NOT to Insulate
Certain areas should never be insulated, as doing so creates serious problems. Areas to avoid insulating include spaces that require ventilation, moisture management, or heat dissipation.
Never insulate these areas:
Directly against heat-producing appliances or chimneys
Around recessed light fittings without proper barriers
In poorly ventilated spaces prone to condensation
Over exhaust fans or bathroom/kitchen vents
Between roof cladding and sarking (unless designed for it)
In active moisture problem areas before fixing the cause
Moisture and Ventilation Considerations
Insulation install projects must account for moisture movement and ventilation requirements. Blocking natural airflow paths creates condensation, mould, and structural damage.
Maintain soffit vents, ridge vents, and wall cavity drainage. Don't seal roof spaces completely – they need controlled ventilation to manage moisture and heat buildup.
In wet areas like bathrooms and laundries, ensure exhaust fans vent outside, not into ceiling or wall cavities. Moisture trapped in insulated cavities causes long-term problems that expensive to remediate.
Specific Installation Scenarios
Different home types and construction methods require modified approaches to insulation install projects.
Retrofitting Older Homes
Many Victorian homes built before mandatory insulation requirements have little or no existing insulation. Retrofitting dramatically improves comfort and running costs.
Wall cavities in older homes may contain rubble, debris, or previous failed insulation. Clean cavities before installing new insulation for best results. Access may be limited, requiring creative solutions or professional assistance.
Ceiling spaces in older homes sometimes have insufficient clearance for modern R-values. In these cases, prioritize the highest R-value that fits without compression rather than leaving the space empty.
Pole Frame and Steel Frame Homes
Modern pole frame and steel frame construction uses different spacing and stud depths than traditional timber framing. Measure carefully and choose appropriately sized products.
Steel frames conduct heat, creating thermal bridges that reduce overall insulation effectiveness. Consider using insulation wraps or breaks at steel frame contact points for optimal performance.
Multi-Storey and Complex Layouts
Homes with multiple levels, cathedral ceilings, or complex rooflines present additional challenges. Plan access carefully and work systematically through each section.
Inter-storey floors benefit from insulation for both thermal and acoustic reasons. Choose products rated for both applications to improve comfort throughout the home.
Post-Installation Verification
After completing your insulation install, verify the work meets quality standards and delivers expected performance.
Visual Inspection
Walk through accessible areas checking for complete coverage, proper fitting, and no visible gaps. Use a torch to highlight any light penetration through wall or ceiling insulation.
Check that all clearances around heat sources remain adequate. Verify ventilation paths stayed clear throughout the installation process.
Thermal Performance Testing
While not always practical for DIY installations, thermal imaging cameras reveal gaps and missing insulation invisible to the eye. Many building inspectors and energy assessors offer this service affordably.
Compare energy bills over subsequent seasons to previous years (accounting for weather variations). Significant improvements in heating and cooling costs indicate successful insulation install.
Documentation and Compliance
Keep records of products used, including R-values, coverage areas, and installation dates. Take photos during installation showing coverage before walls or ceilings close in.
If required for building permits or compliance, arrange inspections before closing in insulated cavities. Some jurisdictions require certification for new construction or major renovations.
Maintaining Your Insulation Investment
Proper maintenance extends insulation life and maintains performance over decades.
Regular Inspection Schedule
Check ceiling insulation annually for sagging, moisture damage, or pest disturbance. Look for water stains indicating roof leaks that require immediate attention.
Inspect underfloor insulation every few years, particularly after plumbing work or pest control activities. Replace any damaged or displaced insulation promptly.
Addressing Problems Early
Small issues become major problems if ignored. Moisture damage, pest infestation, or displaced insulation reduces effectiveness and may indicate other building problems.
Fix roof leaks immediately before they damage insulation and structural members. Address plumbing leaks in walls or under floors before moisture spreads.
When to Upgrade or Replace
Insulation technology improves over time, and older products may not meet current standards. Consider upgrading when:
Existing insulation is damaged, compressed, or deteriorated
You're renovating and have cavity access
Energy bills seem excessive despite existing insulation
Comfort problems persist in extreme weather
Building codes have changed requiring higher R-values
Modern products like ECOSE® glasswool offer better performance, easier handling, and improved environmental credentials compared to insulation from even a decade ago.
Planning and completing a quality insulation install transforms your home's comfort, energy efficiency, and running costs. Whether you're tackling walls, ceilings, or underfloor spaces, following proper techniques ensures your investment delivers results for decades. When you're ready to start your insulation project, Insulation Supplies Australia offers Victoria's most comprehensive range of quality insulation products backed by expert advice, competitive pricing, and fast delivery across Melbourne and regional Victoria.