

Choosing the right insulation for roof spaces is one of the most effective ways to improve your home's energy efficiency and comfort. With up to 35% of heat loss and gain occurring through the roof, proper insulation makes a substantial difference to your energy bills and year-round comfort. Whether you're building a new home, renovating, or simply upgrading an existing roof, understanding your options helps you make informed decisions that deliver long-term value.
Understanding Roof Insulation and Why It Matters
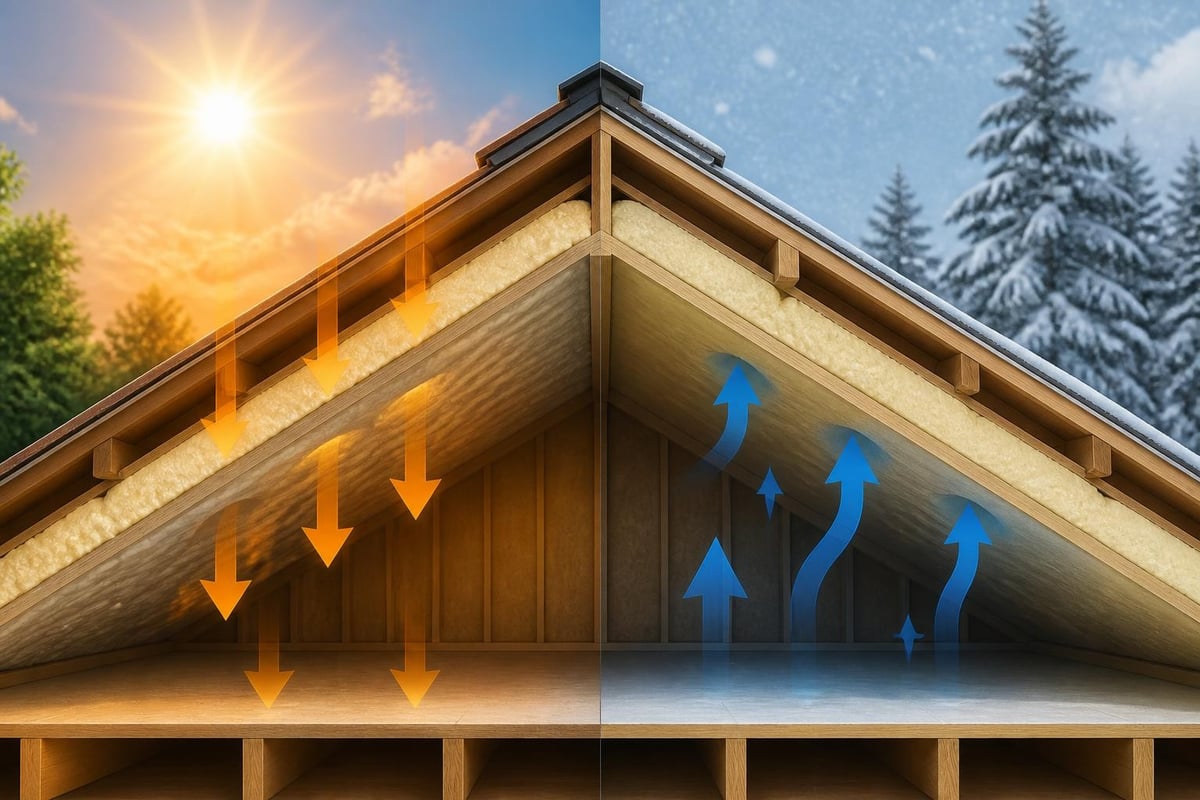
The roof is your home's first line of defence against Victoria's variable climate. During summer, the roof space can reach temperatures above 65°C, radiating heat down into living areas. In winter, warm air naturally rises and escapes through an uninsulated or poorly insulated roof. Quality insulation for roof applications acts as a thermal barrier, keeping heat out in summer and retaining warmth during colder months.
Beyond temperature control, roof insulation also provides acoustic benefits, reducing external noise from rain, hail, and neighbourhood sounds. It helps protect your roof structure from condensation-related issues and contributes to a more stable indoor environment throughout the year.
How Roof Insulation Works
Insulation works by slowing the transfer of heat through conduction, convection, and radiation. Different materials address these heat transfer methods in varying ways:
- Bulk insulation (glasswool, polyester, rockwool) traps air within its structure, reducing conductive and convective heat flow
- Reflective insulation uses metallic foil surfaces to reflect radiant heat away from living spaces
- Composite systems combine both approaches for maximum thermal performance
The effectiveness of insulation for roof spaces is measured by its R-value. Higher R-values indicate greater thermal resistance and better insulating performance. The Building America Solution Center provides detailed guidance on roof assembly configurations and performance targets for different climate zones.
Types of Insulation for Roof Applications
Selecting the right type of insulation depends on your roof design, climate zone, budget, and installation method. Each material offers distinct advantages for different scenarios.
Glasswool Blanket Insulation
Glasswool blanket remains the most popular choice for roof insulation across Victoria. These flexible rolls fit easily between and over roof battens or ceiling joists, delivering excellent thermal and acoustic performance.
Key characteristics:
- Available in R-values from R1.3 to R7.0+
- Lightweight and easy to handle with proper PPE
- Non-combustible and moisture-resistant when using quality products
- Excellent acoustic absorption properties
- Cost-effective for most residential applications
Modern glasswool products manufactured with ECOSE® Technology are softer to touch, contain no added formaldehyde, and produce less dust during installation. For homes in Melbourne's variable climate, R3.0 to R4.0 typically provides good year-round performance, though higher R-values deliver better energy savings.
Glasswool Batts for Ceilings
Pre-cut batts fit between standard ceiling joist spacings (typically 430mm or 580mm centres). They're ideal for new construction or when ceiling access is readily available.
| R-Value | Thickness | Best Application | Climate Suitability |
|---|---|---|---|
| R2.5-R3.0 | 90-120mm | Mild climates, budget projects | Moderate zones |
| R3.5-R4.0 | 165-195mm | General residential | All Victorian climates |
| R5.0-R6.0 | 230-275mm | High performance, cold areas | Cold zones, high efficiency goals |
| R7.0-R8.0 | 330-350mm | Premium performance | Passive house, extreme climates |
For homeowners installing insulation for roof cavities themselves, batts offer the simplest installation process. They're friction-fitted between joists and require no fastening in most applications.
Reflective Foil Insulation
Reflective insulation products use aluminium foil laminated to other materials, creating an effective radiant barrier. When installed with the correct air gap, they reflect up to 97% of radiant heat.
Reflective foil works best in combination with bulk insulation rather than as a standalone solution. In roof applications, it's commonly installed:
- Under metal roofing as a sarking layer
- Above ceiling insulation as an additional radiant barrier
- As roof cavity wrapping in specific assembly types
The ASHRAE Handbook provides technical details on calculating effective R-values for reflective insulation systems, which depend heavily on air gap dimensions and orientation.
Rigid Board Insulation
Rigid boards made from extruded polystyrene (XPS) or polyisocyanurate (PIR) offer high R-values per millimetre of thickness. While less common in traditional pitched roofs, they're valuable for:
- Cathedral ceilings where space is limited
- Above-deck applications on flat or low-slope roofs
- Retrofit situations requiring minimal thickness
- Areas requiring high compressive strength
Rigid boards typically require professional installation and careful attention to joints and sealing to maintain thermal performance.
Choosing the Right R-Value for Your Roof
Victoria's climate zones and the National Construction Code (NCC) set minimum insulation standards, but optimal R-values depend on several factors.
Climate Zone Requirements
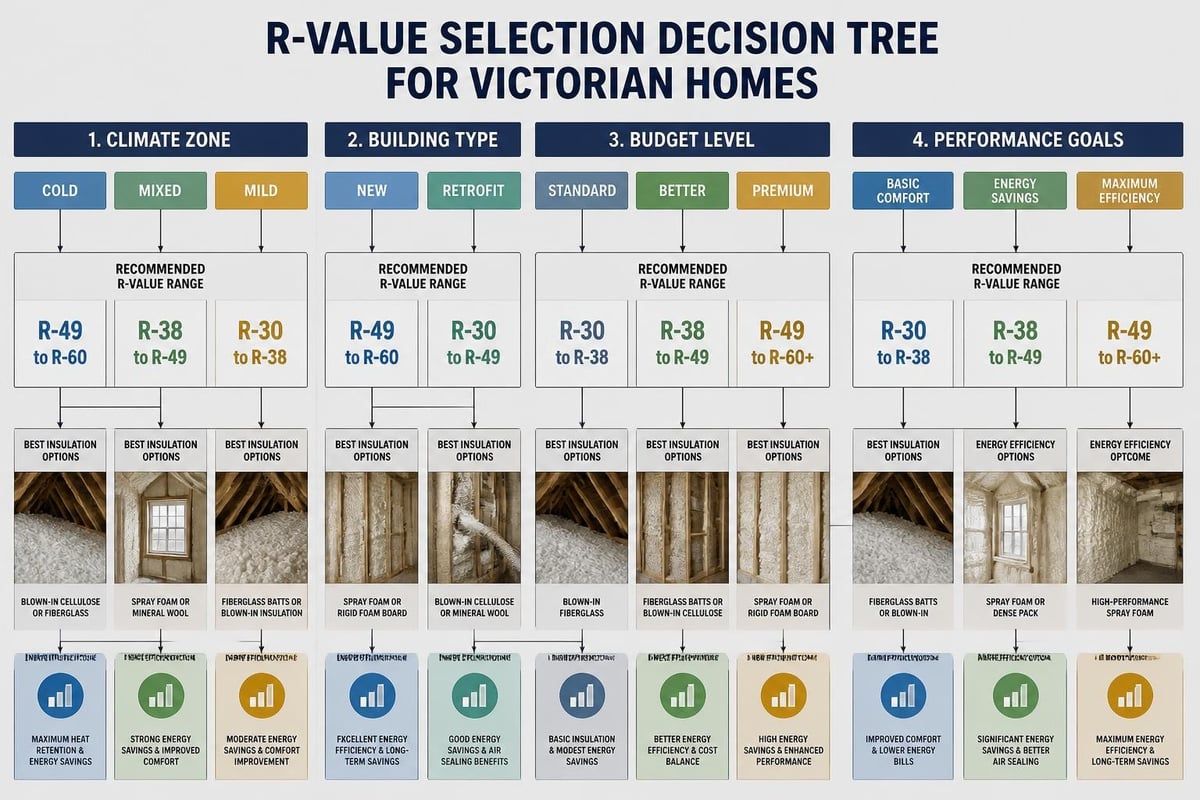
Melbourne and most of Victoria fall within NCC Climate Zone 6, which recommends minimum ceiling R-values of R4.1 for general residential construction. However, many homeowners choose higher values for improved comfort and energy savings.
Recommended R-values by objective:
- Meeting minimum code: R4.1-R4.5
- Good year-round comfort: R5.0-R6.0
- High-performance homes: R6.0-R8.0
- Passive house standards: R8.0+
Coastal areas with milder climates might function adequately with R3.5-R4.0, while homes in the Dandenong Ranges or other elevated, cooler regions benefit significantly from R6.0 or higher. The Home Energy Saver documentation from Lawrence Berkeley National Laboratory provides modeling tools to estimate energy savings from different insulation levels.
Roof Type Considerations
Different roof constructions require specific approaches to insulation for roof spaces:
Pitched roofs with ceiling access: Install insulation on the ceiling plane (horizontal), which is easier and more cost-effective than insulating the roof plane itself. This approach creates an insulated envelope at the ceiling level, leaving the roof cavity as unconditioned space.
Cathedral or raked ceilings: Insulation must be installed within the roof cavity between rafters, often requiring multiple layers or higher-density products to achieve good R-values in limited space. Ventilation paths must be maintained above the insulation.
Flat or low-slope roofs: Above-deck rigid board insulation often works best, installed above the structural deck but below the waterproofing membrane. This approach eliminates thermal bridging through roof framing.
Metal roofs: Require anti-condensation blanket or proper sarking beneath the roofing to manage condensation risk and provide secondary weather protection.
The Whole Building Design Guide offers comprehensive technical guidance on roof assembly design for various roofing types and insulation strategies.
Installation Methods and Best Practices
Proper installation is critical to achieving the rated R-value of any insulation for roof applications. Poor installation can reduce thermal performance by 30-50%, wasting money and compromising comfort.
Preparing for Installation
Before installing roof insulation, ensure:
- The roof structure is sound with no leaks or damage
- Adequate ventilation exists or will be provided (where required)
- Electrical wiring is in good condition and will be accessible
- Any required ceiling penetrations (downlights, exhaust fans) are planned
- Safety equipment is ready (dust mask, gloves, long sleeves, eye protection)
Check for existing insulation that may need removal or supplementation. Older homes often have inadequate or degraded insulation that should be upgraded.
Installing Blanket Insulation
For DIY installation of glasswool blanket products:
- Measure and cut: Measure the required length, adding 50-100mm for compression at ends. Cut with a long blade or insulation knife on a clean surface.
- Fit between joists: Place insulation between ceiling joists, ensuring it sits flat without gaps. Don't compress the insulation as this reduces R-value.
- Work around obstacles: Cut carefully around wiring, plumbing, and other penetrations. Maintain required clearances from recessed lights.
- Add top layer if required: For higher R-values, install a second perpendicular layer over joists, ensuring complete coverage.
- Seal penetrations: Use appropriate methods to seal gaps around pipes, vents, and other ceiling penetrations.
When working with glasswool insulation for roof spaces, the Insulation Institute recommends always wearing protective equipment and working during cooler parts of the day in summer to avoid heat stress.
Installing Batt Insulation
Pre-cut batts follow similar principles:
- Select the correct batt width for your joist spacing (430mm or 580mm)
- Friction-fit batts between joists, ensuring they sit firmly without gaps
- Split batts carefully to fit around obstacles rather than compressing them
- Maintain clearances from heat sources and ensure adequate ventilation
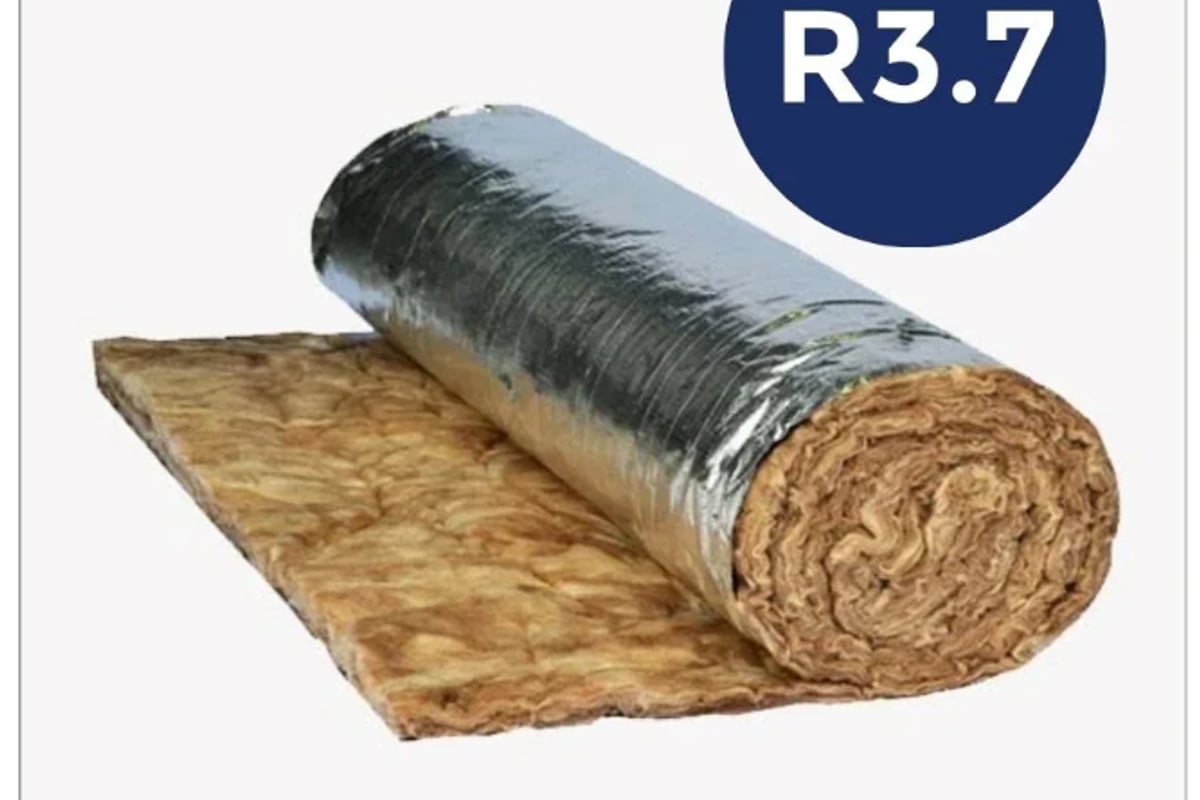
For superior thermal performance in Melbourne homes, products like the Thermal Blanket R3.7 22kg/m³ 130mm x 1.2m Roof Insulation Blanket deliver excellent R-value in a high-density glasswool construction. Its 130mm thickness fits most standard roof cavities while providing strong insulation performance for both hot summers and cold winters.
Common Installation Mistakes to Avoid
Avoid these frequent errors that compromise insulation performance:
- Compression: Squashing insulation reduces trapped air and lowers R-value significantly
- Gaps: Even small gaps allow heat to bypass the insulation (thermal bridging)
- Covering downlights: Creates fire hazard unless using IC-rated fittings with proper clearances
- Blocking ventilation: Roof spaces often need airflow; don't block eave vents or ridge ventilation
- Moisture barriers facing wrong way: Foil-faced products usually have the foil facing down in ceiling applications
- Incomplete coverage: Missing areas over walls, bulkheads, or hard-to-reach zones create cold spots
The EPA's indoor air quality guidance emphasises the importance of proper moisture management when insulating, particularly in roof spaces where condensation risk exists.
Ventilation and Moisture Management
Adequate ventilation prevents moisture buildup that can damage roof structures and reduce insulation effectiveness. While insulation for roof applications dramatically improves thermal performance, it must work in harmony with proper ventilation design.
Ventilation Requirements
Different roof types have varying ventilation needs:
Pitched roofs with horizontal ceiling insulation: Roof cavity should be ventilated through eave vents and ridge or gable vents, allowing natural airflow to remove heat and moisture. Minimum free ventilation area is typically 1/150 of the ceiling area.
Cathedral ceilings: Require ventilation channels above the insulation, typically 25-50mm clear airspace, with inlet vents at eaves and outlet at ridge. Baffles or chutes maintain the air path.
Flat roofs: Often designed as either fully ventilated (cold roof) or fully sealed (warm roof) systems. Hybrid approaches require careful design to avoid condensation issues.
Managing Condensation Risk
When warm, moist air contacts cold surfaces, condensation occurs. In roof spaces, this typically happens:
- On the underside of metal roofing without proper sarking
- On cold surfaces in inadequately ventilated roof cavities
- When vapour barriers are incorrectly positioned
Condensation control strategies:
- Install anti-condensation blanket under metal roofing
- Ensure adequate roof cavity ventilation
- Position vapour barriers on the warm side of insulation
- Seal ceiling penetrations to limit moisture entering roof space
- Provide exhaust fans in bathrooms and kitchens venting directly outside
| Roof Type | Ventilation Strategy | Moisture Control |
|---|---|---|
| Pitched with attic | Eave + ridge vents | Ceiling vapour barrier |
| Cathedral | Ventilation channels | Sealed roof deck option |
| Metal roof | Sarking + vents | Anti-condensation blanket |
| Flat roof | Cold deck or warm deck | System-specific approach |
For quality products and expert guidance on selecting insulation for roof projects, Insulation Supplies Australia offers comprehensive product ranges with detailed specifications and technical support.
Energy Efficiency and Cost Savings
Investing in quality insulation for roof spaces delivers measurable returns through reduced energy consumption and improved comfort.
Quantifying Energy Savings
The actual savings depend on:
- Existing insulation level (or lack thereof)
- New insulation R-value
- Home size and design
- Climate zone
- Heating and cooling systems
- Energy prices
As a general guide, upgrading from no insulation to R4.0 ceiling insulation can reduce heating and cooling energy use by 40-50% in Victorian homes. Moving from R2.0 to R6.0 might save an additional 15-20%.
Example savings scenario: A typical 150m² Melbourne home spending $1,800 annually on heating and cooling might save:
- $720-900 per year upgrading from no insulation to R4.0
- $1,080-1,260 per year upgrading from no insulation to R6.0
- $270-360 per year upgrading from R2.0 to R6.0
These savings continue year after year, typically recovering installation costs within 3-7 years while improving comfort immediately.
Payback Periods and ROI
Higher R-value insulation costs more upfront but delivers greater long-term savings. The optimal choice balances initial cost with ongoing benefits.
Typical payback periods for DIY installation:
- R3.5-R4.0 upgrade: 3-5 years
- R5.0-R6.0 upgrade: 5-7 years
- R7.0+ upgrade: 7-10 years
Professional installation adds labour costs but ensures correct installation, which directly impacts long-term performance. Consider the total lifecycle cost rather than just initial price.
Government Rebates and Incentives
Check current Victorian Energy Upgrades (VEU) program offerings and federal government incentives that may reduce insulation costs. Programs change periodically, so verify current eligibility before purchasing.
Acoustic Benefits of Roof Insulation
While thermal performance drives most insulation decisions, acoustic control offers significant quality-of-life benefits, particularly under metal roofs or in noisy locations.
How Insulation Reduces Noise
Bulk insulation materials absorb sound energy, reducing noise transmission through the roof assembly. Higher density products and greater thickness provide better acoustic performance.
Noise sources managed by roof insulation:
- Rain and hail impact noise
- Aircraft and traffic sounds
- Neighbourhood activity
- Wind and weather noise
Glasswool and polyester insulation for roof applications typically perform better acoustically than foam or reflective products. A minimum R-value of R3.5 provides noticeable noise reduction, while R5.0+ delivers excellent acoustic comfort.
For homes near airports, main roads, or in dense urban areas, choosing insulation partly for acoustic performance enhances livability significantly. The density and thickness matter more for sound absorption than for thermal resistance alone.
Retrofit vs New Construction Considerations
Installing insulation for roof spaces differs significantly between new builds and retrofit situations.
New Construction Advantages
Building new allows:
- Selection of optimal roof and ceiling designs for insulation
- Installation before ceiling lining goes up (easier access)
- Integration of ventilation, vapour barriers, and insulation in the original design
- Planning ceiling penetrations (lights, fans) with insulation in mind
- Meeting current NCC requirements from the start
Choose higher R-values during construction since the incremental cost is relatively small compared to upgrading later.
Retrofit Challenges and Solutions
Existing homes present obstacles:
- Limited ceiling access: Small manholes or no access at all
- Existing wiring and services: Must work around obstacles
- Ceiling fixtures: Downlights, fans, and vents complicate installation
- Unknown roof condition: May discover issues requiring repair first
- Insulation removal: Older insulation might need removal
Retrofit strategies:
- Create adequate access points if necessary (with proper ceiling repair)
- Use flexible blanket products that navigate obstacles easier than batts
- Consider professional installation for difficult layouts
- Address roof leaks and structural issues before insulating
- Work in stages if budget is limited (prioritize most-used areas)
Even with challenges, retrofitting insulation for roof cavities in older homes delivers significant benefits and is almost always cost-effective over a 5-10 year timeframe.
Safety Considerations When Installing Roof Insulation
Working in roof spaces requires attention to safety hazards beyond the insulation material itself.
Personal Protective Equipment
Always wear appropriate PPE:
- Dust mask or respirator (P2 rated minimum)
- Safety glasses or goggles
- Long-sleeved shirt and long pants
- Gloves
- Sturdy footwear
- Hard hat if required
Modern glasswool products are less irritating than older materials, but protection remains important for comfort and health.
Working Safely in Roof Spaces
Roof cavity hazards include:
- Fall risk: Step only on ceiling joists, never between them on ceiling lining
- Heat stress: Roof spaces reach extreme temperatures in summer
- Electrical hazards: Live wiring throughout the space
- Sharp objects: Exposed nails, wire, and metal edges
- Poor lighting: Bring adequate portable lighting
- Limited ventilation: Roof spaces can have poor air quality
Safety practices:
- Work during cooler times of day, especially in summer
- Use crawl boards to distribute weight across joists
- Ensure adequate lighting from multiple angles
- Have a helper outside the roof space who can assist if needed
- Take regular breaks and stay hydrated
- Turn off power to circuits in the work area if working near electrical
- Avoid working alone in extreme heat
If you're uncomfortable working in roof spaces, professional installation is a worthwhile investment for safety and peace of mind.
Maintaining Your Roof Insulation
Once installed, insulation for roof applications requires minimal maintenance but should be checked periodically to ensure ongoing performance.
Inspection Schedule
Check roof insulation:
- Every 3-5 years as part of routine home maintenance
- After any roof repairs or renovations
- If you notice changes in energy bills or comfort
- Following severe weather events
- Before selling the property
What to Look For
During inspections, check for:
- Compression or displacement of insulation
- Water staining indicating roof leaks
- Animal or pest activity
- Deterioration or damage to insulation
- Gaps that have developed over time
- Electrical work that may have disturbed insulation
Address any issues promptly to maintain thermal performance and prevent further damage.
When to Upgrade
Consider upgrading roof insulation when:
- Current insulation is less than R3.0
- You're undertaking other roof or ceiling work
- Energy bills seem high despite other efficiency measures
- Comfort issues persist (too hot in summer, cold in winter)
- Existing insulation is damaged or deteriorated
- You're aiming for higher energy efficiency ratings
Modern insulation products offer better performance and easier installation than materials from even 10-15 years ago, making upgrades worthwhile.
Insulation and Building Codes
Understanding relevant building codes ensures your insulation for roof project meets legal requirements and performs as expected.
National Construction Code Requirements
The NCC specifies minimum R-values for different climate zones and building types. For Victoria (Climate Zone 6), residential ceiling insulation requirements are:
- Minimum total R-value: R4.1
- Higher values required for certain building classes
- Different requirements for heating vs cooling dominated climates
The Australian Building Codes Board (ABCB) publishes detailed requirements and updates regularly. Always check current standards before starting projects.
Compliance and Documentation
For owner-builders and DIY renovators:
- Keep documentation of insulation R-values and installation
- Ensure work meets NCC requirements
- Obtain necessary permits for significant renovations
- Maintain records for property sale purposes
Professional installers should provide compliance certificates and documentation of R-values achieved.
Building Performance Considerations
Beyond minimum code requirements, consider whole-building performance:
- Air sealing complements insulation effectiveness
- Window selection impacts overall thermal performance
- Mechanical systems should be sized for well-insulated homes
- Thermal mass and orientation affect insulation needs
Resources like the YourHome design guide provide comprehensive information on building performance optimization for Australian climates.
Choosing Quality Insulation Products
Not all insulation for roof applications performs equally, even at the same R-value. Product quality affects durability, installation ease, and long-term performance.
Quality Indicators
Look for:
- Australian Standards compliance: AS/NZS 4859 series
- CodeMark certification: Demonstrates NCC compliance
- Manufacturer reputation: Established brands with proven performance
- Environmental credentials: Products with reduced environmental impact
- Warranty coverage: Longer warranties indicate manufacturer confidence
- Technical specifications: Complete product data including density, thickness, coverage
Comparing Products
When comparing insulation options:
| Factor | Why It Matters | What to Compare |
|---|---|---|
| R-value per thickness | Space efficiency | R-value divided by thickness |
| Density | Acoustic performance, durability | kg/m³ rating |
| Coverage per pack | Project planning, cost | m² per pack or roll |
| Price per m² | True cost comparison | Total cost divided by coverage |
| Handling characteristics | Installation ease | Dust, flexibility, irritation |
Where to Buy
Purchase insulation for roof projects from reputable suppliers offering:
- Wide product selection across R-values and types
- Accurate product information and specifications
- Technical support and advice
- Competitive pricing
- Reliable delivery
- Quality assurance
Avoiding inferior products ensures your investment delivers expected performance and longevity. Quality insulation from trusted manufacturers typically carries warranties of 50 years or more when properly installed.
Installing quality insulation for roof spaces delivers immediate comfort improvements and long-term energy savings while reducing your home's environmental impact. Whether you're building new, renovating, or simply upgrading existing insulation, choosing the right products and installation approach ensures optimal performance for decades. Insulation Supplies Australia offers Victoria's most comprehensive range of ceiling and roof insulation products, combining competitive prices with expert advice and fast delivery. Browse our complete selection or contact our team for personalised guidance on selecting the perfect insulation solution for your project at Insulation Supplies Australia.