

Insulation bubble wrap has become a popular topic among Australian homeowners looking for affordable thermal solutions. This reflective foil product, often called bubble foil insulation or radiant barrier insulation, combines layers of aluminium foil with polyethylene bubbles to create a lightweight membrane. While it's commonly used in sheds, garages and underfloor applications, understanding its actual performance and proper use is essential before you commit to a purchase. This guide covers everything Victorian renovators and builders need to know about insulation bubble wrap in 2026.
What Is Insulation Bubble Wrap and How Does It Work
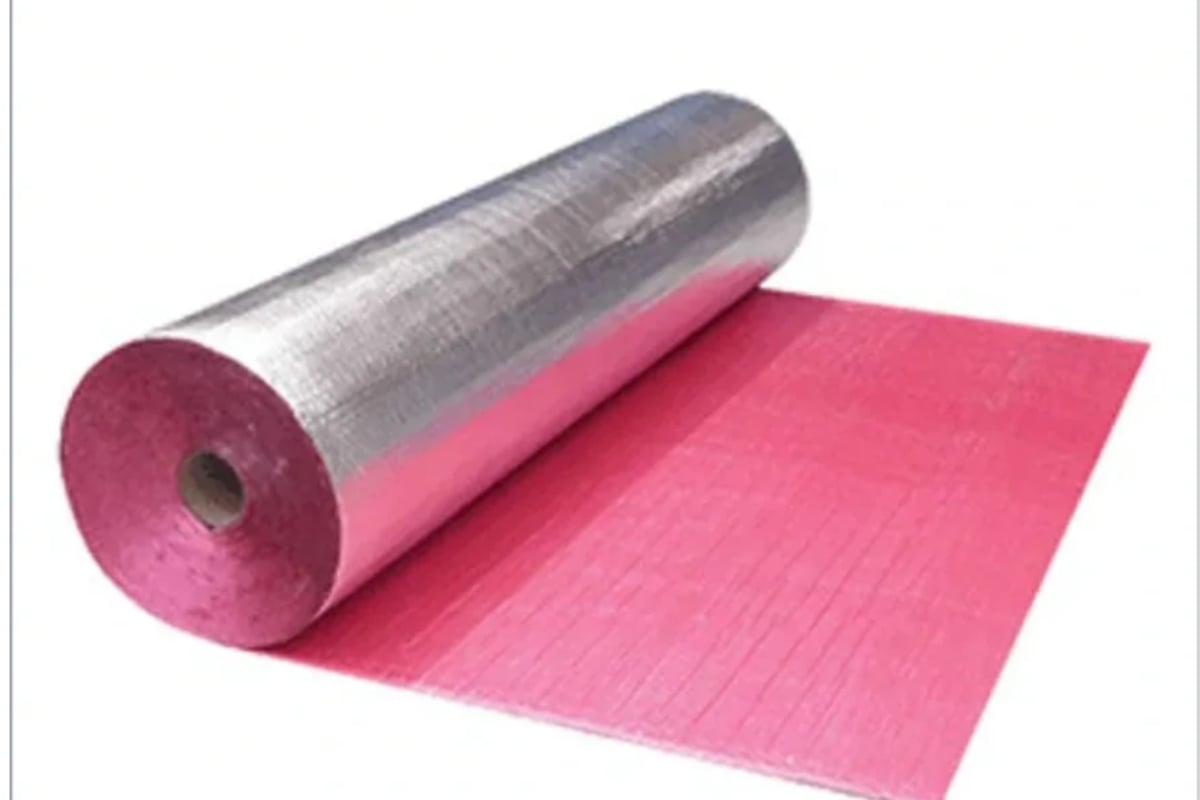
Insulation bubble wrap consists of one or two layers of reflective aluminium foil bonded to a core of polyethylene air bubbles. The product typically comes in rolls 1200mm to 1500mm wide and 20m to 50m long, making it easy to handle on site.
The thermal performance relies on two mechanisms. First, the reflective foil surfaces reduce radiant heat transfer by reflecting up to 97% of radiant energy. Second, the air bubbles provide a small amount of conductive resistance. However, the product only delivers its claimed performance when installed with an air gap on at least one side.
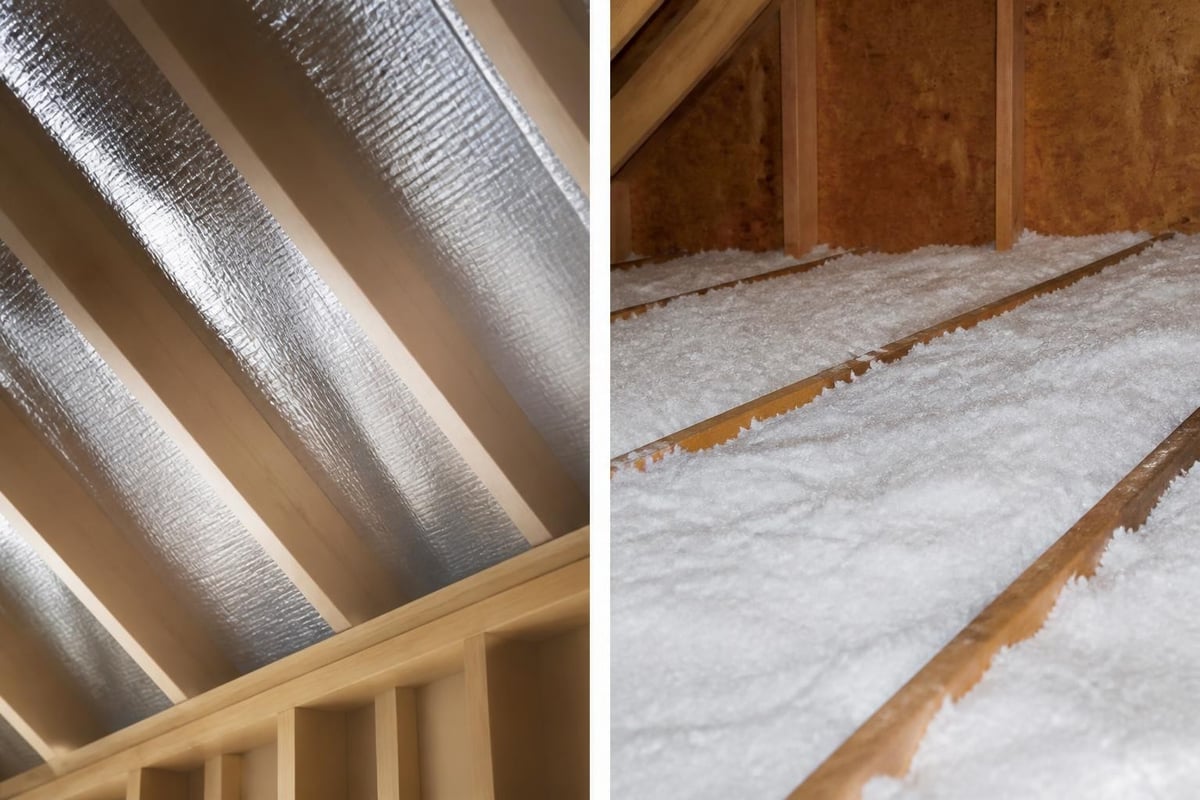
How Reflective Insulation Differs from Traditional Products
Unlike glasswool or polyester batts that trap air within fibres, insulation bubble wrap works by reflecting heat rather than absorbing it. According to Natural Resources Canada's guidance on reflective insulation, these products require proper installation with air spaces to function effectively.
Key differences include:
- Reflective systems need air gaps to work properly
- Performance drops dramatically when compressed or in direct contact with surfaces
- R-values are context-dependent and vary with installation method
- Much thinner than traditional insulation (typically 4mm to 10mm thick)
- Lightweight and easier to handle than bulk insulation
Traditional products like Earthwool batts provide consistent R-values regardless of air gaps, making them more predictable for meeting Building Code requirements.
Performance and R-Values: Setting Realistic Expectations
The R-value of insulation bubble wrap depends entirely on how it's installed. Manufacturers often quote values ranging from R1.0 to R2.0, but these numbers assume specific installation configurations.
| Installation Method | Typical R-Value | Air Gap Requirement |
|---|---|---|
| Horizontal (upward heat flow) | R1.2 - R1.8 | 25mm minimum both sides |
| Vertical installation | R0.8 - R1.2 | 25mm one side |
| Horizontal (downward heat flow) | R0.6 - R1.0 | 25mm one side |
| Direct contact (no air gap) | R0.1 - R0.3 | None (poor performance) |
Research published in De Gruyter's Engineering journal evaluated reflective insulation performance in Southeast Asian climates and found significant variation in real-world conditions. Field measurements showed actual thermal resistance often fell below laboratory values when air gaps weren't maintained consistently.
When Bubble Foil Makes Sense
Insulation bubble wrap works best as a supplementary product rather than a primary insulation layer. It performs well in specific applications where space is limited or where you're primarily blocking radiant heat.
Suitable applications:
- Underfloor draught barriers in suspended timber floors
- Shed and garage roof lining with proper air gap
- Temporary site protection during construction
- Supplementary barrier behind cladding (with ventilation)
- Attic stairs and access hatches
For ceiling insulation in habitable rooms, you'll typically need higher R-values than bubble wrap alone can provide. Victoria's climate zones generally require R4.0 to R6.0 in ceilings to meet energy efficiency standards.
Installation Methods and Critical Details
Proper installation determines whether insulation bubble wrap delivers any meaningful benefit. The Insulation Institute's technical bulletin MB313 outlines detailed requirements for reflective insulation systems.
Creating and Maintaining Air Gaps
The air gap is non-negotiable for reflective performance. When the foil surface touches another material, it conducts heat directly, defeating the reflective mechanism.
Steps for correct installation:
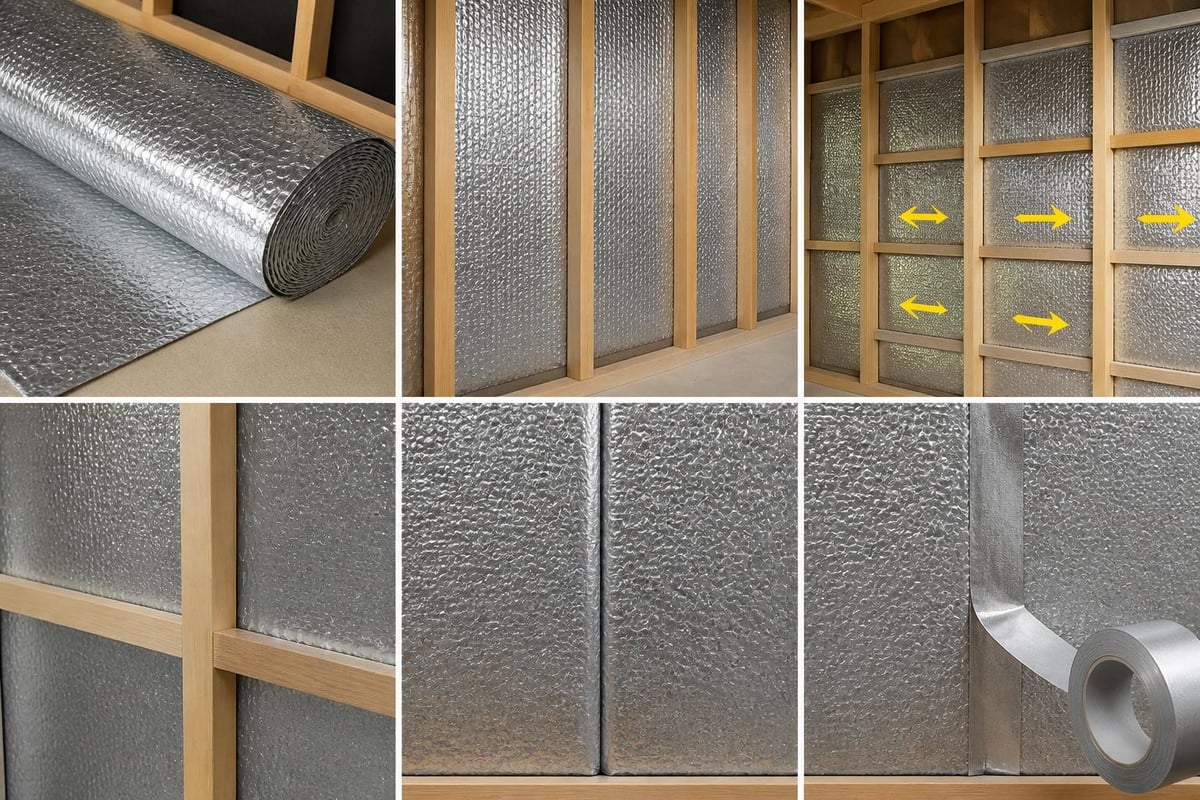
- Install battens or spacers to create minimum 25mm air gap
- Unroll the bubble wrap across the surface
- Staple or fix to framing, keeping material taut but not compressed
- Overlap seams by at least 100mm
- Tape all joints with aluminium foil tape (not standard duct tape)
- Ensure ventilation paths remain clear at edges
Never compress insulation bubble wrap against ceiling joists or wall studs. The bubbles provide minimal resistance, and crushing them further reduces the already-limited conductive performance.
Common Installation Mistakes
Many DIY installers compromise performance through simple errors. The reflective surfaces must face an air space to work effectively.
- Mistake 1: Installing without air gaps on either side
- Mistake 2: Using standard duct tape instead of foil tape (fails over time)
- Mistake 3: Blocking roof ventilation paths, creating moisture issues
- Mistake 4: Assuming the product meets R-value requirements without verification
- Mistake 5: Installing in direct contact with roofing or plasterboard
When working on underfloor insulation, products specifically designed for that application often perform better than general-purpose bubble wrap. The underfloor environment requires moisture resistance and secure attachment methods that standard bubble foil may not provide.
If you need proven thermal performance for suspended floors, consider purpose-built solutions that combine vapour barriers with higher insulation values to meet code requirements and improve comfort year-round.
Fire Safety and Building Code Compliance
Fire performance is a critical consideration often overlooked when selecting insulation bubble wrap. All insulation products must comply with Australian Building Code requirements, and reflective foils present specific fire safety challenges.
The ICC code discussion documents reference NFPA 286 testing for reflective insulation products, highlighting the importance of proper fire testing for wall and ceiling applications.
Material Flammability Characteristics
Most insulation bubble wrap products use polyethylene bubbles, which are combustible. The aluminium foil provides some flame spread resistance, but the plastic core can melt and contribute to fire development.
| Fire Test | Requirement | Typical Bubble Wrap Performance |
|---|---|---|
| AS/NZS 1530.3 (Spread of Flame) | Index ≤ 5 for walls/ceilings | Varies by product (check certification) |
| AS 3837 (combustibility) | Group 3 (non-combustible) ideal | Usually Group 4 (combustible) |
| Smoke development | Lower is better | Moderate to high (plastic content) |
Always verify the specific product's fire certification before installation. Some applications, particularly in habitable rooms, may require additional protection such as plasterboard lining.
Where You Can and Cannot Use Bubble Foil
Building regulations limit where combustible insulation can be installed without protection. For most Victorian residential applications, reflective bubble insulation requires a protective barrier.
Generally acceptable applications:
- Underfloor areas (below timber floors)
- Sheds and garages (non-habitable)
- Behind non-combustible cladding with proper separation
Requires additional fire protection:
- Ceiling insulation in habitable rooms (must be covered by plasterboard)
- Internal wall cavities in multi-storey buildings
- Areas near heat sources or electrical equipment
For ceiling applications in homes, traditional glasswool or polyester batts provide better fire safety alongside superior thermal performance. These products are non-combustible and don't require additional protective layers.
Cost Comparison and Value Analysis
Insulation bubble wrap appears inexpensive when comparing roll prices, but the actual cost per R-value reveals a different picture. A typical 30m² roll costs between $80 and $150 depending on thickness and brand.
Calculating Real Cost Effectiveness
To compare fairly, calculate the cost per square metre per R-value unit. This shows how much insulation value you're actually purchasing.
Example comparison (approximate 2026 prices):
| Product Type | Coverage | Typical R-Value | Cost per Roll | Cost per m² | Cost per R-value unit |
|---|---|---|---|---|---|
| Bubble wrap (basic) | 30m² | R1.0 | $100 | $3.33 | $3.33 |
| Bubble wrap (premium) | 30m² | R1.5 | $140 | $4.67 | $3.11 |
| Polyester batts R2.5 | 13.5m² | R2.5 | $80 | $5.93 | $2.37 |
| Glasswool batts R4.0 | 10m² | R4.0 | $95 | $9.50 | $2.38 |
While the upfront cost per square metre looks attractive, you're getting significantly less thermal resistance. To match R4.0 performance using bubble wrap (if even possible), you'd need multiple layers with air gaps between each layer, dramatically increasing both cost and complexity.
Long-Term Performance Considerations
Insulation bubble wrap faces durability challenges that affect long-term value. The reflective foil can degrade, particularly in hot roof spaces where temperatures exceed 60°C.
Common degradation issues include:
- Foil delamination from bubble core
- Tape failure at seams (allowing air leakage)
- Bubble punctures during installation or from roof movement
- Dust accumulation on reflective surfaces (reducing performance)
- UV damage if exposed to sunlight during storage or installation
Traditional bulk insulation products like glasswool maintain stable performance for 50+ years when properly installed. This longevity justifies the higher initial cost per square metre for primary insulation applications.
Combining Bubble Wrap with Other Insulation Types
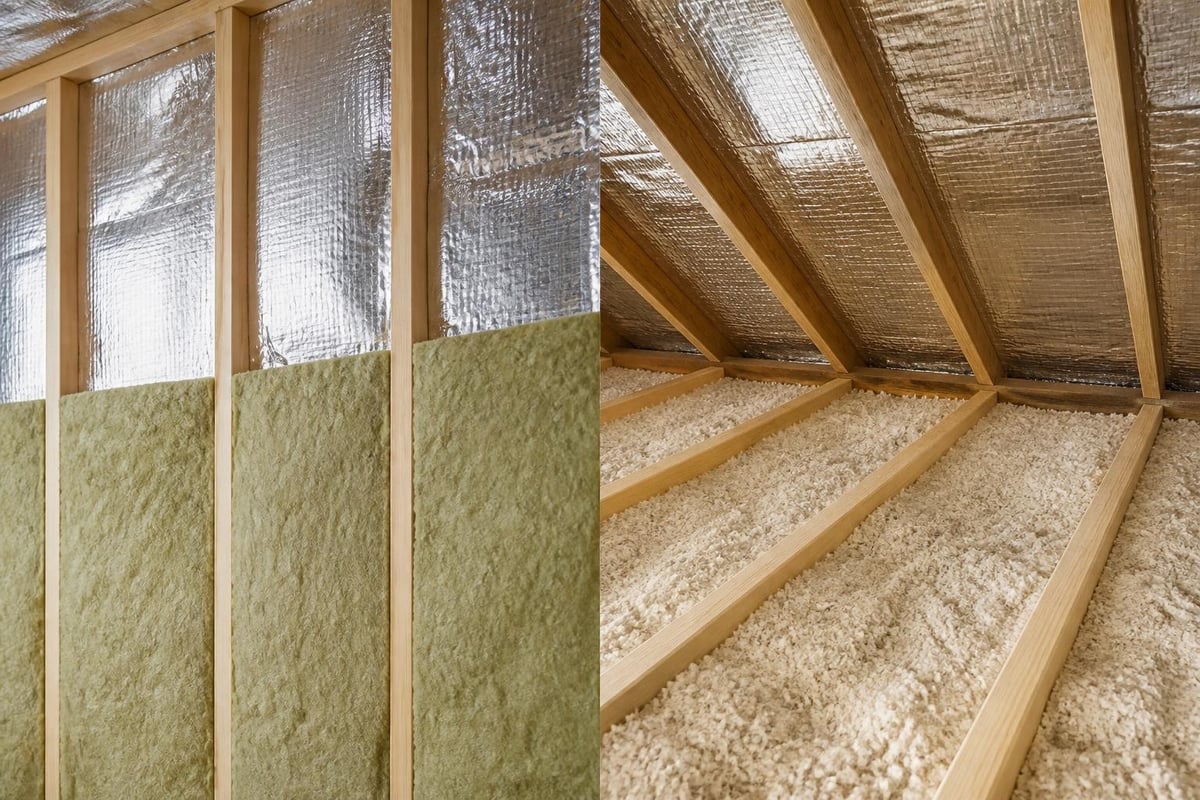
One effective strategy uses insulation bubble wrap as a supplementary barrier alongside higher-performance bulk insulation. This approach can address both radiant and conductive heat transfer.
Roof and Ceiling Systems
In ceiling applications, combining products can improve performance beyond either material alone. A recent study in Scientific Reports examined composite insulation systems, finding that proper integration of radiant barriers with expanded polystyrene improved overall thermal performance.
Recommended ceiling assembly (top to bottom):
- Metal roofing
- Roof battens (creating ventilation gap)
- Reflective foil sarking (separate product from bubble wrap)
- Timber rafters
- Bulk insulation (R4.0 to R6.0 batts between rafters)
- Plasterboard ceiling
This configuration provides radiant barrier benefits without relying on bubble wrap's limited R-value for primary insulation. The bulk insulation handles the conductive heat transfer that dominates in most Australian climates.
Underfloor Applications
Suspended timber floors benefit from both thermal resistance and draught sealing. Using reflective underfloor wrap can block cold air movement while providing modest insulation value.
For better results, consider combining:
- Reflective underfloor membrane as draught barrier
- Higher R-value underfloor batts between joists for thermal performance
- Proper subfloor ventilation to manage moisture
This dual approach addresses both air infiltration and heat loss. The reflective layer stops draughts while the batts provide the bulk of thermal resistance.
Moisture, Condensation and Vapour Barriers
Insulation bubble wrap is essentially impermeable to moisture vapour. The aluminium foil and plastic bubbles create a barrier that can trap moisture if installed incorrectly.
Understanding Vapour Barriers in Australian Climates
Melbourne and Victoria experience varying humidity conditions throughout the year. Installing vapour-impermeable materials in the wrong location can cause condensation problems.
Key principles:
- Vapour barriers should be on the warm side of insulation in winter
- In mixed climates, avoid creating double vapour barriers
- Ensure ventilation paths remain open
- Consider seasonal vapour drive directions
When you install insulation bubble wrap in a ceiling and then add bulk insulation above it, you've potentially created a condensation plane. Warm, moist air from inside the home hits the cold foil surface and condenses, potentially leading to mould growth and material degradation.
Ventilation Requirements
Any installation using reflective foil products must maintain adequate ventilation. Roof spaces need cross-ventilation to remove heat and moisture buildup.
Minimum ventilation requirements include:
- Eave vents with total area ≥ 1/500 of ceiling area
- Ridge or high-level vents for air movement
- Clear air paths from eave to ridge
- No blocking of vents with insulation material
If you're adding insulation to an existing home, check current ventilation before installing any vapour-impermeable products. Poor ventilation combined with bubble foil can create worse moisture problems than having no insulation at all.
Better Alternatives for Different Applications
While insulation bubble wrap has niche uses, most residential applications benefit from purpose-designed alternatives. Matching the right product to the specific need delivers better long-term value.
For Ceiling Insulation
Victorian homes need substantial ceiling insulation to meet energy efficiency standards and provide comfort. Glasswool and polyester batts offer proven performance at competitive prices.
High-performance options include:
- R4.0 to R6.0 batts for standard ceiling heights
- R6.0 to R8.0 batts for cathedral ceilings or extreme climates
- Acoustic batts where noise control matters (near traffic or flight paths)
These products deliver consistent R-values, provide acoustic benefits, and meet fire safety requirements without additional protection. They're easier to install correctly because performance doesn't depend on maintaining precise air gaps.
Homeowners looking to upgrade ceiling insulation can explore proven glasswool and polyester options that provide verified thermal performance and comply with all building regulations.
For Wall Insulation
Wall cavities require products that fit the available depth while delivering maximum R-value. Insulation bubble wrap's low R-value per thickness makes it unsuitable as primary wall insulation.
Better wall insulation choices:
- R1.5 to R2.7 batts for standard 90mm stud walls
- Higher density acoustic batts for party walls or external noise control
- Cavity batts specifically designed for masonry cavity walls
These products fill the wall cavity effectively and provide the thermal resistance needed to meet Building Code requirements and achieve meaningful energy savings.
For Underfloor Applications
While bubble wrap can work as an underfloor draught barrier, purpose-designed products typically perform better in the challenging underfloor environment.
Considerations for underfloor insulation:
- Moisture resistance (critical in ground-contact areas)
- Installation method (supported between joists vs. draped)
- R-value requirements (higher in cooler climates)
- Durability against rodents and mechanical damage
Products engineered specifically for underfloor use address these challenges with appropriate materials, attachment systems, and performance levels. The modest cost difference pays off through easier installation and better long-term results.
Practical Tips for DIY Installation
If you decide insulation bubble wrap suits your project, proper installation techniques ensure you get the available performance from the product.
Tools and Materials Needed
Gather everything before starting to make installation faster and safer:
- Sharp utility knife or scissors
- Heavy-duty stapler with 10mm staples
- Aluminium foil tape (not standard duct tape)
- Measuring tape and pencil
- Safety glasses and gloves
- Ladder or scaffold (for overhead work)
- Timber battens if creating air gaps
Step-by-Step Installation Process
For underfloor installation:
- Clean the joist area and remove any debris
- Measure between joists and cut bubble wrap to width plus 50mm overlap
- Start from one end, draping material between joists
- Staple to joists every 300mm, keeping material slightly slack (not tight)
- Overlap adjacent runs by 100mm minimum
- Tape all joints with foil tape, pressing firmly
- Ensure edge ventilation remains clear
For shed roof lining:
- Install battens under roof to create 25mm minimum air gap
- Unroll bubble wrap across battens
- Staple to battens every 400mm along runs
- Overlap seams by 100mm, tape with foil tape
- Ensure ridge and eave ventilation is not blocked
- If adding ceiling boards, maintain air gap above bubble wrap
Never pull the material tight. Slight slack allows for thermal expansion and prevents tearing around fixings. The bubbles will be partially compressed at staples, which is acceptable, but overall the material should remain mostly uncompressed.
Making the Right Choice for Your Project
Insulation bubble wrap fills specific niches in building thermal management, but it's not a universal solution. Understanding where it genuinely adds value versus where better alternatives exist helps you make informed decisions.
Questions to Ask Before Buying
Evaluate your actual needs against what the product delivers:
- What R-value does my application require by code?
- Can I reliably install and maintain the required air gaps?
- Is fire performance adequate for my application?
- Would bulk insulation provide better value per R-unit?
- Do I need acoustic performance (bubble wrap provides minimal sound blocking)?
For most Victorian home renovation projects, traditional bulk insulation delivers better thermal performance, acoustic benefits, and compliance certainty. These products work effectively even when installation isn't perfect, providing more forgiving margins than reflective systems.
When to Seek Expert Advice
Complex installations benefit from professional guidance. Consider consulting with insulation specialists when:
- Designing insulation for new construction or major renovations
- Combining multiple insulation types in one assembly
- Working in moisture-sensitive areas like bathrooms or laundries
- Unsure about Building Code compliance requirements
- Dealing with existing moisture or condensation problems
Contact insulation experts who understand Victorian climate conditions and building practices to get tailored recommendations for your specific project. Professional advice often prevents costly mistakes and ensures you select products that deliver actual performance improvements.
Regulatory Compliance and Standards
All insulation products sold in Australia must comply with relevant standards. Understanding these requirements protects you from non-compliant products and installation issues.
Australian Standards for Reflective Insulation
Insulation bubble wrap falls under several standards depending on the specific product composition and claimed properties:
- AS/NZS 4859.1 - Bulk thermal insulation materials
- AS/NZS 1530.3 - Spread of flame test
- AS 4200 series - Reflective and composite materials
Verify that any product you purchase carries appropriate certification marks. Uncertified imports may not meet fire safety requirements or deliver claimed R-values.
Building Code Requirements
The National Construction Code (NCC) sets minimum insulation requirements based on climate zone. Victoria falls primarily into Climate Zones 6 and 7, with some alpine areas in Zone 8.
Minimum R-values for habitable buildings:
- Ceilings: R4.0 to R6.0 (depending on specific zone and roof type)
- Walls: R1.5 to R2.0
- Underfloor: R1.0 to R2.0
Insulation bubble wrap typically cannot meet ceiling requirements on its own. Using it as sole insulation in walls may technically comply with minimum values, but provides poor energy efficiency and minimal comfort improvement compared to higher-performance alternatives.
Insulation bubble wrap serves specific purposes in Australian building projects when installed correctly with proper air gaps, but it's rarely the best choice for primary thermal insulation in homes. For most applications, traditional bulk insulation delivers superior thermal performance, better fire safety, and more reliable long-term value. When planning your renovation or building project, Insulation Supplies Australia provides expert guidance and a comprehensive range of proven insulation solutions with fast delivery across Victoria, helping you choose the right product for your specific needs and budget.