

Ceiling insulation is one of the most cost-effective upgrades you can make to your home. It creates a thermal barrier between your living spaces and the roof cavity, keeping your home cooler in summer and warmer in winter. For Victorian homeowners facing rising energy costs and unpredictable weather, proper ceiling insulation can reduce heating and cooling bills by up to 45%, while improving year-round comfort. Whether you're renovating, building new, or simply looking to improve your home's energy efficiency, understanding ceiling insulation helps you make informed decisions that deliver lasting value.
Why Ceiling Insulation Matters for Australian Homes
Heat naturally rises, which means without proper insulation, your ceiling becomes a major escape route for warmth during winter. In summer, the reverse happens as radiant heat from your roof transfers downward into living spaces.
The thermal performance benefits include:
- Reduced energy consumption for heating and cooling
- Lower electricity and gas bills throughout the year
- More consistent indoor temperatures across all seasons
- Decreased reliance on air conditioning and heating systems
Beyond comfort and cost savings, ceiling insulation also provides acoustic benefits. It dampens noise from rain, wind, and external sources, creating a quieter indoor environment. For homes near busy roads or flight paths, this additional sound control can significantly improve quality of life.
Environmental considerations also play a role. By reducing energy consumption, ceiling insulation lowers your household's carbon footprint and contributes to broader sustainability goals.
Meeting Building Code Requirements
The National Construction Code (NCC) sets minimum thermal performance standards for Australian homes. These requirements vary by climate zone, and Victoria falls predominantly into Zone 6 and Zone 7, which have specific R-value minimums for ceiling insulation.
Most new builds in Melbourne and regional Victoria require ceiling insulation with at least R4.0 to R6.0, depending on your exact location and building design. Renovations may have different requirements, but upgrading to current standards is always worthwhile for long-term performance.
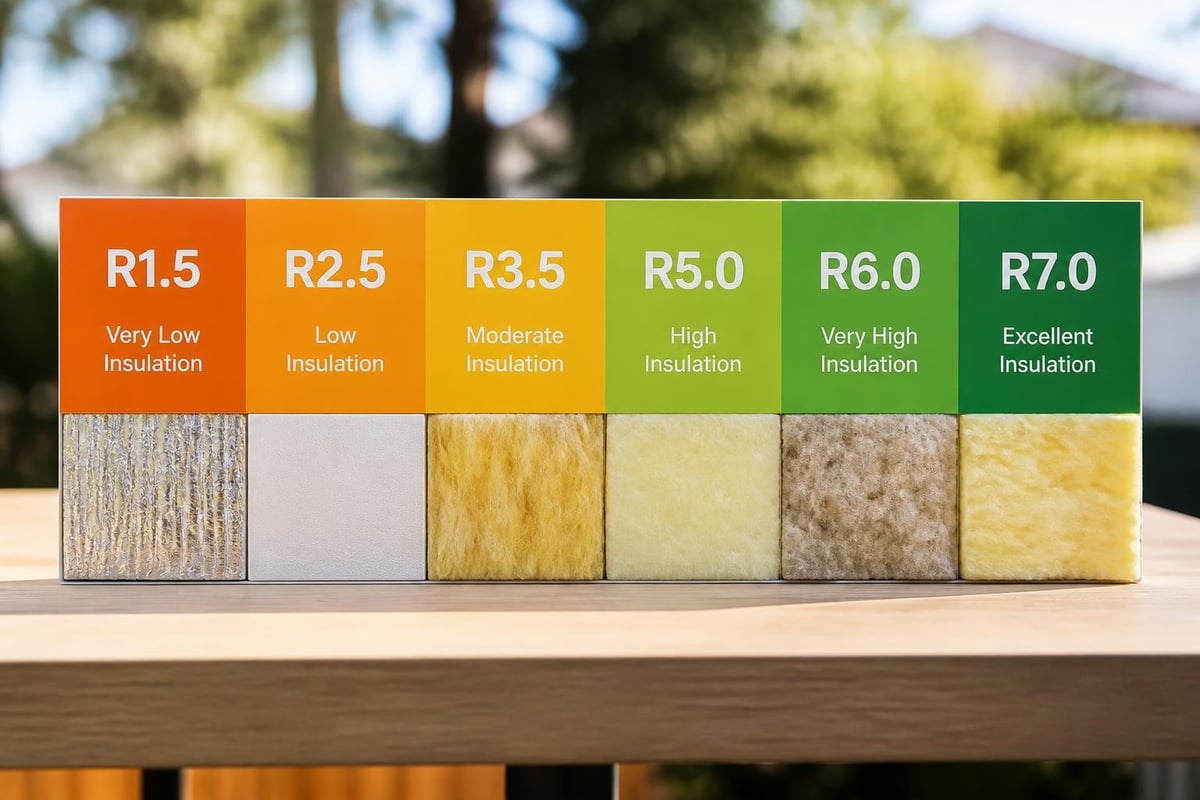
Understanding R-Values and Thermal Performance
The R-value measures thermal resistance, indicating how well insulation resists heat flow. Higher R-values mean better insulating performance, which translates to greater energy savings and comfort.
| R-Value | Thickness (approx.) | Best Application | Performance Level |
|---|---|---|---|
| R1.5 - R2.5 | 60-90mm | Mild climates, minimal heating/cooling | Basic |
| R3.0 - R4.0 | 130-175mm | Standard residential, moderate climates | Good |
| R4.0 - R6.0 | 175-240mm | Cold climates, high-performance homes | Excellent |
| R6.0+ | 240mm+ | Premium builds, extreme climates | Maximum |
Choosing the right R-value depends on several factors:
Climate and location - Melbourne's variable weather benefits from higher R-values, particularly R5.0 or above. Regional Victoria may need even higher ratings depending on altitude and exposure.
Roof type and colour - Dark roofs absorb more heat, increasing the thermal load on your ceiling insulation. Metal roofs in particular can reach extreme temperatures during summer.
Ceiling height and ventilation - Higher ceilings and well-ventilated roof spaces affect how insulation performs. Proper airflow prevents moisture buildup and maintains insulation effectiveness.
For most Victorian homes, ceiling insulation products in the R4.0 to R6.0 range deliver the best balance of performance, cost, and long-term value.
Types of Ceiling Insulation Materials
Several insulation materials are commonly used in Australian ceilings, each with distinct characteristics, benefits, and installation requirements.
Glasswool Batts and Blankets
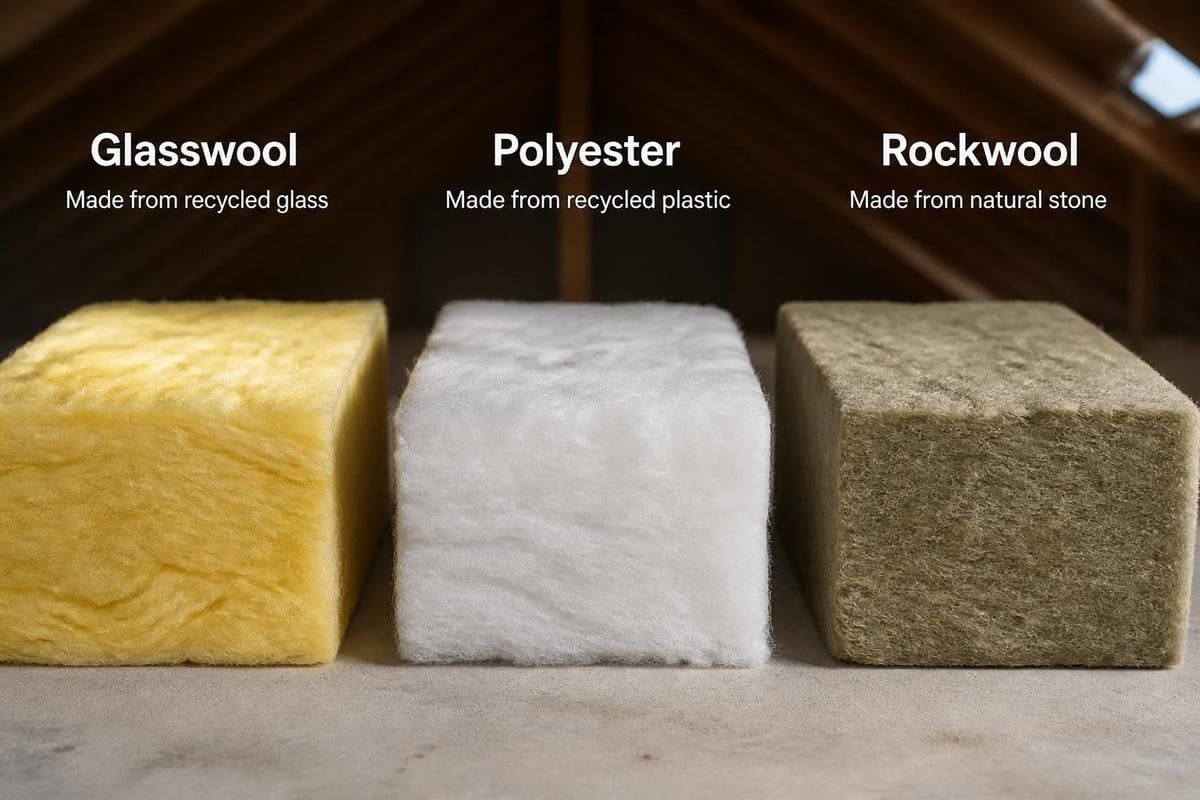
Glasswool remains the most popular ceiling insulation choice for Australian homes. Made from recycled glass and sand, it's affordable, fire-resistant, and widely available.
Advantages:
- Excellent thermal and acoustic performance
- Non-combustible and fire-resistant
- Soft to handle with modern manufacturing (ECOSE Technology)
- Available in various R-values from R1.5 to R7.0
- Cost-effective for most budgets
Glasswool batts come pre-cut to fit standard ceiling joist spacing (typically 600mm), making DIY installation straightforward. Blanket rolls offer continuous coverage for irregular spaces but require more cutting and fitting.
Polyester Batts
Polyester insulation is manufactured from recycled plastic bottles, offering an environmentally friendly alternative. It's completely non-allergenic and contains no breathable fibres, making it ideal for people with sensitivities.
This material is naturally resistant to moisture, won't sag over time, and maintains its thermal performance even in humid conditions. Polyester batts are also non-itchy and dust-free, which simplifies installation and reduces health concerns during handling.
Rockwool (Stone Wool)
Rockwool insulation is made from volcanic rock and recycled slag. It delivers exceptional fire resistance, acoustic control, and thermal performance, though it typically costs more than glasswool.
The dense structure of rockwool provides superior soundproofing, making it popular for multi-storey homes, home theatres, and properties near noise sources. It's also water-repellent and won't promote mold growth.
Reflective Foil and Bulk Insulation Combinations
Some ceiling systems combine bulk insulation (glasswool or polyester) with reflective foil barriers. The foil reflects radiant heat away during summer, while the bulk insulation provides resistance to conductive and convective heat transfer.
These hybrid systems can deliver enhanced performance in particularly hot climates, though proper installation with appropriate air gaps is essential for the reflective component to function correctly.
Installation Methods and Considerations
Proper installation directly impacts how well ceiling insulation performs. Even premium products with high R-values will underperform if installed incorrectly or with gaps and compression.
DIY vs Professional Installation
Many homeowners successfully install ceiling insulation themselves, particularly when using pre-cut batts in straightforward ceiling layouts. DIY installation saves on labour costs and gives you direct control over quality.
Before starting a DIY project, consider:
- Safety equipment requirements (mask, gloves, protective clothing, sturdy ladder)
- Roof space access and working conditions (height, lighting, ventilation)
- Obstacles like electrical wiring, downlights, and plumbing
- Physical demands of working in confined, hot spaces
Professional installers bring experience, proper safety equipment, and knowledge of building codes. They can also identify and address structural issues, ventilation problems, or electrical hazards that might not be obvious to DIYers.
Key Installation Steps
Preparation phase:
- Clear the roof space of stored items
- Inspect for asbestos in older homes (pre-1990)
- Check for roof leaks, damaged timbers, or pest issues
- Identify and mark electrical cables and downlights
Installation process:
- Measure joist spacing to confirm batt width requirements
- Start from the eaves and work toward the centre
- Fit batts snugly between joists without compression
- Cut around obstacles using a sharp knife
- Maintain clearance around heat sources and downlights
- Ensure even coverage without gaps
Common Installation Mistakes to Avoid
Compression reduces insulation effectiveness significantly. Squashing R4.0 batts into a space designed for R2.5 can reduce actual performance to R3.0 or less. Always choose the correct thickness for your joist depth.
Gaps between batts allow heat transfer through thermal bridging. Ensure edges meet tightly without overlapping, which can create compression. Cut custom pieces for irregular spaces rather than leaving voids.
Covering downlights creates fire hazards. Most recessed lights require clearance zones, typically 200mm in all directions. Install special downlight covers or switch to IC-rated fixtures that can be safely covered.
Acoustic Benefits and Soundproofing
Beyond thermal performance, ceiling insulation significantly reduces noise transmission between floors in multi-storey homes and dampens external sounds from above.
Sound absorption depends on:
- Material density and thickness
- Installation completeness (no gaps)
- Ceiling construction and finishes
Higher-density products like rockwool and acoustic-grade glasswool batts deliver superior sound reduction compared to standard thermal insulation. These specialised products often have Sound Transmission Class (STC) ratings indicating their acoustic performance.
For maximum noise control, consider combining ceiling insulation with resilient ceiling systems, acoustic sealants, and proper construction techniques that decouple ceiling materials from structural framing.
Upgrading and Retrofitting Existing Ceilings
Many older Australian homes have inadequate or deteriorated ceiling insulation. Upgrading is often the highest-return energy efficiency improvement you can make.
Assessing Current Insulation
Before adding new insulation, inspect what's already there:
| Assessment Point | What to Check | Action Required |
|---|---|---|
| Coverage | Gaps, missing sections | Fill voids, add material |
| Thickness | Below current standards | Top up or replace |
| Condition | Compressed, damaged, wet | Replace affected areas |
| Type | Asbestos-containing materials | Professional removal required |
In homes built before 1990, insulation may contain asbestos. Never disturb suspect materials - engage licensed asbestos assessors and removers to handle safely.
Topping Up vs Complete Replacement
If existing insulation is in good condition but doesn't meet current R-value standards, topping up can be cost-effective. Add new batts perpendicular to existing layers or use blanket products to cover gaps.
Complete replacement makes sense when:
- Current insulation is damaged, compressed, or contaminated
- Major renovations provide easy access
- Switching to higher-performance materials
- Addressing moisture or pest issues in the roof space
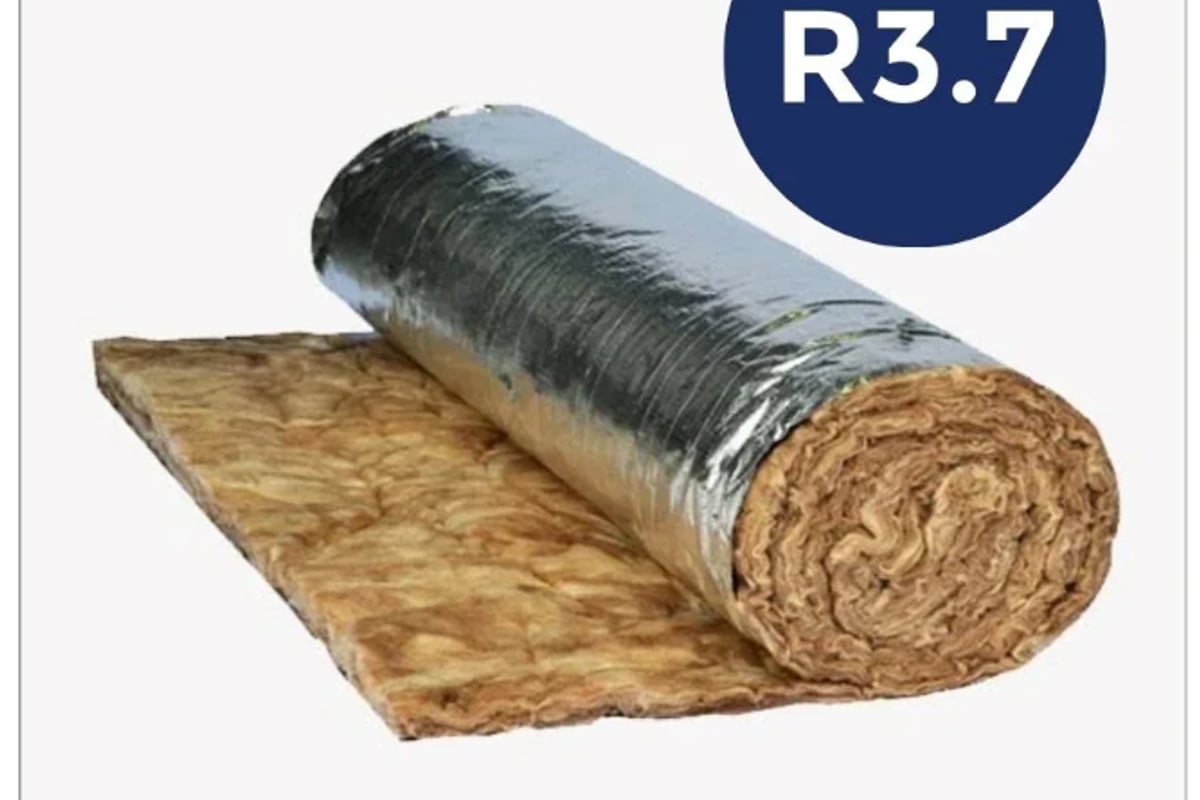
For homeowners seeking maximum thermal comfort and energy savings, premium products like the Thermal Blanket R3.7 22kg/m³ Roof Insulation deliver exceptional performance with higher-density glasswool construction designed specifically for challenging Australian conditions.
Maintenance and Long-Term Performance
Properly installed ceiling insulation requires minimal maintenance but occasional inspections ensure continued effectiveness.
Schedule annual or bi-annual checks for:
- Moisture or water staining indicating roof leaks
- Compression or displacement from stored items
- Pest activity or nesting materials
- Electrical modifications affecting clearances
Most quality insulation products maintain their R-value for 40-70 years under normal conditions. However, physical damage, water exposure, or compression can reduce performance.
If you notice increased energy bills, temperature variations, or ceiling stains, inspect your insulation promptly. Early intervention prevents minor issues from becoming costly problems.
Ventilation and Moisture Control
Ceiling insulation works best in well-ventilated roof spaces. Adequate airflow prevents moisture accumulation, which can damage insulation and structural timbers.
Ensure soffit vents, ridge vents, or whirlybird ventilators provide sufficient air movement. In particularly humid climates or poorly ventilated homes, consider mechanical ventilation or vapour barriers to manage moisture.
Cost Considerations and Return on Investment
Ceiling insulation costs vary based on material type, R-value, roof space accessibility, and whether you install it yourself or hire professionals.
Typical cost ranges for DIY materials (2026):
- Budget glasswool (R2.5-R3.5): $8-15 per square metre
- Standard glasswool (R4.0-R5.0): $12-22 per square metre
- Premium polyester or high-R glasswool (R5.0-R7.0): $18-35 per square metre
- Rockwool or specialised acoustic products: $25-50 per square metre
Professional installation adds $15-40 per square metre depending on roof complexity, access, and regional labour rates.
For a typical 150-square-metre ceiling, expect total material costs between $1,800 and $5,250, with professional installation bringing the total to $4,000-$11,000.
Energy Savings and Payback Period
Ceiling insulation typically pays for itself within 3-7 years through reduced energy bills. The exact payback depends on:
- Your climate zone and heating/cooling usage patterns
- Current energy prices and rate increases
- Insulation R-value and installation quality
- Home design and existing energy efficiency measures
Victorian homes using electric heating and cooling may see annual savings of $300-800, while gas-heated homes typically save $200-500. Over a 40-year lifespan, total savings can exceed $15,000-30,000, making ceiling insulation one of the best home investments you can make.
Choosing the Right Product for Your Project
Selecting ceiling insulation involves balancing performance requirements, budget, and installation constraints.
Start by determining:
- Required R-value for your climate zone
- Available ceiling joist depth and spacing
- Acoustic performance needs
- Budget and timeframe
- DIY capability vs professional installation preference
For standard residential applications in Melbourne and Victoria, R4.0 to R6.0 ceiling insulation delivers excellent all-round performance. Colder regional areas benefit from higher R-values approaching R6.0 or R7.0.
Consider manufacturer reputation and product certifications. Look for CodeMark certification, compliance with Australian Standards AS/NZS 4859.1, and thermal performance verified by NATA-accredited laboratories.
Environmental credentials also matter for many homeowners. Products using recycled content, sustainable manufacturing, and minimal chemical treatments align with green building principles without compromising performance.
Working with Downlights and Electrical Fixtures
Recessed downlights create particular challenges for ceiling insulation. Older downlight models generate significant heat and require substantial clearance zones where insulation cannot be installed.
Three approaches to the downlight problem:
Replace with IC-rated LED downlights - Modern IC (Insulation Contact) rated fixtures can be safely covered with insulation, eliminating clearance gaps and heat loss points. This is the best long-term solution.
Install downlight covers - Special heat-resistant covers create protective barriers around non-IC-rated downlights, allowing insulation to maintain coverage while preserving required clearances.
Accept clearance zones - For homeowners unable to upgrade fixtures, maintaining proper clearances is essential for fire safety, though it creates thermal weak points where heat escapes.
Electrical cables running through ceiling spaces should be positioned above insulation where possible, or derated if buried. Consult an electrician about cable capacity if you're adding thick insulation layers.
Special Considerations for Different Roof Types
Ceiling insulation requirements and installation approaches vary based on roof design and construction.
Flat or Low-Pitch Roofs
Limited roof space in flat-roof designs restricts insulation thickness options. High-performance materials with better R-values per millimetre, such as polyester or dense glasswool products, maximise thermal resistance in confined spaces.
Ensure adequate ventilation gaps between insulation and roof decking to prevent moisture accumulation. Some flat-roof designs benefit from external insulation systems installed above the roof deck.
Cathedral or Vaulted Ceilings
These dramatic ceiling designs have no accessible roof cavity, requiring insulation installation between structural rafters during construction or major renovation.
Cathedral ceiling insulation must accommodate ventilation channels, often using rigid foam boards, spray foam, or specially designed rafter-fill batts with air gaps. Professional installation is typically necessary to ensure proper performance and building code compliance.
Steel-Framed Roofs
Metal roof frames conduct heat readily, creating thermal bridging that reduces overall ceiling insulation effectiveness. Combat this by:
- Using continuous insulation layers that cover framing members
- Installing thermal breaks at steel connections
- Combining bulk and reflective insulation systems
- Increasing overall R-value to compensate for bridging losses
Health and Safety During Installation
Working in roof spaces presents several health and safety risks that require proper management.
Essential safety equipment:
- P2 or N95 respirator mask (even for low-dust products)
- Safety glasses or goggles
- Long-sleeved clothing and long pants
- Gloves (leather for handling, disposable for comfort)
- Hard hat in low-clearance areas
- Sturdy, properly positioned ladder
- Portable lighting
Work during cooler morning hours when possible. Roof spaces can reach 60-70°C during summer afternoons, creating dangerous heat stress conditions. Stay hydrated and take regular breaks.
Never step between ceiling joists - only walk on structural members or place boards across joists to distribute weight. Stepping through plasterboard creates serious fall risks and costly damage.
Switch off electrical circuits in work areas when possible, and never handle or move electrical cables. If electrical work is needed, engage a licensed electrician.
Planning Your Ceiling Insulation Project
Successful insulation projects start with thorough planning and accurate measurements.
Project planning checklist:
- Calculate ceiling area (length × width for each room/section)
- Measure joist spacing and depth
- Identify obstacles (downlights, cables, plumbing, chimneys)
- Determine target R-value based on climate and budget
- Choose insulation type and product
- Calculate quantities with 5-10% wastage allowance
- Arrange delivery and storage
- Schedule installation during suitable weather
- Prepare safety equipment and tools
Order materials in advance to avoid delays. Insulation Supplies Australia offers fast delivery across Victoria, helping you keep projects on schedule.
Store insulation in dry, protected areas before installation. Keep packaging intact until ready to use, and avoid compressing batts during storage or transport.
Ceiling insulation delivers unmatched value through reduced energy bills, improved comfort, and long-term performance that lasts decades. By understanding R-values, material options, and proper installation techniques, you can confidently choose the right solution for your home's specific needs. Whether you're renovating an older home or building new, Insulation Supplies Australia provides everything you need - from expert product advice to competitive pricing and fast delivery across Victoria - making it simple to upgrade your home's thermal performance and start saving immediately.