

When winter rolls around in Melbourne and across Victoria, drafty windows can turn your home into an icebox while sending energy bills through the roof. A 3M window insulation kit offers an affordable, temporary solution that can dramatically reduce heat loss and improve comfort without the expense of replacing windows. This comprehensive guide walks you through everything you need to know about these popular kits, from how they work to step-by-step installation tips for Australian conditions.
What Is a 3M Window Insulation Kit and How Does It Work
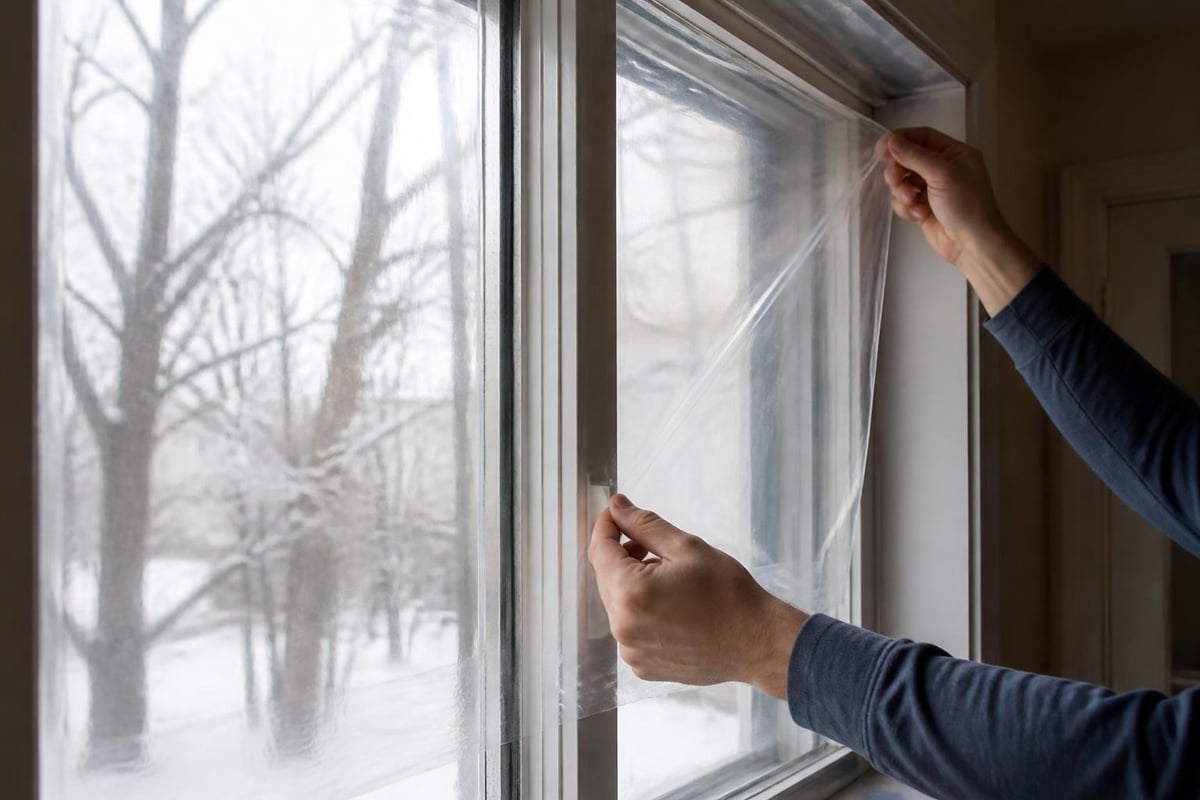
The 3M window insulation kit is a clear plastic film system designed to create an insulating air barrier over your existing windows. The kit includes clear polyester or plastic film, double-sided tape, and everything needed to seal the film tightly over window frames.
The science behind the kit is straightforward. By creating a sealed air pocket between the window glass and the plastic film, you add an extra layer of insulation that reduces heat transfer. This trapped air layer acts similarly to double-glazing, though not quite as effectively as permanent double-glazed windows.
Key Components of the Kit
- Clear plastic film: Thin, transparent sheeting that shrinks when heat is applied
- Double-sided adhesive tape: Pre-cut or by-the-roll tape for securing film to frames
- Installation instructions: Step-by-step guidance from 3M
- Hairdryer method: Uses household hairdryer to shrink film tight and remove wrinkles
The film remains virtually invisible once installed correctly, maintaining your view while adding thermal resistance. According to DOE research on energy-efficient windows, adding storm windows or similar barriers can improve window R-values significantly.
Benefits of Using Window Insulation Kits in Victorian Homes
Melbourne's variable climate means cold winters and sometimes scorching summers. A 3M window insulation kit addresses several common problems homeowners face throughout the year.
Energy savings top the list of benefits. By reducing heat loss through windows, your heating system doesn't need to work as hard, cutting gas or electricity consumption. Some households report heating cost reductions of 10-20% after installing kits on all drafty windows.
Improved comfort matters just as much as savings. Cold spots near windows disappear, reducing that clammy feeling when sitting near glass on winter evenings. The film also helps reduce condensation on window panes, which can prevent mould growth and water damage to frames and sills.
Additional Advantages
- Cost-effective: Kits cost $15-40 depending on size, far cheaper than window replacement
- Renter-friendly: Temporary installation removes cleanly without damage
- Easy installation: Most windows can be completed in 15-30 minutes
- Seasonal flexibility: Install before winter, remove in spring
The kits work particularly well on older single-pane windows common in Victorian-era homes and pre-1990s construction across Melbourne suburbs. While they won't match the performance of permanent ceiling insulation or wall upgrades, they're an excellent stopgap measure.
Choosing the Right 3M Window Insulation Kit
3M manufactures several variations of window insulation kits, each suited to different window sizes and installation preferences. Understanding your options helps you pick the right product for your home.
Available Kit Sizes and Types
| Kit Type | Coverage | Best For | Price Range |
|---|---|---|---|
| Indoor Window Insulator (Single) | 1 standard window | Small projects, testing | $15-20 |
| Indoor Window Insulator (5-Pack) | Up to 5 large windows | Whole-room coverage | $35-45 |
| Patio Door Kit | Sliding or French doors | Large glass areas | $25-35 |
| Indoor Window Insulator XL | Extra-large windows | Bay windows, picture windows | $20-30 |
Most Australian hardware stores stock the standard Indoor Window Insulator kit, which covers windows up to approximately 1.5m x 1.8m. The film can be trimmed to size, so buying a slightly larger kit gives you flexibility.
Indoor vs. outdoor kits represent an important distinction. The 3M window insulation kit designed for indoor use is most common and easiest to install. Outdoor kits exist but require more robust adhesives and withstand weather exposure. For Victorian homes, indoor kits are usually the practical choice.
When selecting a kit, measure your windows first. You'll need enough film to extend 25-50mm beyond the window frame on all sides to ensure proper adhesive contact. Consumer Reports testing found that proper sizing and coverage significantly impact performance.
Step-by-Step Installation Guide for Australian Conditions
Installing a 3M window insulation kit is a straightforward DIY project requiring minimal tools. Following proper technique ensures the best seal and appearance.
Tools and Preparation
You'll need:
- Scissors or utility knife
- Tape measure
- Hairdryer
- Clean cloth
- Methylated spirits (for cleaning frames)
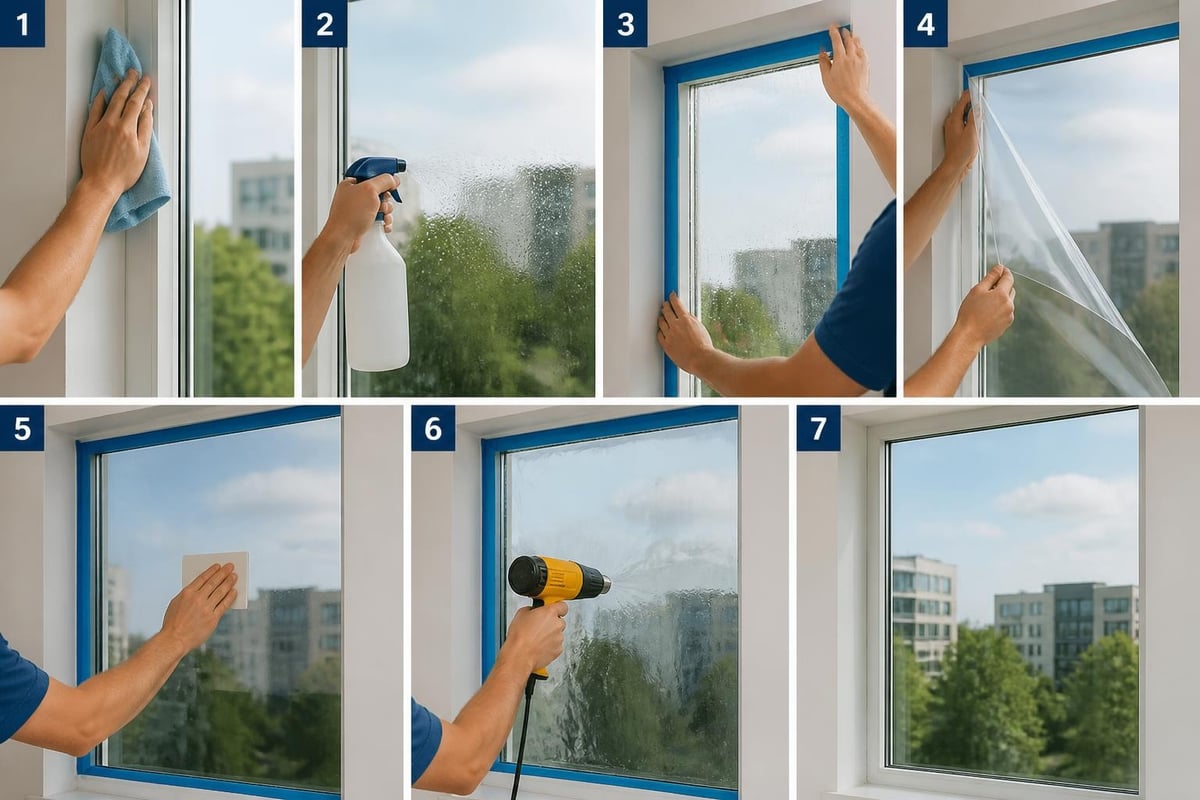
Preparation matters more than most people realise. Clean window frames thoroughly with methylated spirits to remove dust, grease, and any previous tape residue. The adhesive won't stick properly to dirty surfaces. Wait until frames are completely dry before proceeding.
Timing also matters. Install the 3M window insulation kit when temperatures are above 10°C if possible. Cold conditions make the tape less sticky and the film more brittle. Choose a still day with no breeze if you're working near open doors.
Installation Process
- Apply the double-sided tape around the entire window frame, pressing firmly to ensure good contact
- Measure and cut the film with 50-75mm extra on all sides for adjustment
- Remove the tape backing one section at a time to avoid premature sticking
- Attach the film starting at the top, smoothing downward to prevent wrinkles
- Press the film onto tape all around the perimeter, ensuring complete seal
- Trim excess film leaving 10-15mm beyond the tape line
- Apply heat using a hairdryer on medium setting, working from centre outward
- Shrink the film taut, holding the dryer 150-200mm from the surface
The heat-shrinking step transforms the appearance from wrinkled plastic to nearly invisible. Work slowly and evenly. If you overheat one area, the film can tear or melt.
3M's official installation guidelines provide additional technical details for specialty applications. While this resource covers security films, the general principles for achieving clean, bubble-free installation apply to insulation kits as well.
Common Installation Mistakes to Avoid
- Skipping frame cleaning: Leads to tape failure and gaps
- Installing on cold days: Reduces adhesive effectiveness
- Overheating the film: Causes melting, shrinkage, or holes
- Insufficient overlap: Creates air leaks at edges
- Rushing the process: Results in wrinkles and poor appearance
Many Melbourne homeowners successfully install kits on timber, aluminium, and uPVC window frames. The key is patient, methodical work rather than speed.
Performance and Energy Savings in Real-World Conditions
Understanding realistic expectations helps you evaluate whether a 3M window insulation kit makes sense for your situation. Independent testing and real-world experience provide useful benchmarks.
The kits typically add an R-value of approximately R0.7 to R1.0 to your windows. For comparison, a single-pane window might have an R-value around R0.9, while a double-glazed window ranges from R2.0 to R3.0. The film improves performance but doesn't match permanent double-glazing.
Energy savings vary based on several factors:
- Existing window condition and type
- Size of windows relative to total home
- Climate zone and heating/cooling needs
- Thermostat settings and usage patterns
- Overall home insulation levels
Research from Lawrence Berkeley National Laboratory on window retrofit options indicates that interior plastic film can reduce heat loss by 25-40% through affected windows. For a typical Melbourne home with 15-20% of heat loss occurring through windows, this translates to overall heating savings of approximately 5-10%.
Comparing Window Insulation to Other Upgrades
| Upgrade Type | Typical Cost | Energy Impact | DIY-Friendly | Permanent |
|---|---|---|---|---|
| 3M Window Kit | $15-40 per window | Low-Medium | Yes | No |
| Heavy Curtains | $50-200 per window | Low-Medium | Yes | Semi |
| Ceiling Insulation | $1,500-4,000 | High | Sometimes | Yes |
| Double Glazing | $500-1,500 per window | High | No | Yes |
| Underfloor Insulation | $1,000-3,000 | Medium-High | Sometimes | Yes |
While permanent insulation upgrades deliver greater long-term benefits, window film kits offer an accessible entry point for renters or homeowners on tight budgets. They work well as part of a staged approach to improving home energy efficiency.
Maintenance, Removal, and Seasonal Considerations
The 3M window insulation kit is designed as a temporary seasonal solution. Understanding how to maintain and remove it properly extends usability and prevents damage.
During the Winter Season
Once installed, the film requires minimal maintenance. Check periodically that the edges remain sealed, particularly after temperature fluctuations or strong winds. If an edge starts to peel, press it back into place while the adhesive is still active.
Cleaning can be done carefully with a soft, damp cloth. Avoid harsh chemicals or scrubbing, which can damage or tear the film. The shrunk film is reasonably durable but won't withstand rough treatment.
Monitor condensation between the glass and film. A small amount is normal and actually indicates the air seal is working. Excessive moisture suggests air leakage or high indoor humidity levels. Address ventilation and moisture sources rather than assuming the kit is faulty.
Removal Process
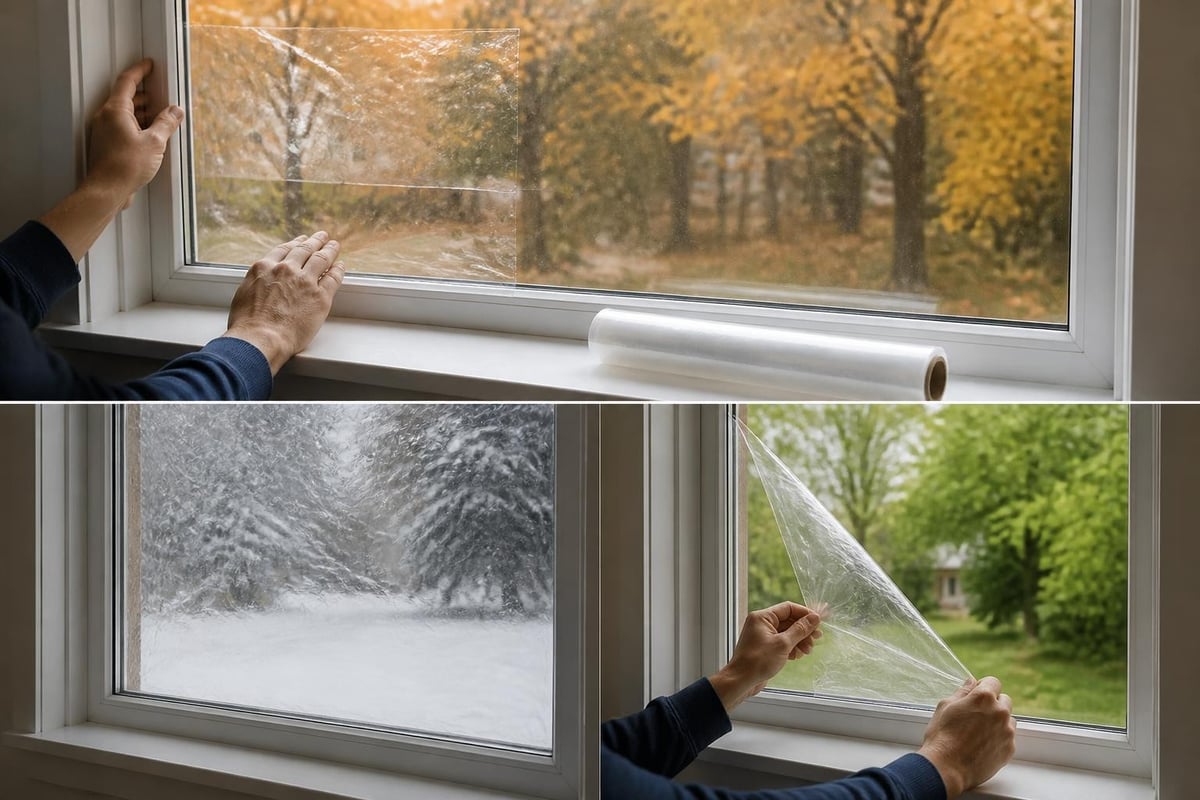
When warmer weather arrives, removing the film is straightforward:
- Peel the film away from one corner
- Pull slowly and steadily to avoid tearing
- Remove any remaining tape from the frame
- Clean frames with methylated spirits to remove adhesive residue
- Inspect frames for any damage (rare with proper installation)
The adhesive is designed to remove cleanly from most painted or finished surfaces. On damaged paint or weathered timber, take extra care. Some homeowners report minor paint lifting on older, failing paintwork, though this is uncommon on well-maintained frames.
Reuse Possibilities
3M window insulation kits are generally single-use products. Once removed, the film typically tears and the adhesive tape loses effectiveness. Some homeowners attempt careful removal and storage, but results are mixed. Budget for new kits each winter for best results.
Store unused portions of film rolls in a cool, dry place away from direct sunlight. Properly stored, unopened kits remain usable for 2-3 years, though adhesive quality may decline over time.
Alternatives and Complementary Solutions
While the 3M window insulation kit works well for many situations, understanding alternative approaches helps you make the best choice for your specific circumstances.
Other Window Insulation Methods
Magnetic window insulation uses magnetised strips to hold film or acrylic sheets in place. This allows easier removal and reinstallation compared to adhesive systems. The magnetic approach suits renters who change kits frequently or need to access windows regularly.
Cellular shades or honeycomb blinds provide insulation through trapped air cells while remaining permanently installed. They offer better aesthetics and convenience than plastic film but cost significantly more, typically $150-400 per window.
Heavy thermal curtains backed with insulating materials add R-value while improving privacy and light control. Quality thermal curtains can add R1.0 to R2.0 when closed. Combine with window film for maximum effect during extreme cold snaps.
Whole-House Insulation Strategy
Window film represents just one element of comprehensive home insulation. For maximum energy efficiency and comfort, consider a systematic approach:
- Ceiling insulation: Address the largest source of heat loss first with quality roof insulation rated R4.0 or higher for Melbourne's climate
- Wall insulation: Retrofit or new wall insulation significantly improves thermal performance in older homes
- Underfloor barriers: Underfloor insulation prevents cold air infiltration from subfloor spaces
- Draught sealing: Combine window film with door seals, gap filling, and other air-tightness improvements
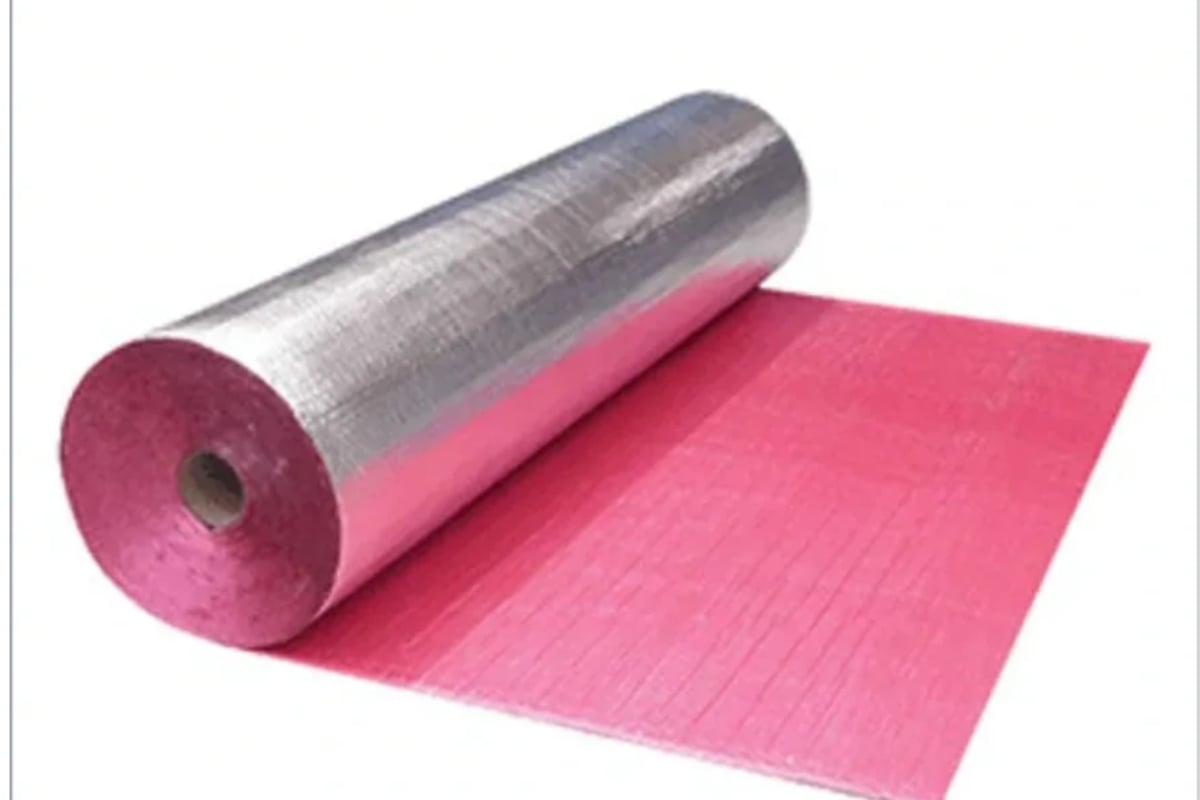
For homeowners tackling suspended timber floors, products like Sancell Breeze Underfloor 500-3 provide effective draught barriers and thermal resistance. This multi-layer synthetic insulation reduces cold air movement from beneath the building, working in tandem with window improvements to create a comfortable living space.
According to practical guidance from BobVila, combining multiple insulation strategies delivers the best return on investment. Window kits should complement, not replace, more substantial insulation upgrades.
Cost Analysis and Return on Investment
Understanding the financial aspects helps homeowners make informed decisions about whether a 3M window insulation kit represents good value for their circumstances.
Upfront Costs
A typical Melbourne home with 10-15 windows might spend $150-350 on kits for complete coverage, assuming an average cost of $20-25 per window. Multi-packs reduce per-window costs. Factor in replacement each year, as the film isn't reusable.
Tools required are minimal if you already own a hairdryer and basic cutting tools. Otherwise, add $20-30 for a cheap hairdryer dedicated to the purpose.
Ongoing Savings
Heating cost reduction depends heavily on your starting point. Homes with very drafty, single-pane windows see the most dramatic improvements. A household spending $800-1,200 annually on gas heating might save $80-180 per winter with comprehensive window film installation.
Payback period typically ranges from 1-3 heating seasons, making the 3M window insulation kit one of the fastest-returning energy efficiency investments available. Compare this to double-glazing, which might take 15-25 years to pay back through energy savings alone.
Value Beyond Energy
Financial analysis alone doesn't capture the full picture. Improved comfort, reduced condensation problems, and better preservation of window frames and sills add value that's harder to quantify. Many homeowners report that eliminating cold drafts and icy-feeling zones near windows significantly improves their daily comfort and enjoyment of their homes.
For renters, the 3M window insulation kit offers benefits that permanent upgrades can't match. The temporary, removable nature means you can take the skills and approach to your next rental property, even if you can't take the actual film.
Safety Considerations and Best Practices
While installing a 3M window insulation kit is generally safe, following proper practices ensures good results and prevents problems.
Working Safely with Materials
Hairdryer use requires basic precautions. Keep the dryer moving to avoid overheating any single spot. Never use heat guns, which are far too hot and will immediately melt the film. Maintain appropriate distance as recommended in the kit instructions.
Ladder safety matters when working on upper-storey windows. Use a stable, properly rated ladder and have someone spot you when working at height. Never overreach. Move the ladder frequently rather than stretching to cover more area.
EPA guidance on renovation practices emphasises the importance of proper preparation and safety awareness when working around windows, particularly in pre-1980 homes where lead paint may be present. While window film doesn't disturb paint, cleaning frames might.
Avoiding Common Hazards
- Fire risk: Don't leave the hairdryer unattended or use it near flammable materials
- Sharp edges: Cut film carefully to avoid injury; dispose of scraps safely
- Falls: Use appropriate fall protection when working on upper levels
- Ventilation: Ensure adequate fresh air exchange in your home after sealing windows
Remember that sealing windows reduces natural ventilation. In very tightly sealed homes, consider opening windows periodically or using mechanical ventilation to maintain healthy indoor air quality.
Addressing Common Problems and Troubleshooting
Even with careful installation, you might encounter occasional challenges with your 3M window insulation kit. Most issues have straightforward solutions.
Film Won't Stick or Keeps Peeling
This usually indicates dirty frames or cold conditions during installation. Remove the film completely, clean frames again with methylated spirits, wait for warmer weather, and reinstall with fresh tape. Check that you're using enough tape around the entire perimeter without gaps.
Wrinkles Won't Disappear During Heating
Apply more heat, working systematically from the centre outward. Hold the hairdryer closer (but not touching) and move more slowly. If wrinkles persist in one area, you may have trapped too much slack. In extreme cases, remove the film from one edge, pull it tighter, and reattach.
Condensation Between Film and Glass
Light condensation is normal and indicates the air seal is working. Heavy condensation or water pooling suggests either high indoor humidity or air leakage around the film edges. Check the seal and consider using a dehumidifier if your home has ongoing moisture problems.
Film Tears or Develops Holes
Small tears can be temporarily patched with clear packing tape as an emergency measure, but replacement is the proper solution. Tears typically occur from overheating during installation or physical damage afterward. Be more cautious with heat application and keep children and pets away from freshly installed film.
Tape Removes Paint When Taking Down
This usually only happens on failing paint that was already poorly adhered. If you anticipate this problem, test the tape in an inconspicuous spot first. Use lower-tack painter's tape instead of the supplied adhesive if your frames have delicate finishes, though this may reduce effectiveness.
Frequently Overlooked Tips for Best Results
Experienced users of the 3M window insulation kit have discovered techniques that significantly improve results.
Install on a still day when air currents won't disturb the film during attachment. Close doors to other rooms and turn off heating/cooling that might create drafts. This simple step makes installation far easier and results in fewer wrinkles.
Warm the tape slightly before application using a hairdryer on low setting. This activates the adhesive more effectively, especially in cold conditions. Don't overheat, just take the chill off.
Cut film oversized first, then trim to exact dimensions after ensuring proper placement. It's much easier to trim excess than to stretch film that's cut too small. Leave 75-100mm extra on all sides initially.
Work with a helper on large windows or patio doors. One person can hold the film while the other ensures straight, wrinkle-free attachment. The process goes much faster and smoother with assistance.
Document your work by measuring each window and noting how much film you used. This makes reordering easier next year and helps you budget accurately. Photograph particularly tricky installations for reference.
Consider window function before sealing. Don't install film on windows you need to open for emergency egress or regular ventilation. Mark these windows clearly and skip them or use alternative solutions.
Comparing Leading Window Insulation Brands
While 3M dominates the market for window insulation kits, several other brands offer comparable products. Understanding the differences helps you choose wisely.
Brand Comparison
| Brand | Price Point | Film Quality | Tape Adhesion | Availability |
|---|---|---|---|---|
| 3M | Medium-High | Excellent | Very Strong | Excellent |
| Duck Brand | Low-Medium | Good | Good | Good |
| Frost King | Medium | Good | Good | Good |
| Thermwell | Low | Fair | Fair | Moderate |
The 3M window insulation kit typically costs slightly more but offers superior film clarity, better adhesive performance, and more consistent results. The film shrinks more evenly and remains clearer after installation compared to budget alternatives.
Budget brands work adequately for temporary use or testing the concept before committing to multiple windows. However, the adhesive may fail more quickly, and the film might appear hazier after shrinking.
Most Australian hardware chains stock 3M products reliably. Lesser-known brands may be harder to find, particularly in regional Victoria. For consistent availability and proven performance, 3M remains the safe choice for homeowners tackling multiple windows.
Window insulation kits offer an accessible, affordable way to reduce heat loss and improve comfort during Melbourne's cold winters, delivering solid returns for minimal investment. Whether you're a renter seeking temporary improvements or a homeowner working toward whole-house efficiency, these simple film barriers make a genuine difference. For more permanent and comprehensive insulation solutions that address walls, ceilings, and underfloor spaces, Insulation Supplies Australia stocks quality products backed by expert advice to help you create a more comfortable, energy-efficient home.